Linux from scratch
by @Entr0phy4 (David Agámez), Software Engineering
by @Entr0phy4 (David Agámez), Software Engineering
Table of contents
Get a look at all of the content covered in this guide. Everything you need to know is inside.
This guide will take you through the step-by-step process of building your own Linux distribution from the ground up, known as "Linux From Scratch" (LFS). The table of contents outlines the key stages involved in setting up a fully functional, custom Linux system. Whether you're looking to deepen your understanding of Linux or create a tailored OS environment, this guide will provide all the instructions you need.
Introduction
Linux From Scratch (LFS) is a project that provides you with step-by-step instructions for building your own custom Linux system, entirely from source code. But why would anyone want to build their own Linux distribution from scratch when there are hundreds of ready-to-use distributions available?
The primary purpose of LFS is educational. By building a Linux system from the ground up, you gain an intimate understanding of how Linux systems work internally. You'll learn:
This deep understanding is invaluable for system administrators, Linux enthusiasts, and anyone interested in operating system internals. While the process is time-consuming and challenging, the knowledge gained is well worth the effort.
LFS also offers complete control over your system. You decide exactly which packages to include, how they're configured, and how the system is structured. This level of customization can result in a system that's:
This guide will walk you through the entire process, from preparing your host system to configuring the final bootable system. While it may seem daunting at first, we'll break it down into manageable steps, each building upon the previous ones.
Link to the official guide: Linux From Scratch
It is advisable to create a snapshot of the system so as not to lose our progress in case something goes wrong.
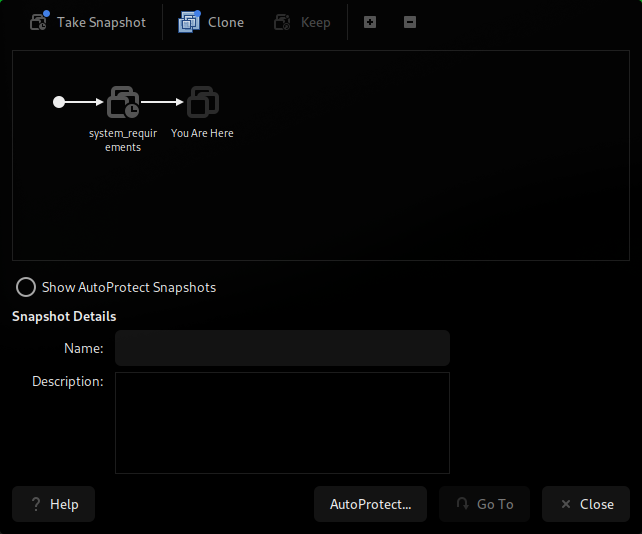
If you are using VMware workstation for virtualization, in the upper menu, you should have the following options:

Set a name and description for the snapshot.
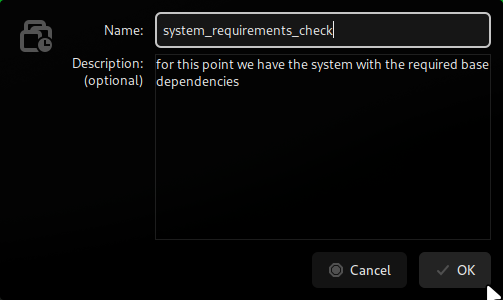
And our snapshot has been created, in case we have an error we can always return to this point.
Preparing Host System
First of all it is necessary to know that we need a linux on which to work. We will be using Debian 12.10.0.
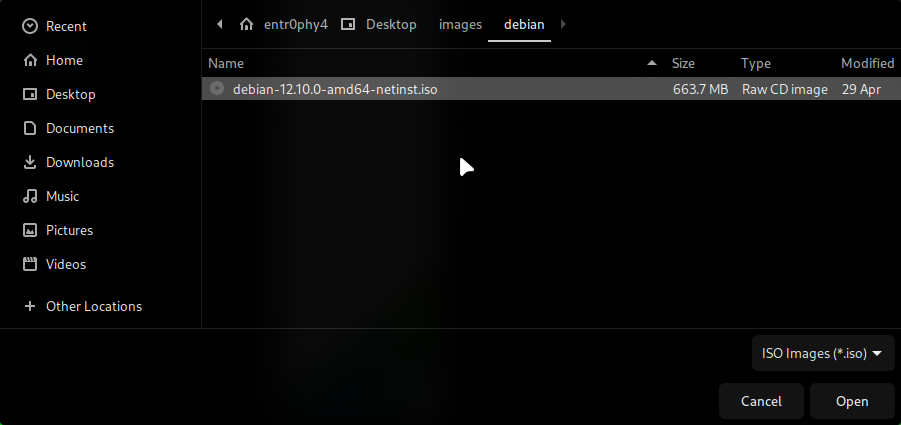
Once we have the ISO we will continue virtualizing it in our software of choice, in my case I will be using VMware Workstation
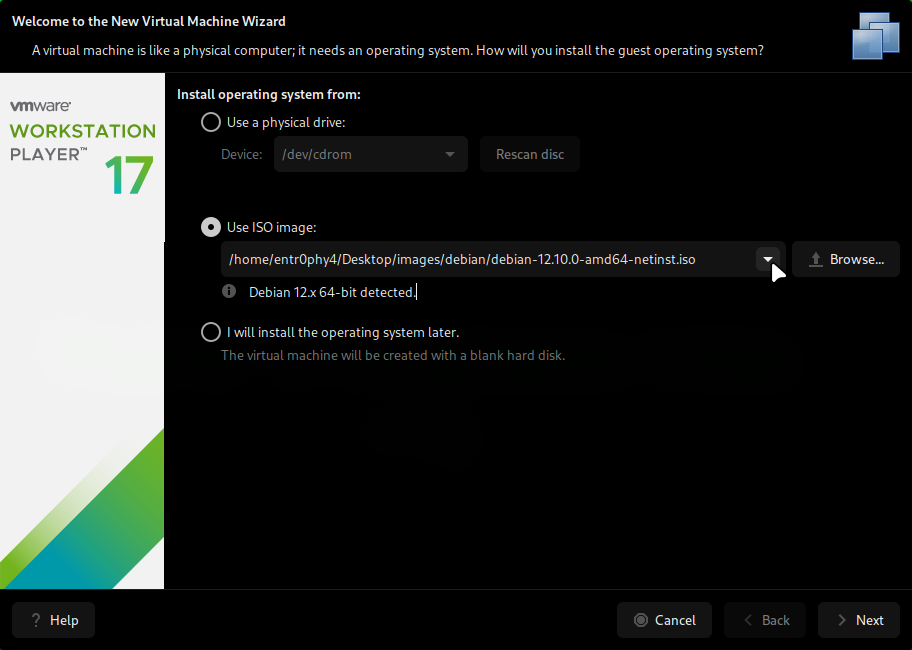
With VMware Workstation open, we will click on: Create a New Virtual Machine.

Once we click on it, we will be in this window, in which we will have to select the image of Debian.
Next, we will have to assign a name to our virtual machine, in our case it will be LFS from Linux From Scratch.

Now, we need to select the disk size, I will leave the default value but later we will add another disk to store the LFS.

In the next step, we will have to select the hardware specifications, we will use 8 RAM.

and 4 processor cores.

After this our virtual machine should start up without any problems.

We will complicate our life much more later, but for now we will select graphical installation. If you use the North American keyboard layout and you understand English, just need to click next for the first few steps, if this is not your case, select the options of your preference.
In the network configuration it is the same story, you can leave the default hostname and do not set a domain name.
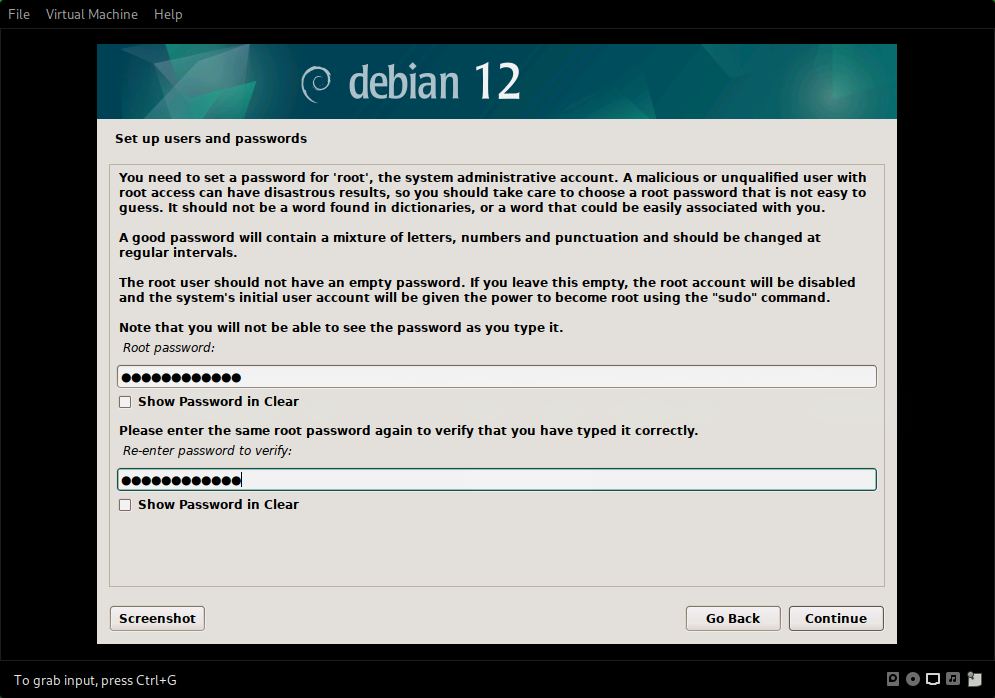
Next step, enter your password for super user.
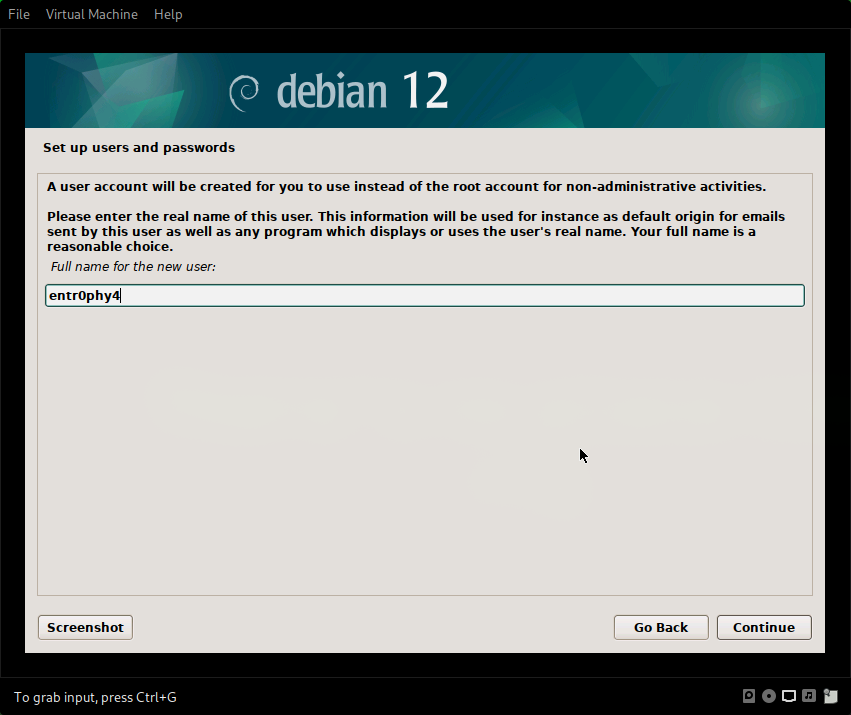
Now, set your user name.
You must then enter a new password but for your non-administrative user.
Next should be the clock configuration, which again depends on your region.
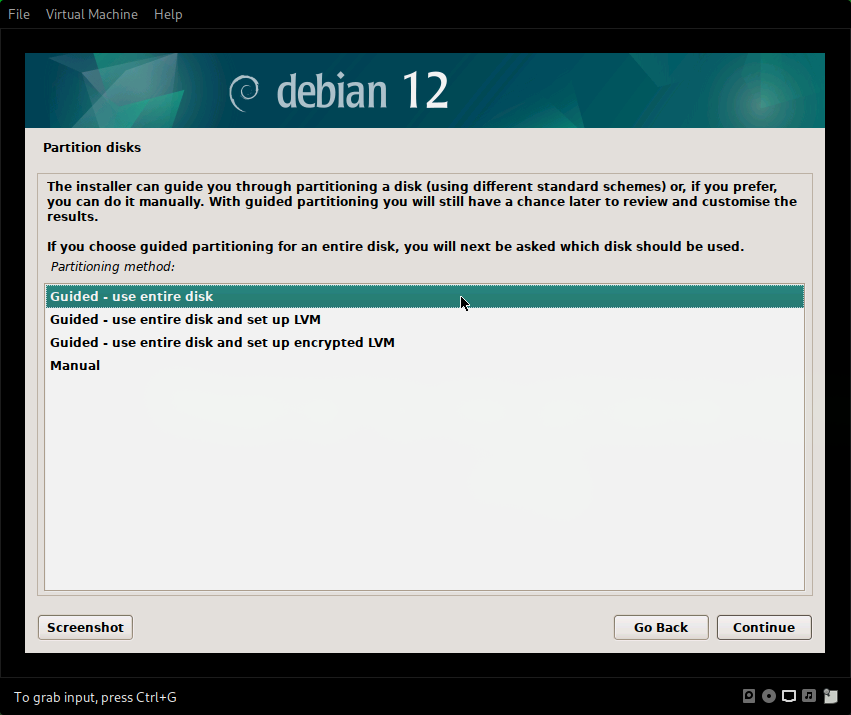
Then it will ask us about disk partitioning, we will select use the entire disk.
For the partition scheme we will select All files in one partition.

Later we will separate /home in another partition.
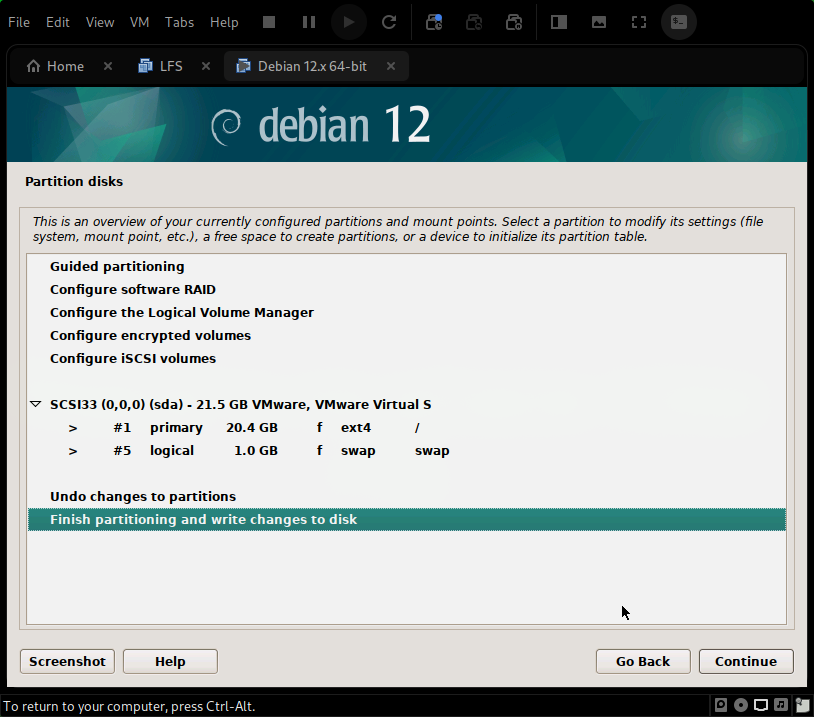
Select Finish partitioning and write changes to disk.
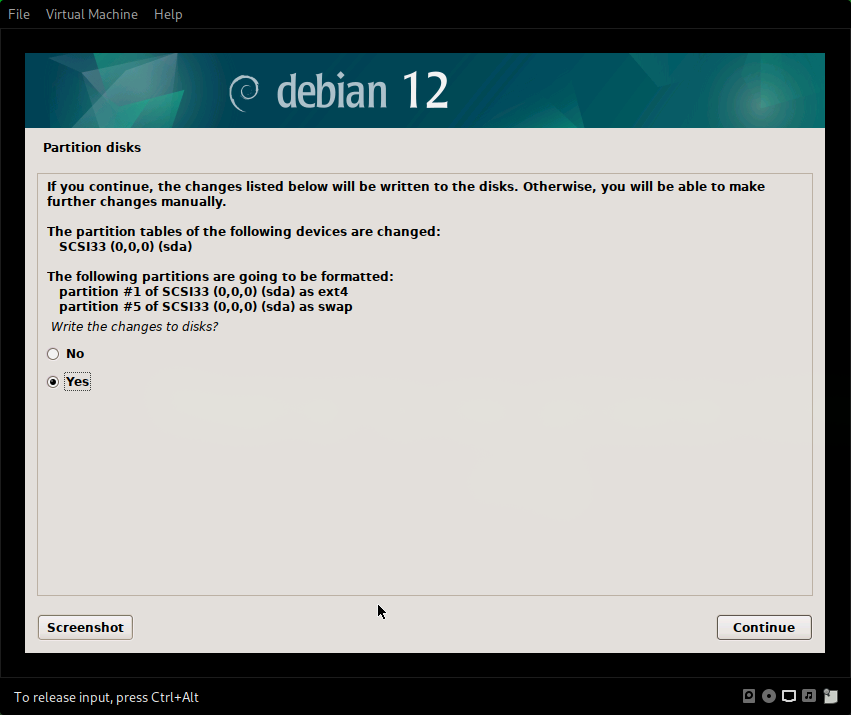
And that's it.
Now, we must wait for the installation of the base system to be completed.
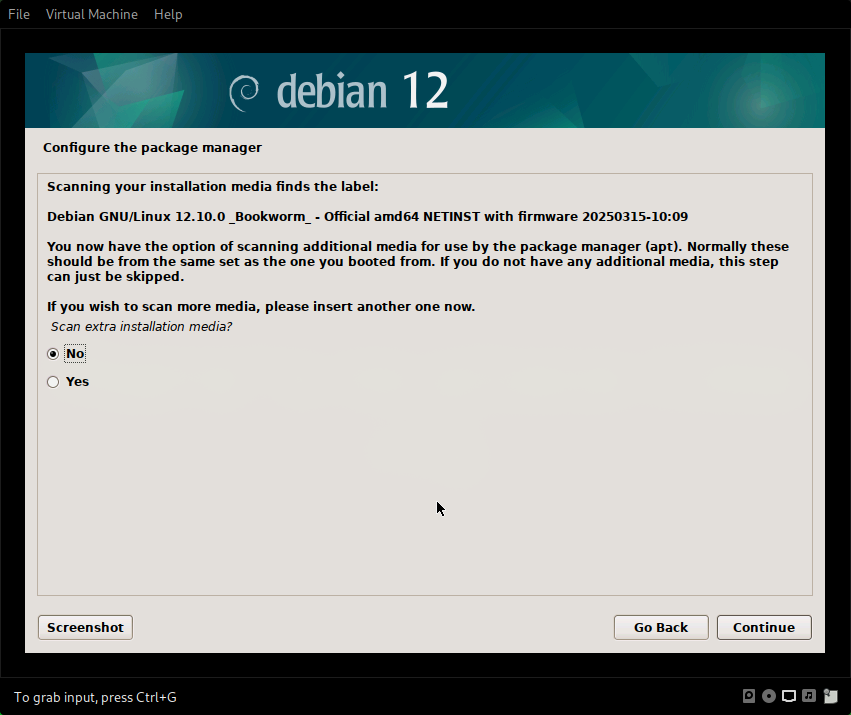
Then it will ask us if we want to use another installation media, select no and continue.
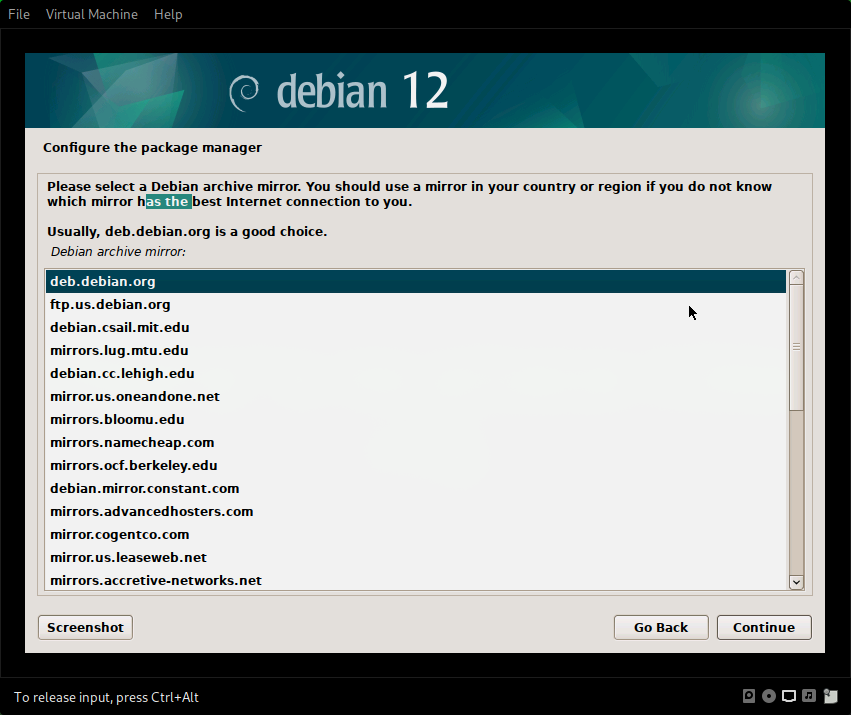
Next it will ask us for the package manager configuration, select our region if it is there, if it is not, select the nearest one, when it asks us for the debian archive mirror, leave the default one.
When asked for the http proxy, we leave it blank.
Then start configuring the package manager (apt).
After, in the popularity contest select no and continue.
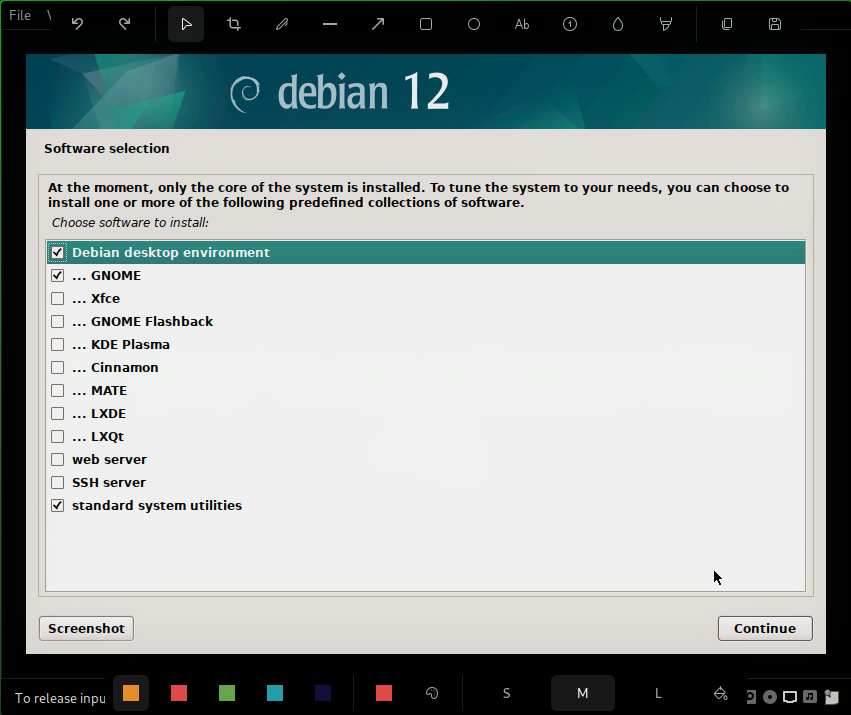
After installing some other packages it will ask to select our desktop environment, in my case I will user GNOME.
This it could take a few minutes, then ask us if we want to install the bootloader, GRUB, select yes and continue.
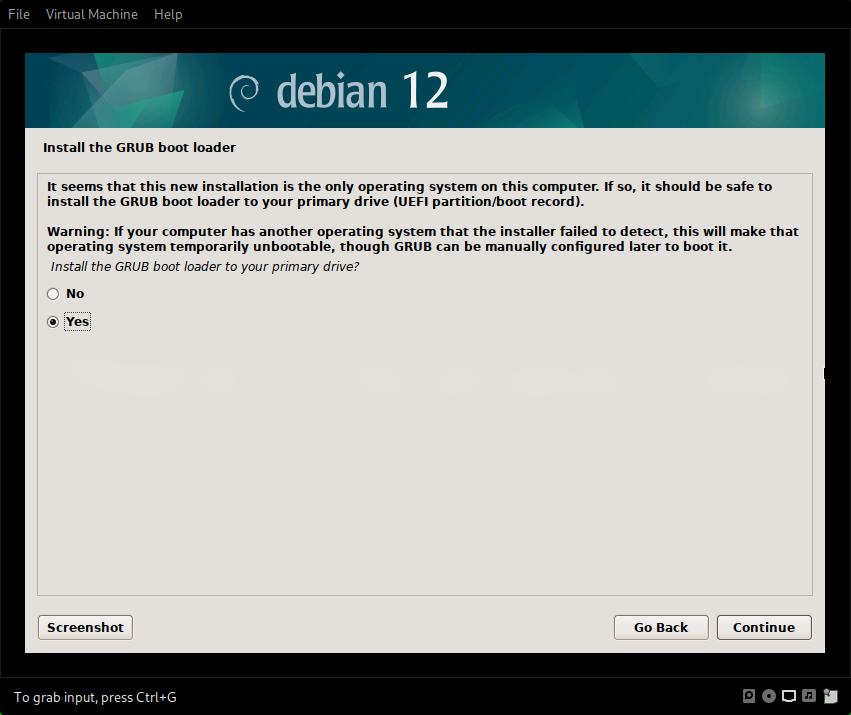
Then we will have to indicate where we want to install it, select /dev/sda and continue.
The installation process will start and may take a few minutes, when this is over we should see something like this:

Click on continue, the virtual machine will reboot and the once the system restarts we should see the following.
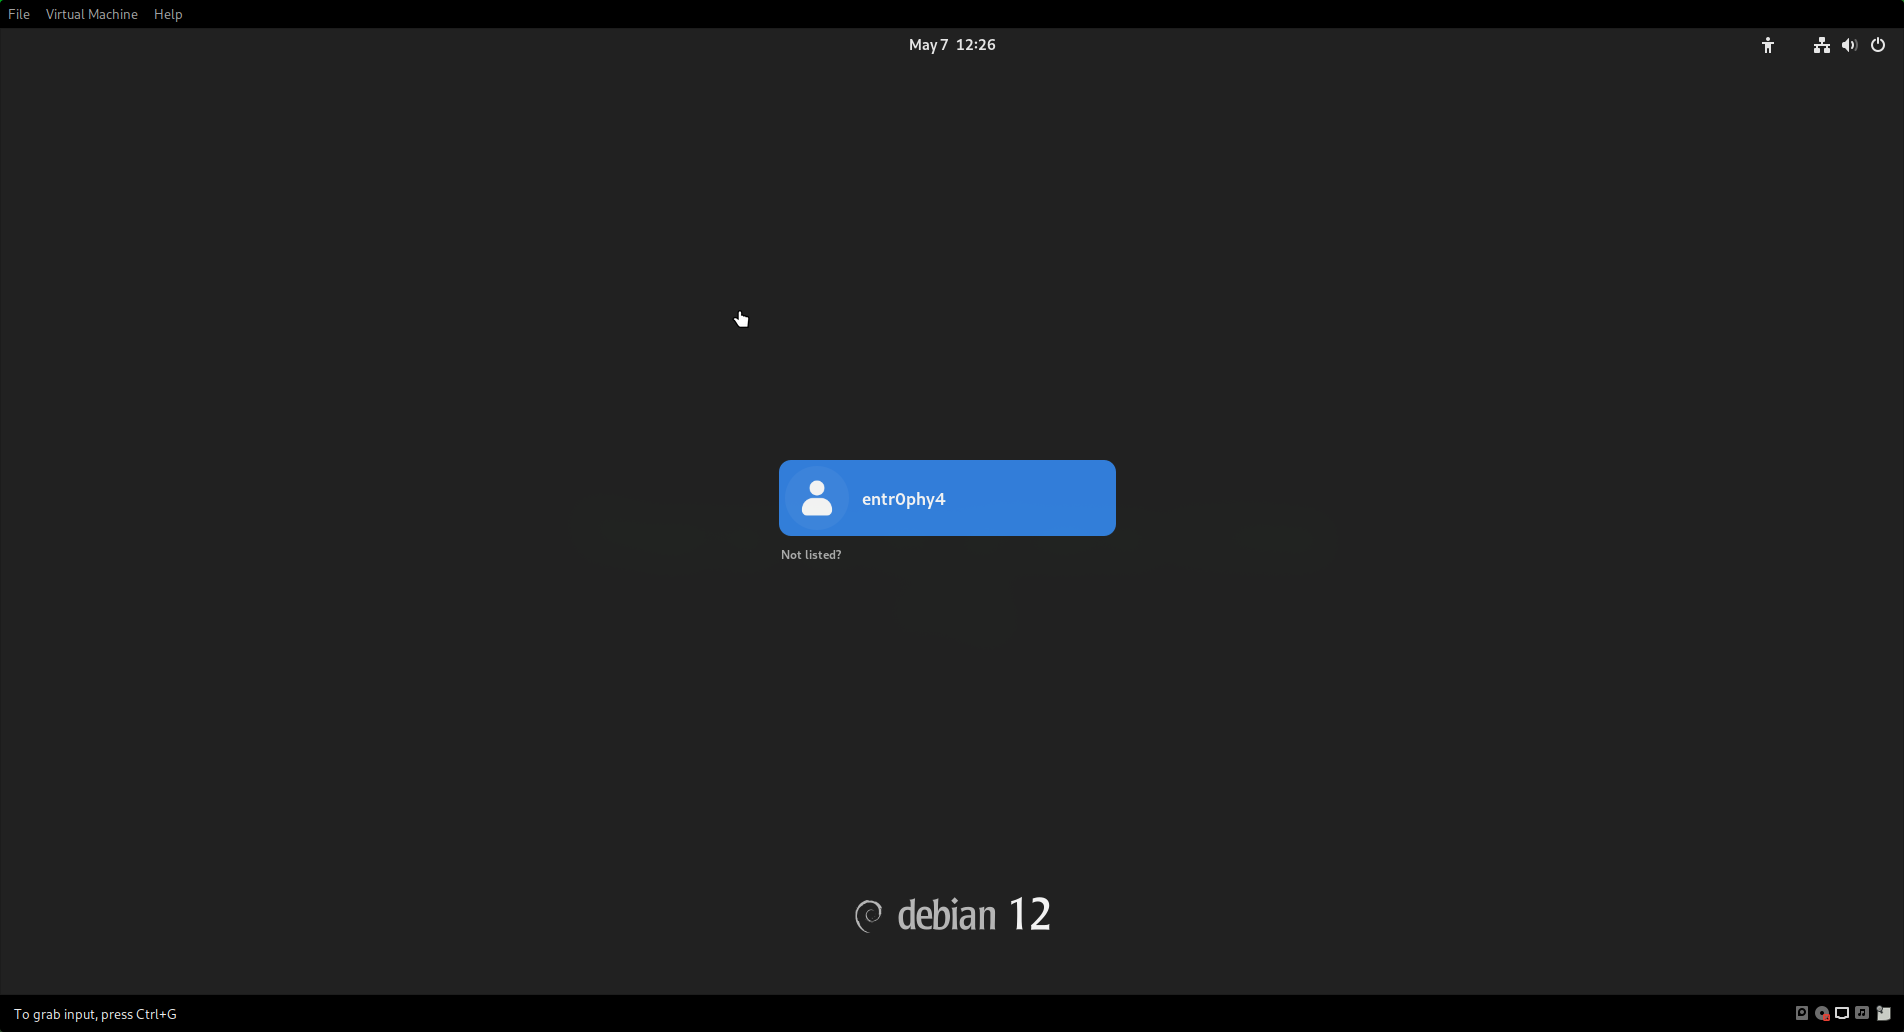
Well, so far we already have a base operating system on which to operate comfortably, let's make some modifications.
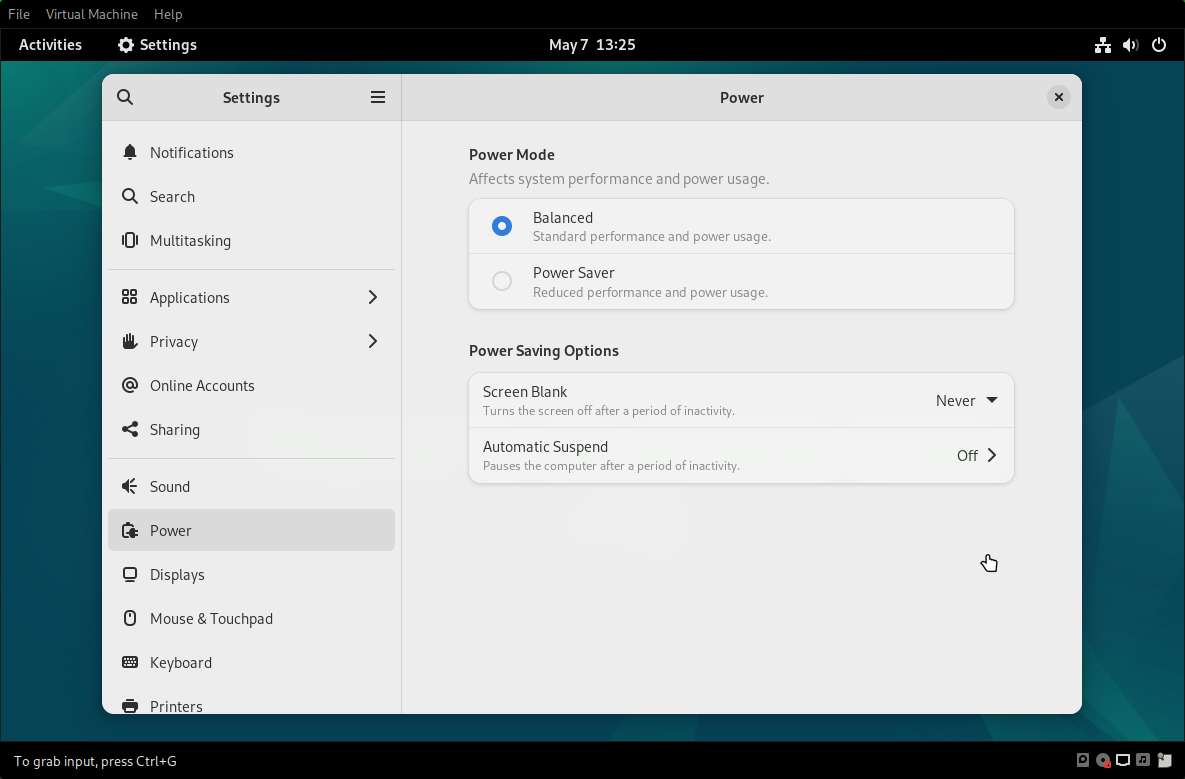
First, we will soon have quite extensive copilation processes so we want to avoid the automatic suspension of the system.
We are going to Settings > Power > Power Saving Options and we disable everything.
Now let's open a terminal and become root.

Typing:
sudo usermod -aG sudo <YOUR_NON_ADMINISTRATIVE_USER>And reboot.
With this we add our user to the sudoers file, to be able to execute actions with elevated privileges without needing to be root.
Top tip
If your eyes are bleeding with the white terminal theme you can go to:
Menu > Preferences > General > Terminal variant > dark
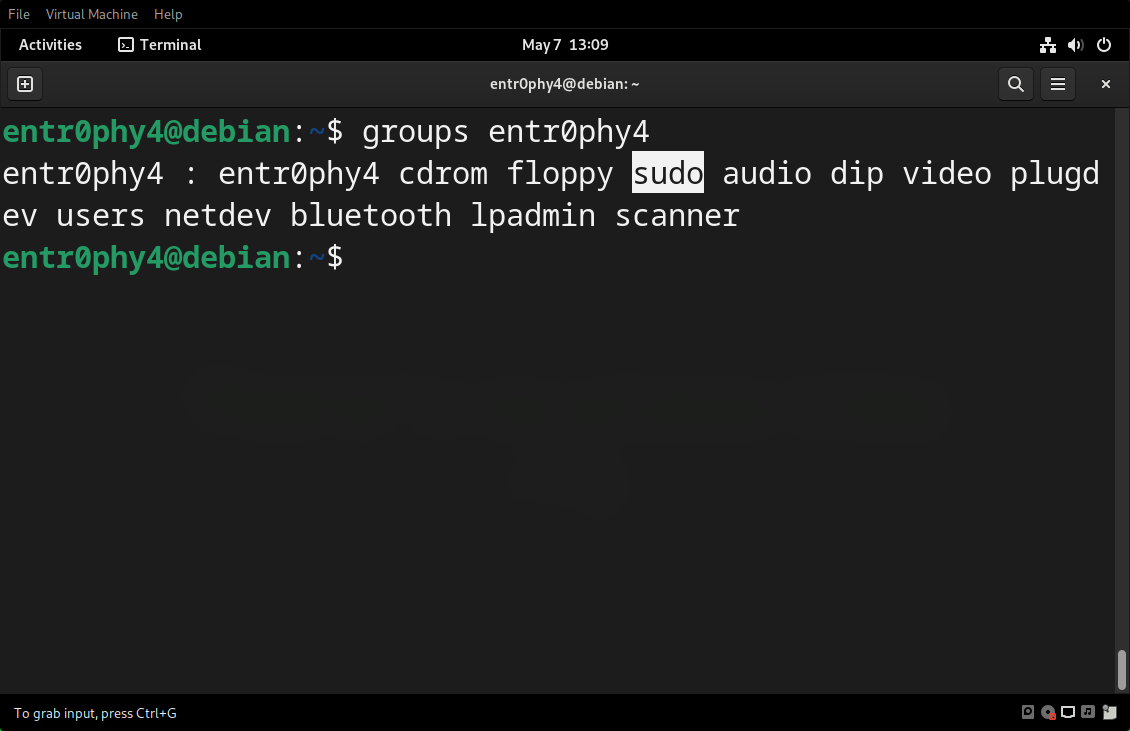
Now, we are part of the sudo group.
the official guide provides us with the following script to verify the necessary dependencies.
cat > version-check.sh << "EOF"
#!/bin/bash
# A script to list version numbers of critical development tools

# If you have tools installed in other directories, adjust PATH here AND
# in ~lfs/.bashrc (section 4.4) as well.

LC_ALL=C
PATH=/usr/bin:/bin

bail() { echo "FATAL: $1"; exit 1; }
grep --version > /dev/null 2> /dev/null || bail "grep does not work"
sed '' /dev/null || bail "sed does not work"
sort   /dev/null || bail "sort does not work"

ver_check()
{
   if ! type -p $2 &>/dev/null
   then
     echo "ERROR: Cannot find $2 ($1)"; return 1;
   fi
   v=$($2 --version 2>&1 | grep -E -o '[0-9]+\.[0-9\.]+[a-z]*' | head -n1)
   if printf '%s\n' $3 $v | sort --version-sort --check &>/dev/null
   then
     printf "OK:    %-9s %-6s >= $3\n" "$1" "$v"; return 0;
   else
     printf "ERROR: %-9s is TOO OLD ($3 or later required)\n" "$1";
     return 1;
   fi
}

ver_kernel()
{
   kver=$(uname -r | grep -E -o '^[0-9\.]+')
   if printf '%s\n' $1 $kver | sort --version-sort --check &>/dev/null
   then
     printf "OK:    Linux Kernel $kver >= $1\n"; return 0;
   else
     printf "ERROR: Linux Kernel ($kver) is TOO OLD ($1 or later required)\n" "$kver";
     return 1;
   fi
}

# Coreutils first because --version-sort needs Coreutils >= 7.0
ver_check Coreutils      sort     8.1 || bail "Coreutils too old, stop"
ver_check Bash           bash     3.2
ver_check Binutils       ld       2.13.1
ver_check Bison          bison    2.7
ver_check Diffutils      diff     2.8.1
ver_check Findutils      find     4.2.31
ver_check Gawk           gawk     4.0.1
ver_check GCC            gcc      5.2
ver_check "GCC (C++)"    g++      5.2
ver_check Grep           grep     2.5.1a
ver_check Gzip           gzip     1.3.12
ver_check M4             m4       1.4.10
ver_check Make           make     4.0
ver_check Patch          patch    2.5.4
ver_check Perl           perl     5.8.8
ver_check Python         python3  3.4
ver_check Sed            sed      4.1.5
ver_check Tar            tar      1.22
ver_check Texinfo        texi2any 5.0
ver_check Xz             xz       5.0.0
ver_kernel 5.4

if mount | grep -q 'devpts on /dev/pts' && [ -e /dev/ptmx ]
then echo "OK:    Linux Kernel supports UNIX 98 PTY";
else echo "ERROR: Linux Kernel does NOT support UNIX 98 PTY"; fi

alias_check() {
   if $1 --version 2>&1 | grep -qi $2
   then printf "OK:    %-4s is $2\n" "$1";
   else printf "ERROR: %-4s is NOT $2\n" "$1"; fi
}
echo "Aliases:"
alias_check awk GNU
alias_check yacc Bison
alias_check sh Bash

echo "Compiler check:"
if printf "int main(){}" | g++ -x c++ -
then echo "OK:    g++ works";
else echo "ERROR: g++ does NOT work"; fi
rm -f a.out

if [ "$(nproc)" = "" ]; then
   echo "ERROR: nproc is not available or it produces empty output"
else
   echo "OK: nproc reports $(nproc) logical cores are available"
fi
EOF

bash version-check.sh
Let's copy it and enter it in the terminal, after press enter we should a output like

A few errors and a new .sh file called version-check.
The errors basically indicate that the corresponding package is not installed, and also report some symbolic links that we need to create. You can download each package independently via
sudo apt install <PACKAGE_NAME>Keep in mind that you will have to download the developer's packages in case it exists, for debian-based distros, they usually have the termination -dev, but on some other systems it is -devel.
But in my case I decided to create a script called install-lfs-deps.sh to automate that process.
#!/bin/bash
set -e

echo "==== [1/5] Updating package list ===="
sudo apt update

# Core packages required for LFS
PACKAGES=(
  bash
  binutils
  bison
  coreutils
  diffutils
  findutils
  gawk
  gcc
  g++
  grep
  gzip
  linux-headers-$(uname -r)
  m4
  make
  patch
  perl
  python3
  sed
  tar
  texinfo
  xz-utils
)

echo "==== [2/5] Installing required base packages ===="
for pkg in "${PACKAGES[@]}"; do
  echo "Installing $pkg..."
  sudo apt install -y "$pkg"
done

echo "==== [3/5] Checking for and installing available development packages (-dev or -devel) ===="
for pkg in "${PACKAGES[@]}"; do
  dev_pkg="${pkg}-dev"
  devel_pkg="${pkg}-devel"

  if apt-cache show "$dev_pkg" >/dev/null 2>&1; then
    echo "Installing development package: $dev_pkg"
    if ! sudo apt install -y "$dev_pkg"; then
      echo "Warning: Failed to install $dev_pkg"
    fi
  elif apt-cache show "$devel_pkg" >/dev/null 2>&1; then
    echo "Installing development package: $devel_pkg"
    if ! sudo apt install -y "$devel_pkg"; then
      echo "Warning: Failed to install $devel_pkg"
    fi
  else
    echo "No development package (-dev or -devel) found for $pkg"
  fi
done

echo "==== [4/5] Creating required LFS symlinks ===="
# Required symlinks for LFS
sudo ln -sf /bin/bash /bin/sh
sudo ln -sf /usr/bin/bison /usr/bin/yacc
sudo ln -sf /usr/bin/gawk /usr/bin/awk

echo "==== [5/5] Verifying g++ compilation ability ===="
if echo "int main(){}" | g++ -x c++ -o /tmp/testprog -; then
  echo "g++ can compile C++ programs"
  rm -f /tmp/testprog
else
  echo "ERROR: g++ failed to compile a simple program"
fi

echo "==== All done! You can now run version-check.sh to verify versions ===="
Once we have the script on the machine we will have to give it execution permissions.
chmod +x install-lfs-deps.shand execute.
bash install-lfs-deps.sh
and if you run version-check.sh again.
bash version-check.sh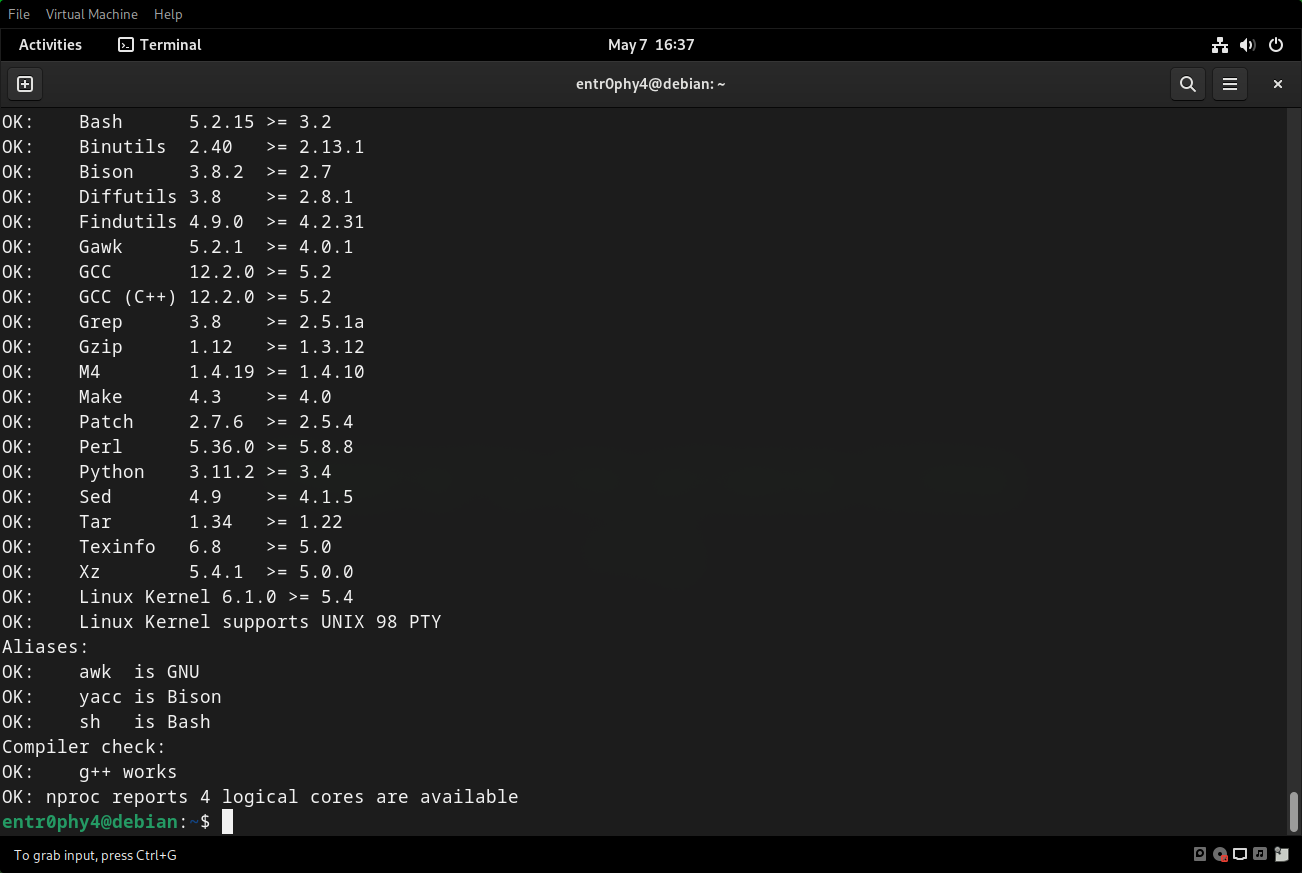
We do not get any errors.
Linux From Scratch like most other operating systems is usually installed on a dedicated partition.
At this point, we are going to add a new disk whare we will store our LFS, first we must turn off our virtual machine.
If we are in VMWare, we will double click on Hard Disk (SCSI).
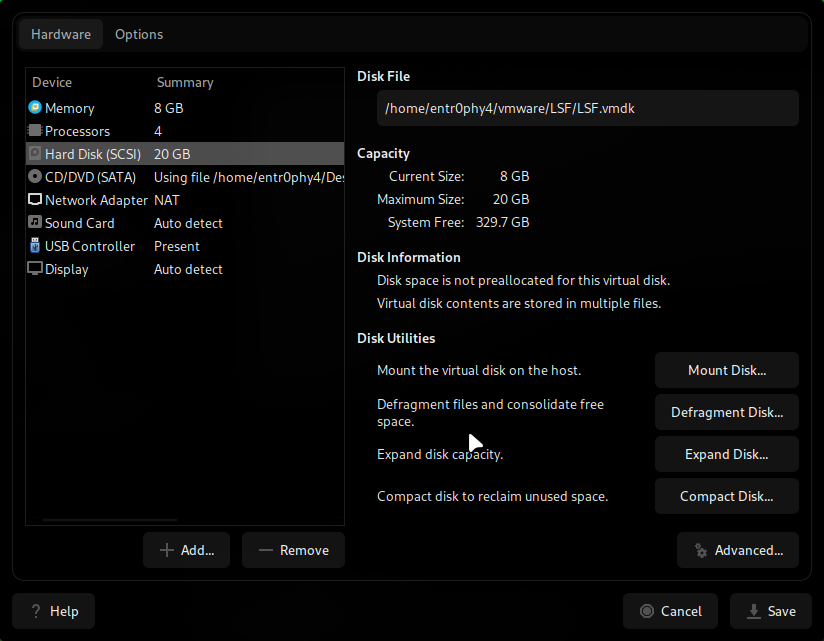
Click on the add button.
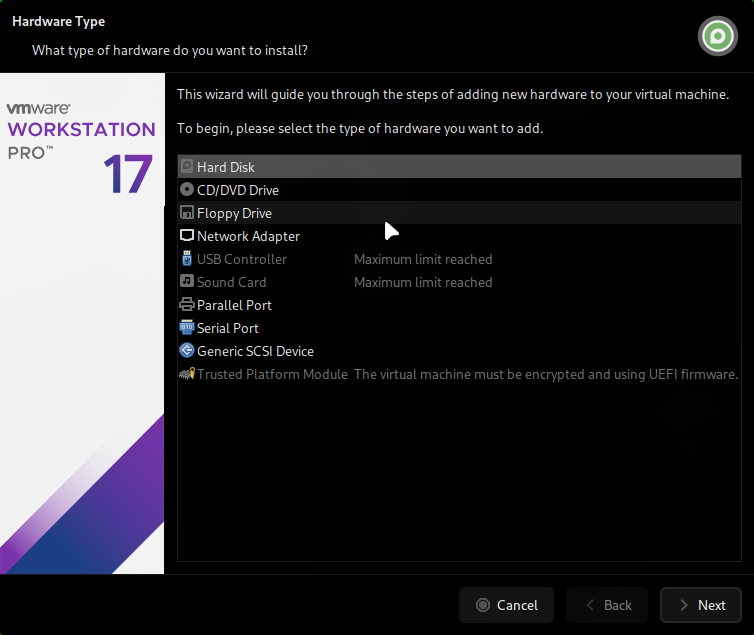
If ask us for for the type of disk we leave the recommended one (SCSI in my case), after select the option Create a new virtual disk and next.
Then you will be asked to select the size of the new disk.

We will allocate 30 GB and leave the default name.
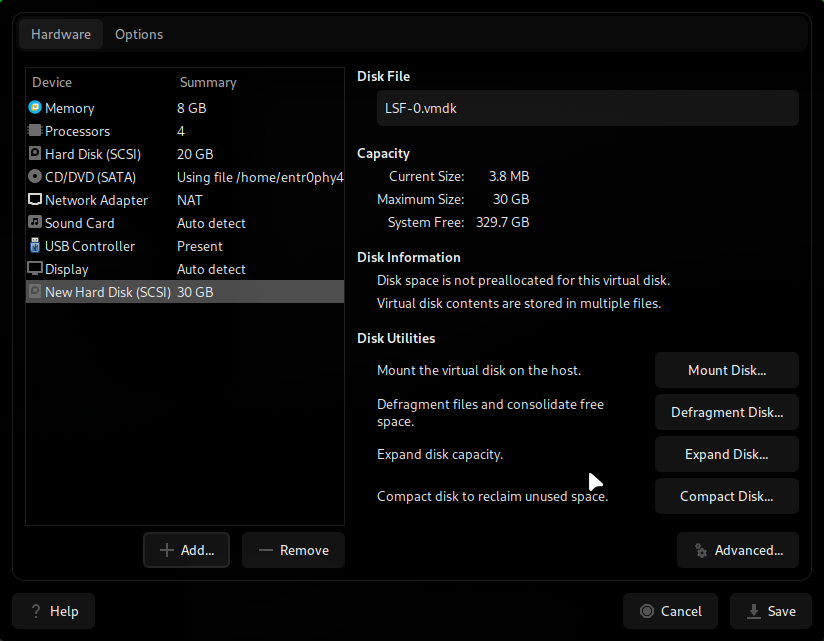
We can click on save and run again our machine.
Once the machine has been started, we are going to use lsblk to display our disks..
sudo lsblk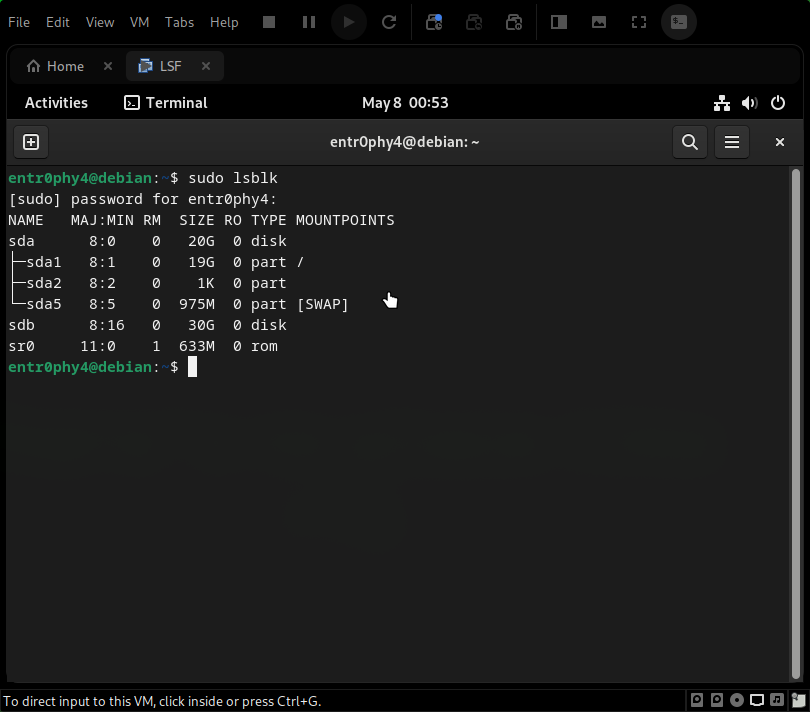
And we can visualize our new disk sdb.
Let's start by creating a new partition table for the disk with fdisk.
sudo fdisk /dev/sdb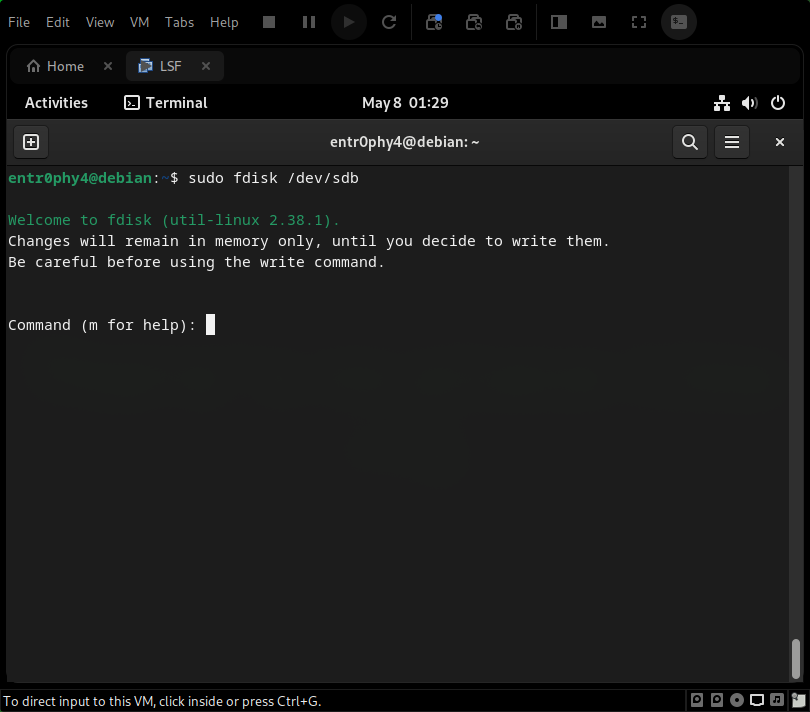
Displaying the help menu typing m + Return we can see these options.
  Create a new label
   g   create a new empty GPT partition table
   G   create a new empty SGI (IRIX) partition table
   o   create a new empty MBR (DOS) partition table
   s   create a new empty Sun partition table
In most cases, modern systems usually use a UEFI bootloader, which is we will be working with, therefore, GPT is the necessary partitioning scheme for systems booting in UEFI mode.
so, option g is the one we are interested in, so we will type it in.
We should see something similar to the following message.
Command (m for help): g
Created a new GPT disklabel (GUID: B3D589A6-3CCE-D44E-88EB-A9276C854317).
Now type w + Return to write the changes and you should see:
Command (m for help): w
The partition table has been altered.
Calling ioctl() to re-read partition table.
Syncing disks.Now we just need to start partitioning the disk, we will be using cfdisk as partition editor.
sudo cfdisk /dev/sdb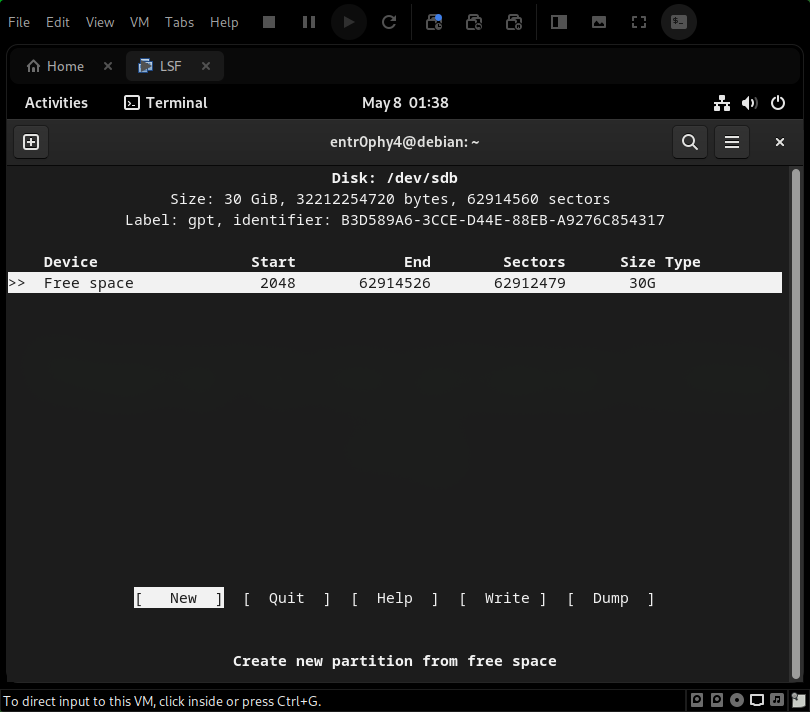
From now, we will focus on creating four partitions:
efi: This partition will store the kernels and other booting information.
root: Here's where we will be building our LFS.
home: Saves our user customizations.
So, let's start with efi, select the New option and assign 200M, Once created, press tab to move to the option Type and press Return.
Change the partition type to EFI System.

Ready, now the root partition, we will assign 20G in this case. The default type should be Linux filesystem, which is fine.
Finally, to our home partition we will assign the rest of the space and the type will also be Linux filesystem.
Our partitions should look like this:
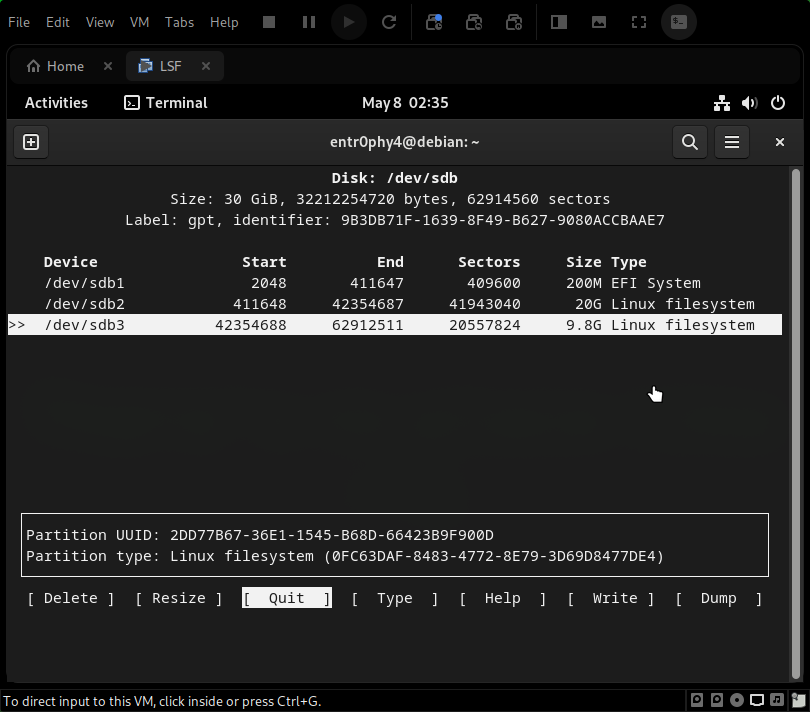
Now that they are ready, select the write option and type yes.
You should see a message like:
The partition table has been altered.With lsblk we can see that our sdb disk now has a similar partitioning to our base systems, except for the SWAP that serves as virtual memory to extend the available RAM.
Is mostly used for mechanical hard disks.

Then we need to assign a ext4 file system to root and home partition, we are going to be using mkfs.
mkfs -v -t ext4 /dev/<YOUR_ROOT_PARTITION>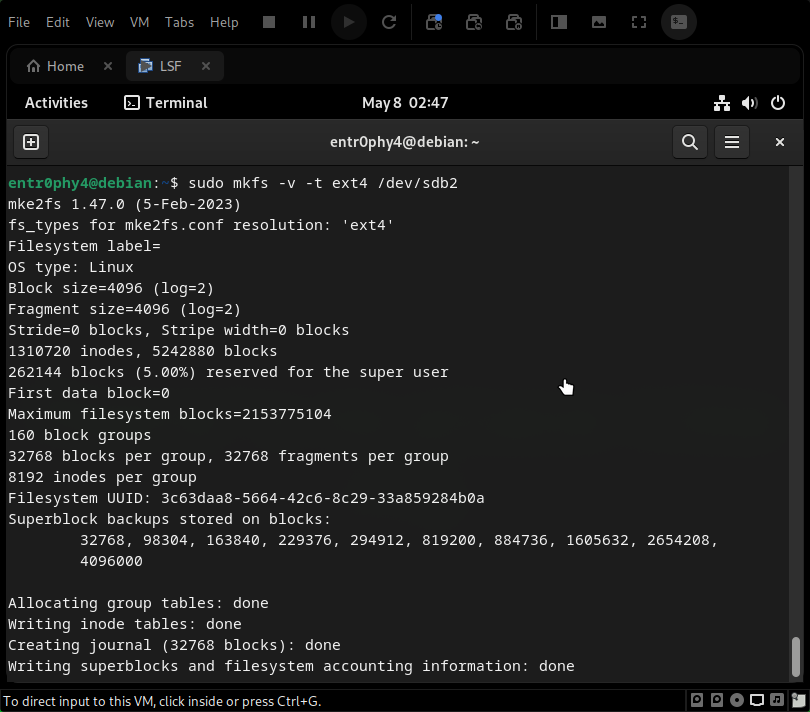
We do the same for sdb3.
Now for the efi partition, we must format with vfat because this is the file system set by the UEFI specification.
sudo mkfs.vfat -F 32 /dev/<YOUR_EFI_PARTITION>And we should have the following output:
entr0phy4@debian:~$ sudo mkfs.vfat -F 32 /dev/sdb1
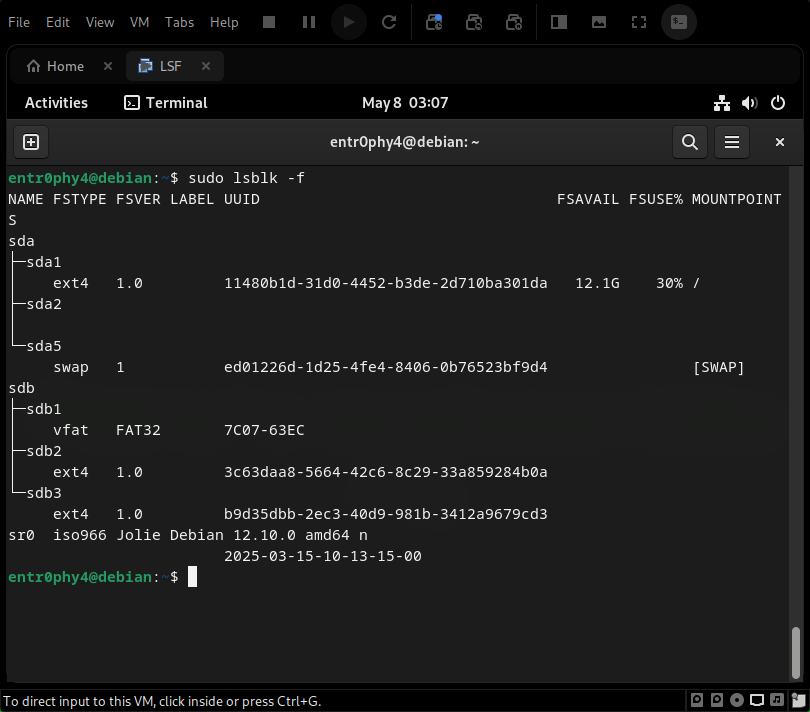
mkfs.fat 4.2 (2021-01-31)If we see the partitions with their respective file systems (sudo lsblk -f), it would look like this:
Once with each partition and its respective file system, let's edit root's, and personalized user .bashrc file to export the following variable for each shell session.
echo "export LFS=/mnt/lfs" | sudo tee -a /root/.bashrc | tee -a ~/.bashrcIf we type source .bashrc and echo $LFS we should obtain from output /mnt/lfs.

We will now proceed to create the $LFS directory.
entr0phy4@debian:~$ sudo mkdir -pv $LFS
mkdir: created directory '/mnt/lfs'With this we have created the $LFS directory, now we will mount the root partitions to it.
entr0phy4@debian:~$ sudo mount -v -t ext4 /dev/sdb2 $LFS
mount: /dev/sdb2 mounted on /mnt/lfs.
All right, now we will mount the home partition.
entr0phy4@debian:~$ sudo mkdir -pv $LFS/home
mkdir: created directory '/mnt/lfs/home'
entr0phy4@debian:~$ sudo mount -v -t ext4 /dev/sdb3 $LFS/home
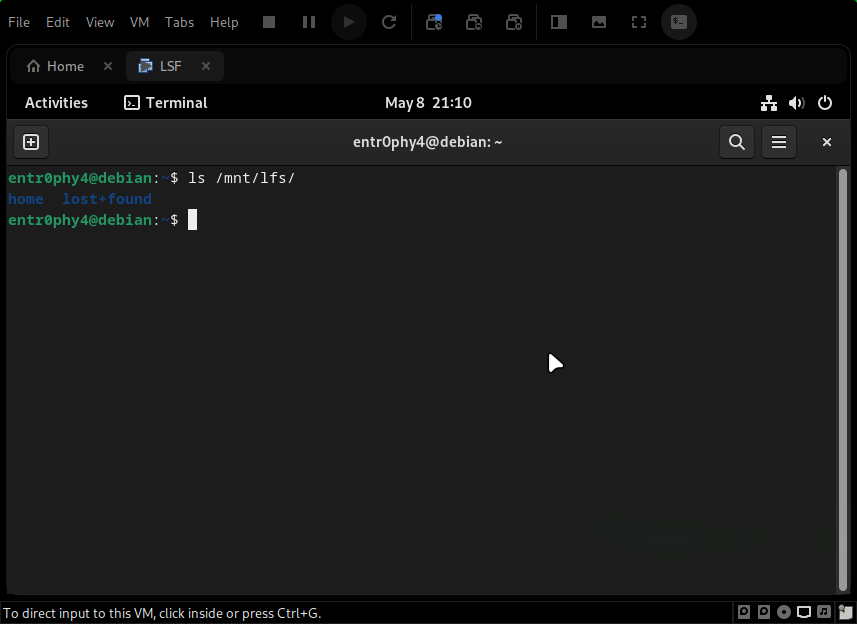
mount: /dev/sdb3 mounted on /mnt/lfs/home.With this we have mounted the partitions to the $LFS directory. If we check the
content of /mnt/lfs we should see the following:
For this point, let's create a directory to store the packages and patches.
sudo mkdir -pv $LFS/sourcesAnd we make that directory writable and set the sticky bit, this is to only the owner of a file can delete or modify it.
entr0phy4@debian:~$ sudo chmod -v a+wt $LFS/sources
mode of '/mnt/lfs/sources' changed to 0755 (rwxr-xr-x) to 1777 (rwxrwxrwt)Now we will download the packages and patches from the lfs-packages repository.
All packages we need are in wget-list-sysv.
So let's download the list of packages.
wget https://www.linuxfromscratch.org/lfs/view/stable/wget-list-sysv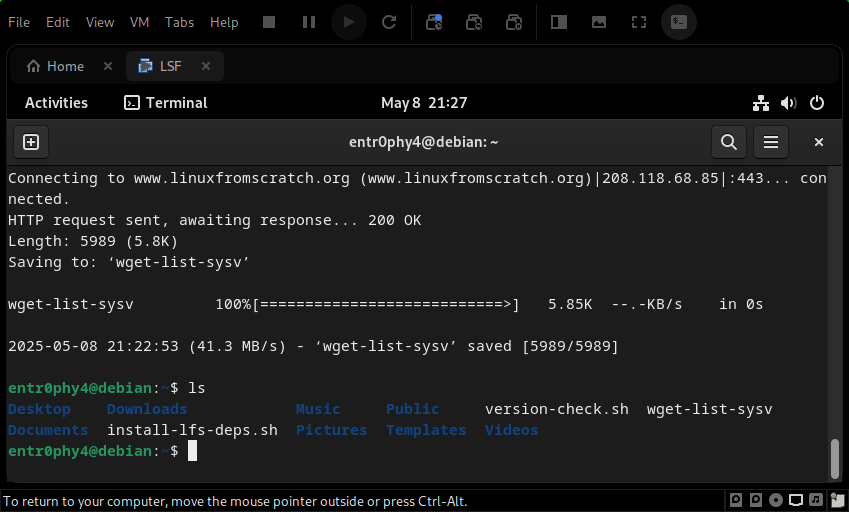
We now have a file called wget-list-sysv in our current directory.
And we will download the packages sending the list of packages to the wget command and
indicating --directory-prefix to specify the directory where the packages will be downloaded.
wget --input-file=wget-list-sysv --continue --directory-prefix=$LFS/sourcesThis start the download all the packages and we can see the progress.
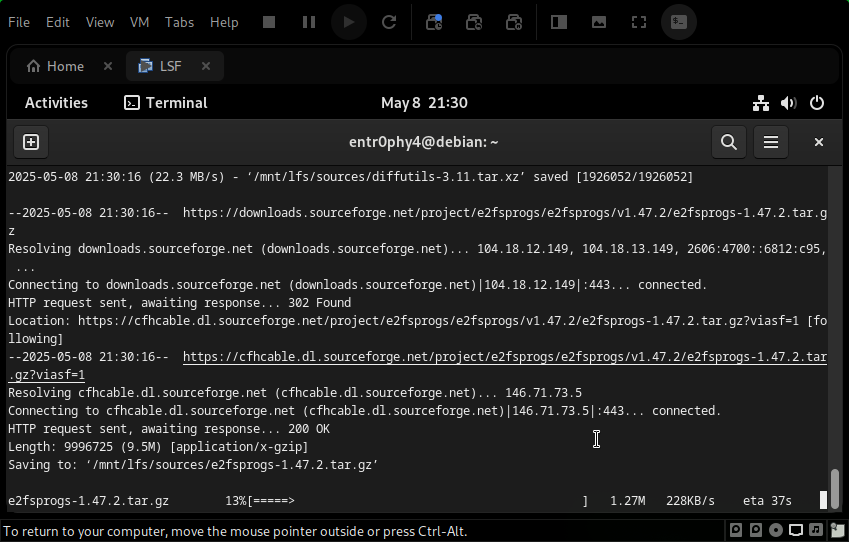
Once the download is finished, we can see this message in the terminal.
FINISHED --2025-05-08 21:37:14--
Total wall clock time: 7m 24s
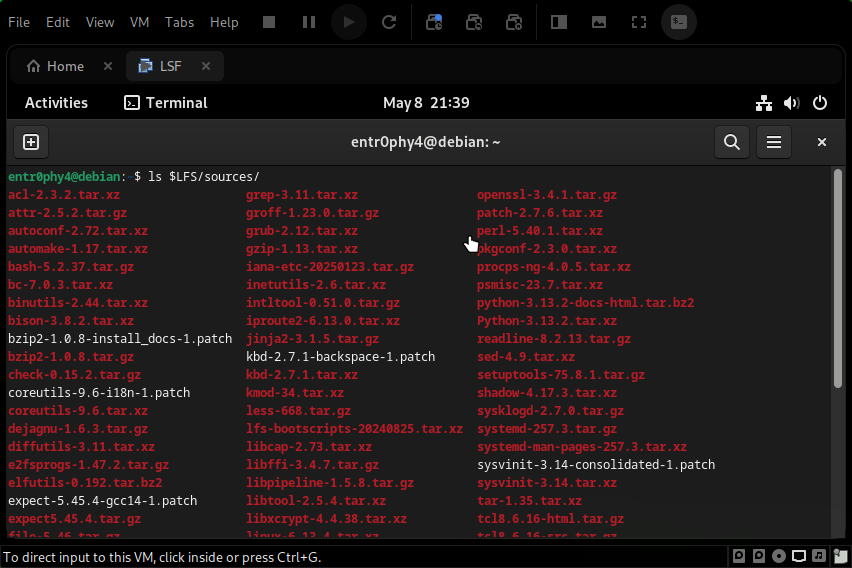
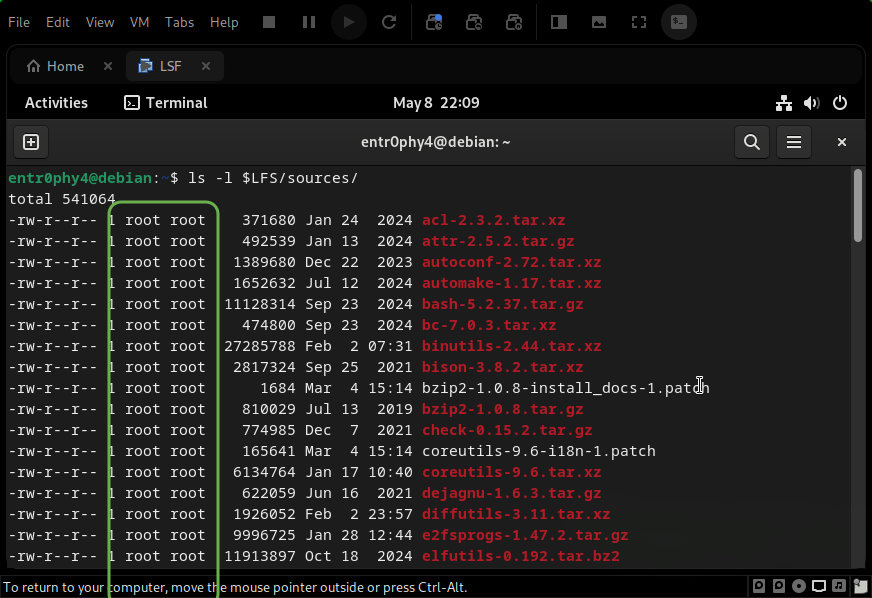
Downloaded: 92 files, 528M in 6m 24s (1.38 MB/s)And we can see the packages in the $LFS/sources directory.
Now, let's verify the integrity of the downloaded packages. First, let's download the MD5 checksums file:
wget https://www.linuxfromscratch.org/lfs/view/stable/md5sumsOnce we have the file, we will verify the integrity of the downloaded packages with the following command:
pushd $LFS/sources; md5sum -c ~/md5sums; popdAnd we should see something like this:
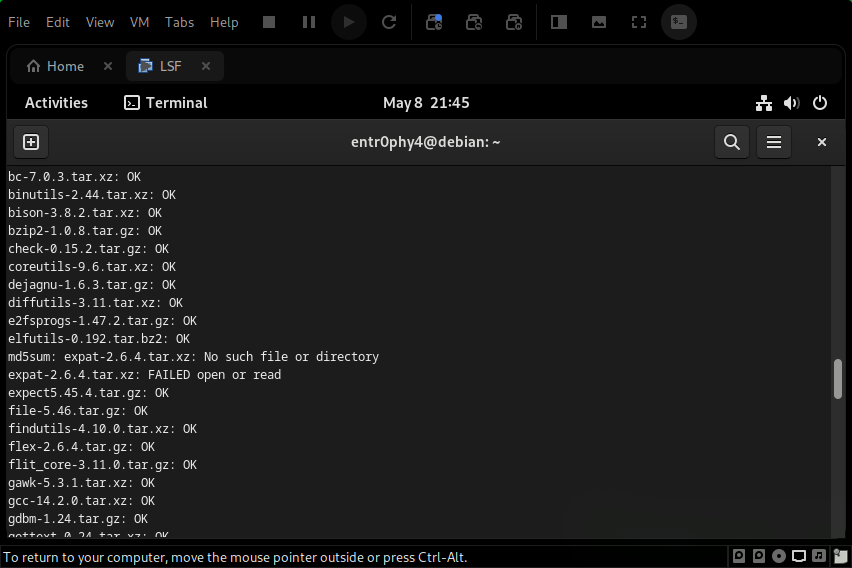
In our case, all the packages have been downloaded correctly except expat-2.6.4.tar.xz.
So we need to download it manually.
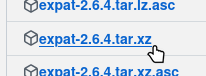
The next link is the github repository of the package for expat 2.6.4 release.
So click on the link and download the file expat-2.6.4.tar.xz.
Once we have the file, we will move it to the $LFS/sources directory.
mv ~/Downloads/expat-2.6.4.tar.xz $LFS/sourcesand check again the md5sum of the files.
pushd $LFS/sources; md5sum -c ~/md5sums; popdIn this case all packages pass the verification.
Top tip
If you have any problems with the packages, you can find support with download links in the
If we donwload the packages being non-root user, we need to change the owner of the packages to root.
sudo chown root:root $LFS/sources/*You can check the owner of the files with ls -l $LFS/sources.
Now we need to become root user for the rest of the process. This is necessary because we'll be performing operations in $LFS directory that require elevated privileges.
We need create the tree structure for our LFS.
mkdir -pv $LFS/{etc,var} $LFS/usr/{bin,lib,sbin}

for i in bin lib sbin; do
  ln -sv usr/$i $LFS/$i
done

case $(uname -m) in
  x86_64) mkdir -pv $LFS/lib64 ;;
esac
Once we paste the script on our terminal and press Enter we will see the following tree structure in our $LFS directory.

If you are Linux user, that looks familiar, right?
Let's create one more directory for the tools where we will compile some tools we need.
mkdir -pv $LFS/toolslfs userAs a security measure, we will create a new user called lfs and add it to the lfs group.
First, we need to create the group.
groupadd lfsAnd then we create the user.
useradd -s /bin/bash -g lfs -m -k /dev/null lfsand create a password for the user.
passwd lfsTo grant lfs full access to all the directories in $LFS:
chown -v lfs $LFS/{usr{,/*},var,etc,tools}
case $(uname -m) in
  x86_64) chown -v lfs $LFS/lib64 ;;
esac
Now we become the lfs user.
su - lfsFrom now, we will be working as lfs user.
Once we are the user lfs we will modify the .bash_profile and .bashrc for lfs user.
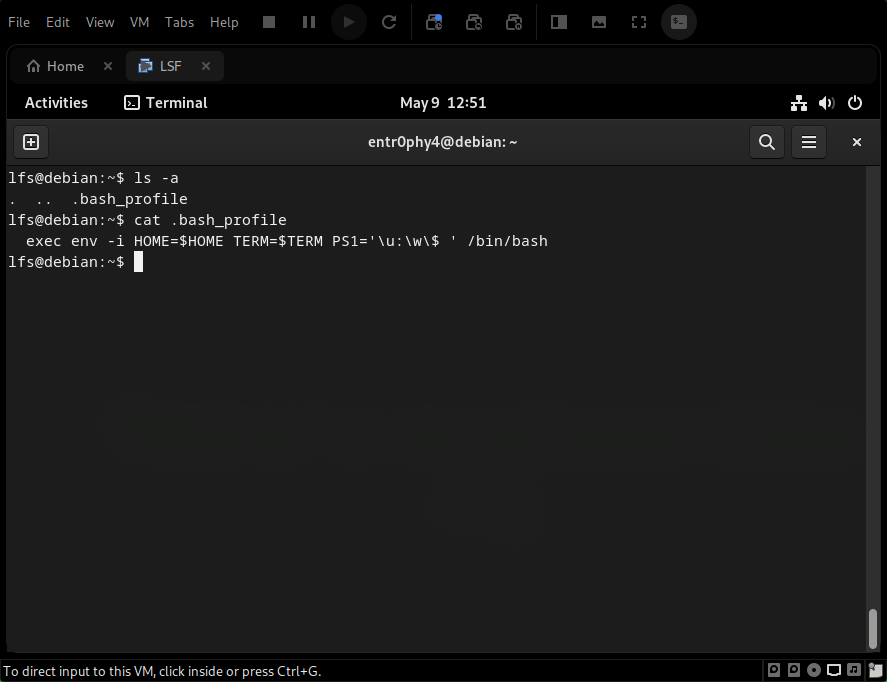
First, we will create a new file called .bash_profile which not should exist, and add the following content:
cat > ~/.bash_profile << "EOF"
  exec env -i HOME=$HOME TERM=$TERM PS1='\u:\w\$ ' /bin/bash
EOF
Now, we should have a file called .bash_profile in our home directory with that content.
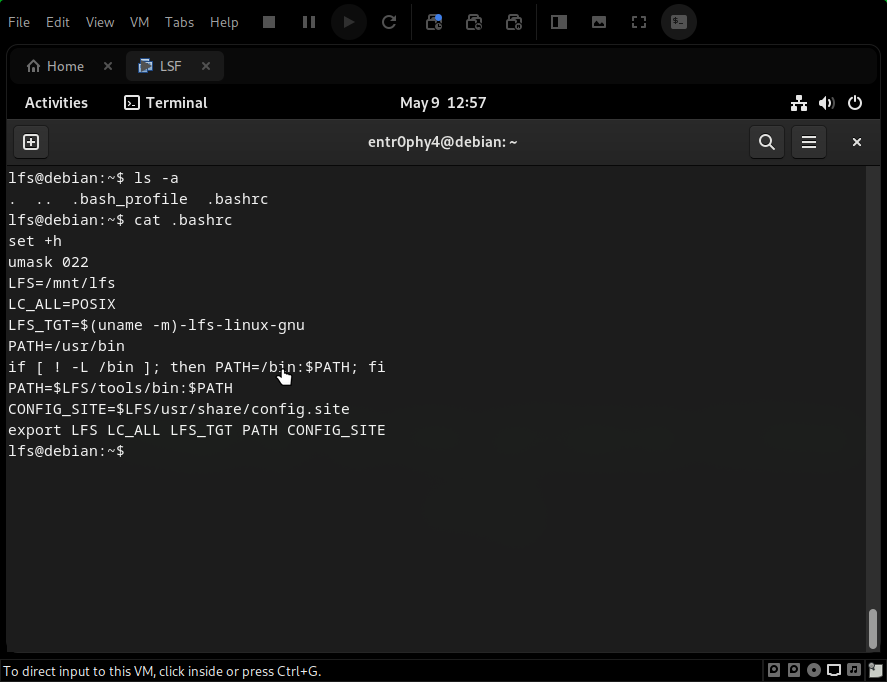
Now, we will create the .bashrc file, which should also not exist, and add the following content:
cat > ~/.bashrc << "EOF"
set +h
umask 022
LFS=/mnt/lfs
LC_ALL=POSIX
LFS_TGT=$(uname -m)-lfs-linux-gnu
PATH=/usr/bin
if [ ! -L /bin ]; then PATH=/bin:$PATH; fi
PATH=$LFS/tools/bin:$PATH
CONFIG_SITE=$LFS/usr/share/config.site
export LFS LC_ALL LFS_TGT PATH CONFIG_SITE
EOF
Now, we should have a file called .bashrc in our home directory with that content.
Now, we will source the .bash_profile and .bashrc files.
source ~/.bash_profile
source ~/.bashrc
With this ready, we can start the compilation of the base system.
Cross Toolchain and Temporary Tools
This is where the real work of building a new system begins.
We are going to place ourselves in the $LFS/sources directory.
cd $LFS/sourcesAnd here we will start the compilation of the base system packages.
First, we must unzip the package binutils-2.44.tar.xz.
tar -xf binutils-2.44.tar.xzAnd we will enter the directory.
cd binutils-2.44Once inside, we must create a directory called build and enter it.
mkdir -v build
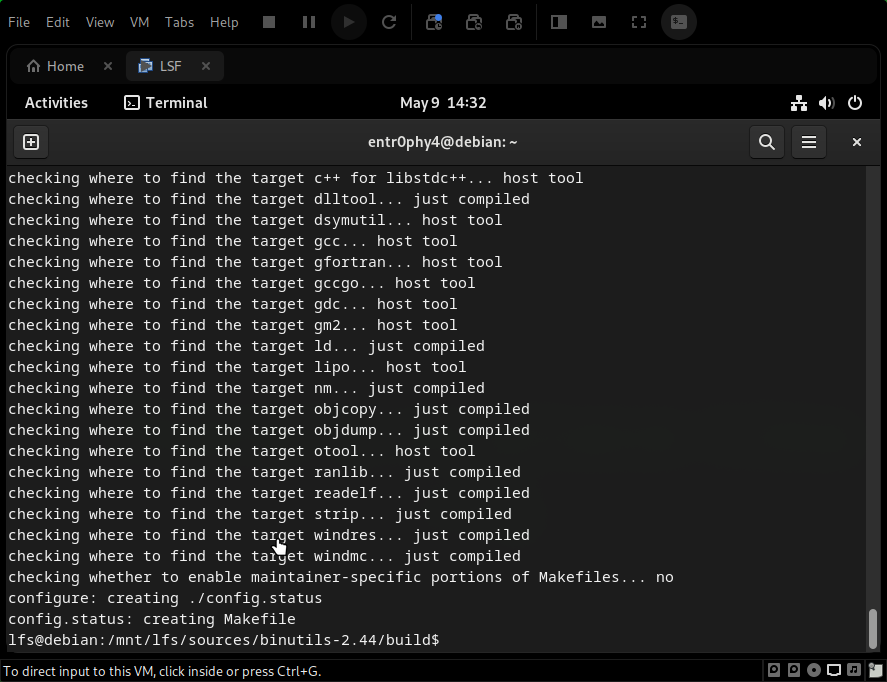
cd buildNow, we will configure the build.
../configure --prefix=$LFS/tools \
             --with-sysroot=$LFS \
             --target=$LFS_TGT   \
             --disable-nls       \
             --enable-gprofng=no \
             --disable-werror    \
             --enable-new-dtags  \
             --enable-default-hash-style=gnu
We should see a output like this:
Now, we will compile the package.
makeThis could take a few minutes.
Once finished we will perform the installation.
make installIf no errors occur, we should have the utility installed so go again to the $LFS/sources directory.
This package depends at the same time on three other packages: mpfr, gmp and mpc.
So once extracted.
tar -xf gcc-14.2.0.tar.xzWe will enter the directory.
cd gcc-14.2.0And we will bring the three necessary packages.
tar -xf ../mpfr-4.2.1.tar.xz
mv -v mpfr-4.2.1 mpfr
tar -xf ../gmp-6.3.0.tar.xz
mv -v gmp-6.3.0 gmp
tar -xf ../mpc-1.3.1.tar.gz
mv -v mpc-1.3.1 mpc
case $(uname -m) in
  x86_64)
    sed -e '/m64=/s/lib64/lib/' \
        -i.orig gcc/config/i386/t-linux64
 ;;
esac
This will set a default directory name for 64-bit libraries to lib.
Now the same story, create a build folder and get into it.
mkdir -v build
cd build
Configure the build.
../configure                  \
    --target=$LFS_TGT         \
    --prefix=$LFS/tools       \
    --with-glibc-version=2.41 \
    --with-sysroot=$LFS       \
    --with-newlib             \
    --without-headers         \
    --enable-default-pie      \
    --enable-default-ssp      \
    --disable-nls             \
    --disable-shared          \
    --disable-multilib        \
    --disable-threads         \
    --disable-libatomic       \
    --disable-libgomp         \
    --disable-libquadmath     \
    --disable-libssp          \
    --disable-libvtv          \
    --disable-libstdcxx       \
    --enable-languages=c,c++
and compile the package.
makeThis one could last almost three times longer than the previous one.
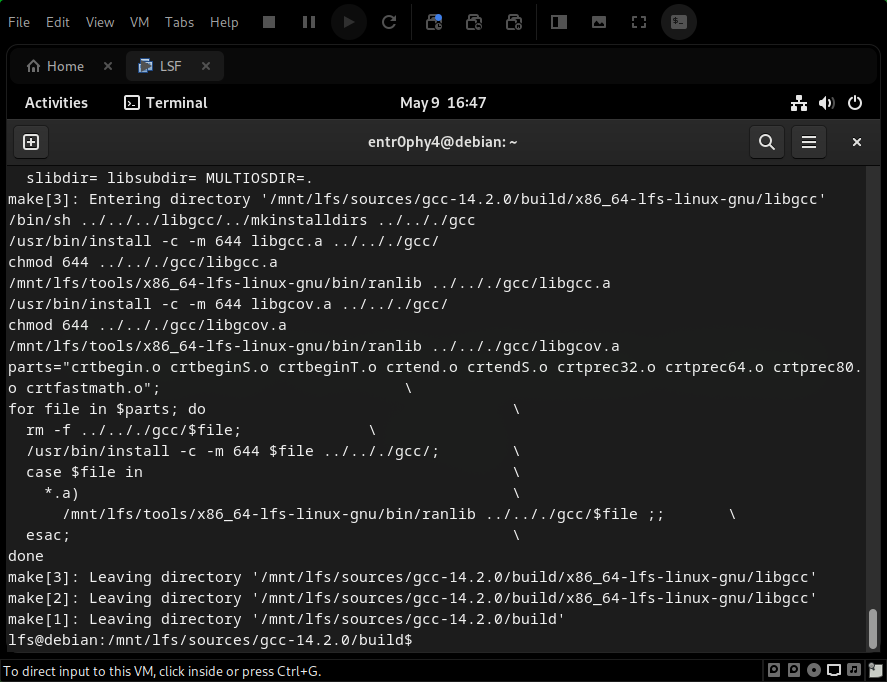
Once finished, if no errors occur, the output should be similar to this:
Now let's install.
make installNow we are going to create a complete version of the internal system header.
This same command is used by the gcc compilation process but his creates the headers in a partial way.
cd ..
cat gcc/limitx.h gcc/glimits.h gcc/limity.h > \
`dirname $($LFS_TGT-gcc -print-libgcc-file-name)`/include/limits.hThis package is a collection of the internal system header files for the Linux kernel.
So first we unzip the package.
tar -xf linux-6.13.4.tar.xzAnd we will enter the directory.
cd linux-6.13.4Now make sure there are no stale files embedded in the package.
make mrproperNow we extract the user-visible kernel headers from the source.
make headers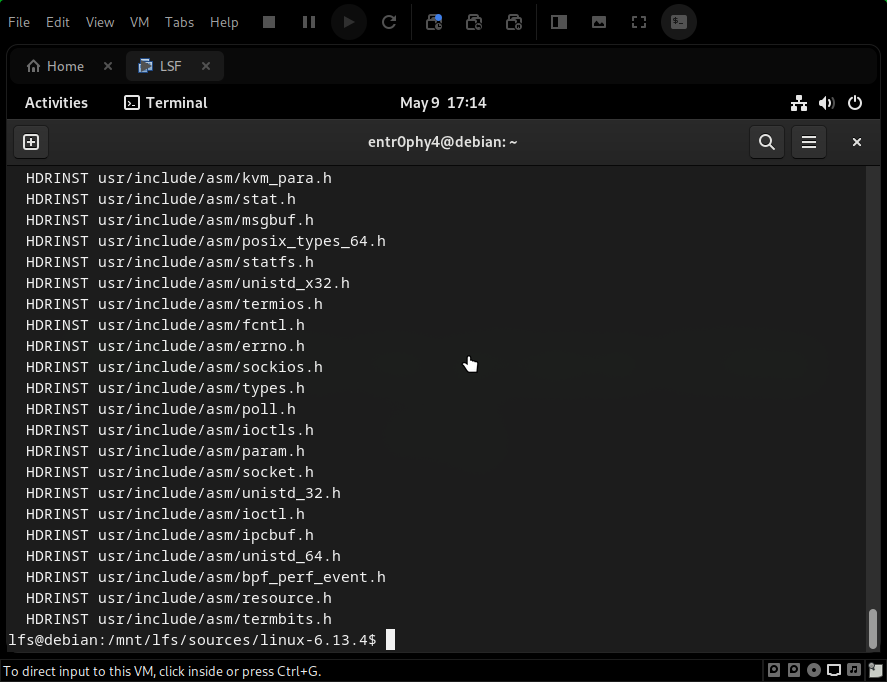
The headers are saved in the /usr directory, so we need to copy them to the $LFS/usr directory.
find usr/include -type f ! -name '*.h' -delete
cp -rv usr/include $LFS/usrThis library provides the basic routines for the C programming language.
Let's unzip the package.
tar -xf glibc-2.41.tar.xzAnd we will enter the directory.
cd glibc-2.41First, create a symbolic link for LSB compliance. Additionally, for x86_64, create a compatibility symbolic link required for proper operation of the dynamic library loader:
case $(uname -m) in
    i?86)   ln -sfv ld-linux.so.2 $LFS/lib/ld-lsb.so.3
    ;;
    x86_64) ln -sfv ../lib/ld-linux-x86-64.so.2 $LFS/lib64
            ln -sfv ../lib/ld-linux-x86-64.so.2 $LFS/lib64/ld-lsb-x86-64.so.3
    ;;
esac
Apply the patch to the source code.
patch -Np1 -i ../glibc-2.41-fhs-1.patchNow we will create a build directory and enter it.
mkdir -v build
cd build
Configure the build.
../configure                             \
      --prefix=/usr                      \
      --host=$LFS_TGT                    \
      --build=$(../scripts/config.guess) \
      --enable-kernel=5.4                \
      --with-headers=$LFS/usr/include    \
      --disable-nscd                     \
      libc_cv_slibdir=/usr/lib
Let's compile the package.
Top tip
There have been reports that this package may fail when building as a
"parallel make." If that occurs, rerun the make command with the -j1 option.
makeNow we will install the package.
make DESTDIR=$LFS installFix a hard coded path to the executable loader in the ldd script:
sed '/RTLDLIST=/s@/usr@@g' -i $LFS/usr/bin/lddOnce this is done we apply the following commands to validate the basic functions (compiler, linker, etc) are working.
echo 'int main(){}' | $LFS_TGT-gcc -xc -
readelf -l a.out | grep ld-linux
We should see the following output:
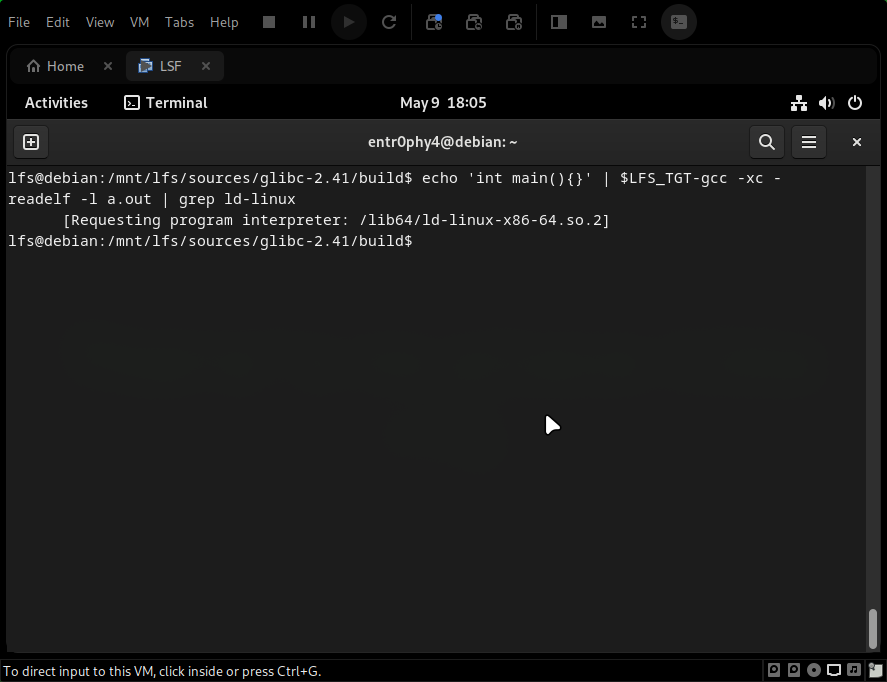
if all is ok, remove the file a.out.
rm -v a.outThis package is the standard C++ library. It is needed to compile c++ code.
For this process we must delete the folder we extracted earlier for gcc-14.2.0.
rm -rf gcc-14.2.0And unzip again the tar file.
tar -xf gcc-14.2.0.tar.xzAnd we will enter the directory.
cd gcc-14.2.0Now we will create a build directory and enter it.
mkdir -v build
cd build
And configure the build with this parameters:
../libstdc++-v3/configure           \
    --host=$LFS_TGT                 \
    --build=$(../config.guess)      \
    --prefix=/usr                   \
    --disable-multilib              \
    --disable-nls                   \
    --disable-libstdcxx-pch         \
    --with-gxx-include-dir=/tools/$LFS_TGT/include/c++/14.2.0
Let's compile the package.
makeand install the package.
make DESTDIR=$LFS installAnd we remove the libtool archive files.
rm -v $LFS/usr/lib/lib{stdc++{,exp,fs},supc++}.laThe M4 package contains a macro processor.
The process for the compilation is usually very similar so we will be less specific with the steps from now on.
Once unzipped the package, we will enter the directory, configure the build, compile and install.
tar -xf m4-1.4.19.tar.xz
cd m4-1.4.19
./configure --prefix=/usr   \
            --host=$LFS_TGT \
            --build=$(build-aux/config.guess)

make
make DESTDIR=$LFS installThe Ncurses package contains libraries for terminal-independent handling of character screens.
First, build the "tic" program on the build host:
tar -xvf ncurses-6.5.tar.gz
cd ncurses-6.5
mkdir build
pushd build
  ../configure AWK=gawk
  make -C include
  make -C progs tic
popd
Now, prepare Ncurses.
./configure --prefix=/usr                \
            --host=$LFS_TGT              \
            --build=$(./config.guess)    \
            --mandir=/usr/share/man      \
            --with-manpage-format=normal \
            --with-shared                \
            --without-normal             \
            --with-cxx-shared            \
            --without-debug              \
            --without-ada                \
            --disable-stripping          \
            AWK=gawk

make
make DESTDIR=$LFS TIC_PATH=$(pwd)/build/progs/tic install
ln -sv libncursesw.so $LFS/usr/lib/libncurses.so
sed -e 's/^#if.*XOPEN.*$/#if 1/' \
-i $LFS/usr/include/curses.hThe Bash package contains the Buourne-Again Shell.
Unzip the package, enter the directory, configure the build, compile and install.
tar -xvf bash-5.2.37.tar.gz
cd bash-5.2.37
./configure --prefix=/usr                      \
            --build=$(sh support/config.guess) \
            --host=$LFS_TGT                    \
            --without-bash-malloc
make
make DESTDIR=$LFS install
ln -sv bash $LFS/bin/shThe Coreutils package contains the basic utility programs needed by every operating system.
tar -xvf coreutils-9.6.tar.xz
cd coreutils-9.6
./configure --prefix=/usr                     \
            --host=$LFS_TGT                   \
            --build=$(build-aux/config.guess) \
            --enable-install-program=hostname \
            --enable-no-install-program=kill,uptime
make
make DESTDIR=$LFS install
mv -v $LFS/usr/bin/chroot              $LFS/usr/sbin
mkdir -pv $LFS/usr/share/man/man8
mv -v $LFS/usr/share/man/man1/chroot.1 $LFS/usr/share/man/man8/chroot.8
sed -i 's/"1"/"8"/' $LFS/usr/share/man/man8/chroot.8The Diffutils package contains programs that show the differences between files or directories.
tar -xvf diffutils-3.11.tar.xz
cd diffutils-3.11
./configure --prefix=/usr   \
            --host=$LFS_TGT \
            --build=$(./build-aux/config.guess)
make
make DESTDIR=$LFS installThe File package contains a utility for determining the type of a given file or files.
tar -xvf file-5.46.tar.gz
cd file-5.46
mkdir build
pushd build
  ../configure --disable-bzlib      \
               --disable-libseccomp \
               --disable-xzlib      \
               --disable-zlib
  make
popd
./configure --prefix=/usr --host=$LFS_TGT --build=$(./config.guess)
make FILE_COMPILE=$(pwd)/build/src/file
make DESTDIR=$LFS install
rm -v $LFS/usr/lib/libmagic.laThe findutils package contains programs to find files.
tar -xvf findutils-4.10.0.tar.xz
cd findutils-4.10.0
./configure --prefix=/usr                   \
            --localstatedir=/var/lib/locate \
            --host=$LFS_TGT                 \
            --build=$(build-aux/config.guess)
make
make DESTDIR=$LFS installThe Gawk package contains programs for manipulating text files.
tar -xvf gawk-5.3.1.tar.xz
cd gawk-5.3.1
sed -i 's/extras//' Makefile.in
./configure --prefix=/usr   \
            --host=$LFS_TGT \
            --build=$(build-aux/config.guess)
make
make DESTDIR=$LFS installThe Grep package contains programs for searching through the contents of files.
tar -xvf grep-3.11.tar.xz
cd grep-3.11
./configure --prefix=/usr   \
            --host=$LFS_TGT \
            --build=$(./build-aux/config.guess)
make
make DESTDIR=$LFS installThe Gzip package contains programs for compressing and decompressing files.
tar -xvf gzip-1.13.tar.xz
cd gzip-1.13
./configure --prefix=/usr --host=$LFS_TGT
make
make DESTDIR=$LFS installThe Make package contains a program for controlling the generation of executables and other non-source files of a package from source files.
tar -xvf make-4.4.1.tar.gz
cd make-4.4.1
./configure --prefix=/usr   \
            --without-guile \
            --host=$LFS_TGT \
            --build=$(build-aux/config.guess)
make
make DESTDIR=$LFS installThe Patch package contains a program for modifying or creating files by applying a "Patch" file typically created by the diff program.
tar -xvf patch-2.7.6.tar.xz
cd patch-2.7.6
./configure --prefix=/usr   \
            --host=$LFS_TGT \
            --build=$(build-aux/config.guess)
make
make DESTDIR=$LFS installThe Sed package contains a stream editor.
tar -xvf sed-4.9.tar.xz
cd sed-4.9
./configure --prefix=/usr   \
            --host=$LFS_TGT \
            --build=$(./build-aux/config.guess)
make
make DESTDIR=$LFS installThe Tar package provides the ability to create tar archives as well as perform various other kinds of archive manipulation. Tar can be used on previously created archives to extract files, to store additional files, or to update or list files which were already stored.
tar -xvf tar-1.35.tar.xz
cd tar-1.35
./configure --prefix=/usr                     \
            --host=$LFS_TGT                   \
            --build=$(build-aux/config.guess)
make
make DESTDIR=$LFS installThe Xz package contains programs for compressing and decompressing files.
tar -xvf xz-5.6.4.tar.xz
cd xz-5.6.4
./configure --prefix=/usr                     \
            --host=$LFS_TGT                   \
            --build=$(build-aux/config.guess) \
            --disable-static                  \
            --docdir=/usr/share/doc/xz-5.6.4
make
make DESTDIR=$LFS install
rm -v $LFS/usr/lib/liblzma.laThe Binutils package contains a linker, an assembler, and other tools for handling object files.
For second phase of the compilation we will eliminate the previous folder and extract again the source code.
rm -rf binutils-2.44/
tar -xvf binutils-2.44.tar.xz
cd binutils-2.44
sed '6031s/$add_dir//' -i ltmain.sh
Now, we will configure the build, compile and install.
mkdir -v build
cd       build
../configure                   \
    --prefix=/usr              \
    --build=$(../config.guess) \
    --host=$LFS_TGT            \
    --disable-nls              \
    --enable-shared            \
    --enable-gprofng=no        \
    --disable-werror           \
    --enable-64-bit-bfd        \
    --enable-new-dtags         \
    --enable-default-hash-style=gnu
make
make DESTDIR=$LFS install
rm -v $LFS/usr/lib/lib{bfd,ctf,ctf-nobfd,opcodes,sframe}.{a,la}The GCC package contains the GNU compiler collection, which includes the C and C++ compilers.
So again, we will eliminate the previous folder and extract again the source code.
rm -rf gcc-14.2.0/
tar -xvf gcc-14.2.0.tar.xz
cd gcc-14.2.0
We bring the dependencies.
tar -xf ../mpfr-4.2.1.tar.xz
mv -v mpfr-4.2.1 mpfr
tar -xf ../gmp-6.3.0.tar.xz
mv -v gmp-6.3.0 gmp
tar -xf ../mpc-1.3.1.tar.gz
mv -v mpc-1.3.1 mpc
If building on x86_64, change the default directory name for 64-bit libraries to “lib”:
case $(uname -m) in
  x86_64)
    sed -e '/m64=/s/lib64/lib/' \
        -i.orig gcc/config/i386/t-linux64
  ;;
esac
Override the building rule of libgcc and libstdc++ headers, to allow building these libraries with POSIX threads support:
sed '/thread_header =/s/@.*@/gthr-posix.h/' \
    -i libgcc/Makefile.in libstdc++-v3/include/Makefile.in
Now, we will configure the build, compile and install.
mkdir -v build
cd       build
../configure                                       \
    --build=$(../config.guess)                     \
    --host=$LFS_TGT                                \
    --target=$LFS_TGT                              \
    LDFLAGS_FOR_TARGET=-L$PWD/$LFS_TGT/libgcc      \
    --prefix=/usr                                  \
    --with-build-sysroot=$LFS                      \
    --enable-default-pie                           \
    --enable-default-ssp                           \
    --disable-nls                                  \
    --disable-multilib                             \
    --disable-libatomic                            \
    --disable-libgomp                              \
    --disable-libquadmath                          \
    --disable-libsanitizer                         \
    --disable-libssp                               \
    --disable-libvtv                               \
    --enable-languages=c,c++
make
make DESTDIR=$LFS install
ln -sv gcc $LFS/usr/bin/cc
This will take a while.
The chroot environment is completely insolated from the host operating system, except for the running kernel.
From now on all the commands must be executed as root user and be sure to have
the LFS variable set.
su rootAs most of the commands in previous sections were executed as the user lfs, now we need to change the ownership to root user.
chown --from lfs -R root:root $LFS/{usr,lib,var,etc,bin,sbin,tools}
case $(uname -m) in
  x86_64) chown --from lfs -R root:root $LFS/lib64 ;;
esacLet's create the directories where the file system will be mounted.
mkdir -pv $LFS/{dev,proc,sys,run}During a normal boot of the LFS system, the kernel automatically mounts the devtmpfs
file system on the /dev directory, so we need mount it manually.
mount -v --bind /dev $LFS/devNow, we mount the remaining virtual kernel file systems.
mount -vt devpts devpts -o gid=5,mode=0620 $LFS/dev/pts
mount -vt proc proc $LFS/proc
mount -vt sysfs sysfs $LFS/sys
mount -vt tmpfs tmpfs $LFS/run
In some host systems, /dev/shm is a symbolic link to a directory, typically /run/shm,
so we need to mount it.
if [ -h $LFS/dev/shm ]; then
  install -v -d -m 1777 $LFS$(realpath /dev/shm)
else
  mount -vt tmpfs -o nosuid,nodev tmpfs $LFS/dev/shm
fiIt is time to enter the chroot environment and finish installing temporary tools.
chroot "$LFS" /usr/bin/env -i   \
    HOME=/root                  \
    TERM="$TERM"                \
    PS1='(lfs chroot) \u:\w\$ ' \
    PATH=/usr/bin:/usr/sbin     \
    MAKEFLAGS="-j$(nproc)"      \
    TESTSUITEFLAGS="-j$(nproc)" \
    /bin/bash --login
And we should see something like this:

This would basically be the root console of our new distribution.
Let's create root-level directories.
mkdir -pv /{boot,home,mnt,opt,srv}And the required set of subdirectories.
mkdir -pv /etc/{opt,sysconfig}
mkdir -pv /lib/firmware
mkdir -pv /media/{floppy,cdrom}
mkdir -pv /usr/{,local/}{include,src}
mkdir -pv /usr/lib/locale
mkdir -pv /usr/local/{bin,lib,sbin}
mkdir -pv /usr/{,local/}share/{color,dict,doc,info,locale,man}
mkdir -pv /usr/{,local/}share/{misc,terminfo,zoneinfo}
mkdir -pv /usr/{,local/}share/man/man{1..8}
mkdir -pv /var/{cache,local,log,mail,opt,spool}
mkdir -pv /var/lib/{color,misc,locate}

ln -sfv /run /var/run
ln -sfv /run/lock /var/lock

install -dv -m 0750 /root
install -dv -m 1777 /tmp /var/tmp
In addition to this we must constantly make sure that the /usr/lib64
directory does not exist, this will probably break your system.
First, we need to satisfy the utilities that solve /etc/mtab.
ln -sv /proc/self/mounts /etc/mtabCreate a basic /etc/hosts file.
cat > /etc/hosts << EOF
127.0.0.1  localhost $(hostname)
::1        localhost
EOF
Create the /etc/passwd file.
cat > /etc/passwd << "EOF"
root:x:0:0:root:/root:/bin/bash
bin:x:1:1:bin:/dev/null:/usr/bin/false
daemon:x:6:6:Daemon User:/dev/null:/usr/bin/false
messagebus:x:18:18:D-Bus Message Daemon User:/run/dbus:/usr/bin/false
uuidd:x:80:80:UUID Generation Daemon User:/dev/null:/usr/bin/false
nobody:x:65534:65534:Unprivileged User:/dev/null:/usr/bin/false
EOF
Create the /etc/group file.
cat > /etc/group << "EOF"
root:x:0:
bin:x:1:daemon
sys:x:2:
kmem:x:3:
tape:x:4:
tty:x:5:
daemon:x:6:
floppy:x:7:
disk:x:8:
lp:x:9:
dialout:x:10:
audio:x:11:
video:x:12:
utmp:x:13:
cdrom:x:15:
adm:x:16:
messagebus:x:18:
input:x:24:
mail:x:34:
kvm:x:61:
uuidd:x:80:
wheel:x:97:
users:x:999:
nogroup:x:65534:
EOF
Soon we will need to do some test with a regular user, so let's create it.
echo "tester:x:101:101::/home/tester:/bin/bash" >> /etc/passwd
echo "tester:x:101:" >> /etc/group
install -o tester -d /home/tester
At this point we can start a new shell to remove I have no name! message.
exec /usr/bin/bash --loginAnd our shell should look like this now:
(lfs chroot) root:/# Now, let's initialize log files and give them proper permissions.
touch /var/log/{btmp,lastlog,faillog,wtmp}
chgrp -v utmp /var/log/lastlog
chmod -v 664  /var/log/lastlog
chmod -v 600 /var/log/btmpLet's move to the sources directory to continue installing tools.
cd /sourcesThe Gettext package contains utilities for internationalization and localization.
Unzip the package Gettext.
tar -xvf gettext-0.24.tar.xz
cd gettext-0.24
Configure:
./configure --disable-sharedAnd compile:
makeInstall msgfmt, msgmerge and xgettext programs:
cp -v gettext-tools/src/{msgfmt,msgmerge,xgettext} /usr/binThe Bison package provides a parser generator.
Unzip the package Bison, enter the directory, configure, compile and install.
tar -xvf bison-3.8.2.tar.xz
cd bison-3.8.2
./configure --prefix=/usr \
            --docdir=/usr/share/doc/bison-3.8.2
make
make installThe Perl package contains the practical extraction and report language.
Unzip the package Perl, enter the directory, configure, compile and install.
tar -xvf perl-5.40.1.tar.xz
cd perl-5.40.1
sh Configure -des                                         \
             -D prefix=/usr                               \
             -D vendorprefix=/usr                         \
             -D useshrplib                                \
             -D privlib=/usr/lib/perl5/5.40/core_perl     \
             -D archlib=/usr/lib/perl5/5.40/core_perl     \
             -D sitelib=/usr/lib/perl5/5.40/site_perl     \
             -D sitearch=/usr/lib/perl5/5.40/site_perl    \
             -D vendorlib=/usr/lib/perl5/5.40/vendor_perl \
             -D vendorarch=/usr/lib/perl5/5.40/vendor_perl
make
make installThe Python 3 package contains the Python development environment.
Unzip the package of Python, enter the directory, configure, compile and install.
Top tip
There are two package files whose name starts with the "python" prefix. The one to extract form is you notice the uppercase first letter. (Python-3.13.2.tar.xz)
tar -xvf Python-3.13.2.tar.xz
cd Python-3.13.2
./configure --prefix=/usr   \
            --enable-shared \
            --without-ensurepip
make
make installThe Textinfo package contains programs for reading, writing and converting info pages.
Unzip the package, enter the directory, configure, compile and install.
tar -xvf texinfo-7.2.tar.xz
cd texinfo-7.2
./configure --prefix=/usr
make
make installThe Util-linux package contains miscellaneous utility programs.
Unzip the package, enter the directory.
tar -xvf util-linux-2.40.4.tar.xz
cd util-linux-2.40.4
It is recommended using the /var/lib/hwclock directory instead of the usual /etc directory
as the location for the adjtime file. Create the directory.
mkdir -pv /var/lib/hwclockConfigure, compile and install.
./configure --libdir=/usr/lib     \
            --runstatedir=/run    \
            --disable-chfn-chsh   \
            --disable-login       \
            --disable-nologin     \
            --disable-su          \
            --disable-setpriv     \
            --disable-runuser     \
            --disable-pylibmount  \
            --disable-static      \
            --disable-liblastlog2 \
            --without-python      \
            ADJTIME_PATH=/var/lib/hwclock/adjtime \
            --docdir=/usr/share/doc/util-linux-2.40.4
make
make installFirst, remove the currently installed documentation files.
rm -rf /usr/share/{info,man,doc}/*Now, remove the libtool .la files, are only useful for libltdl.
find /usr/{lib,libexec} -name \*.la -deleteAnd the directory /tools is no longer needed.
rm -rf /toolsAt this point the current LFS system is in a good state, Creating a backup of the current system may prove useful.
The following steps are performed from outside the chroot environment.
Leave the chroot environment.
exitOnce outside the chroot environment, make sure you are root user and the content of the LFS variable
be /mnt/lfs.
root@debian:~$ echo $LFS
/mnt/lfs
Now, unmount the virtual file systems.
mountpoint -q $LFS/dev/shm && umount $LFS/dev/shm
umount $LFS/dev/pts
umount $LFS/{sys,proc,run,dev}
Before creating the backup, we should delete the folder of each package we install in /sources directory.
cd $LFS/sources
rm -rf */
With this we are left with only .tar files.
Now, we can create a backup of the current system.
cd $LFS
tar -cJpf $HOME/lfs-temp-tools-12.3.tar.xz .
This take a while to complete, be patient.
Building the LFS System
Once here, we going to enter the chroot environment again, but we must be sure that
the /dev directory, virtual kernel file system is mounted and link /dev/shm is created.
mount -v --bind /dev $LFS/dev
mount -vt devpts devpts -o gid=5,mode=0620 $LFS/dev/pts
mount -vt proc proc $LFS/proc
mount -vt sysfs sysfs $LFS/sys
mount -vt tmpfs tmpfs $LFS/run

if [ -h $LFS/dev/shm ]; then
  install -v -d -m 1777 $LFS$(realpath /dev/shm)
else
  mount -vt tmpfs -o nosuid,nodev tmpfs $LFS/dev/shm
fi
Now, enter the chroot environment.
chroot "$LFS" /usr/bin/env -i   \
    HOME=/root                  \
    TERM="$TERM"                \
    PS1='(lfs chroot) \u:\w\$ ' \
    PATH=/usr/bin:/usr/sbin     \
    MAKEFLAGS="-j$(nproc)"      \
    TESTSUITEFLAGS="-j$(nproc)" \
    /bin/bash --login
Now inside the chroot environment, let's install the packages definitives.
For some packages I not add description, because I added he description in the previous chapters.
The Man-pages package contains the manual pages.
Unzip the package.
tar -xf man-pages-6.12.tar.xz
cd man-pages-6.12
Remove two man pages for password hashing functions. Libxcrypt will provide a better version of these man pages:
rm -v man3/crypt*And install the package.
make -R GIT=false prefix=/usr installThe Iana-Etc package provides data for network services and protocols.
Unzip the package.
tar -xvf iana-etc-20250123.tar.gz
cd iana-etc-20250123
For this package, we only need to copy the files into place:
cp services protocols /etcThe Glibc package contains the main C library.
tar -xvf glibc-2.41.tar.xz
cd glibc-2.41
patch -Np1 -i ../glibc-2.41-fhs-1.patch
mkdir -v build
cd       build
echo "rootsbindir=/usr/sbin" > configparms
../configure --prefix=/usr                            \
             --disable-werror                         \
             --enable-kernel=5.4                      \
             --enable-stack-protector=strong          \
             --disable-nscd                           \
             libc_cv_slibdir=/usr/lib
make
This is the definitive installation of the Glibc package in our system, so we need check the package is correcly compiled.
make checkThis can take a while to check all the tests, but some may fail.
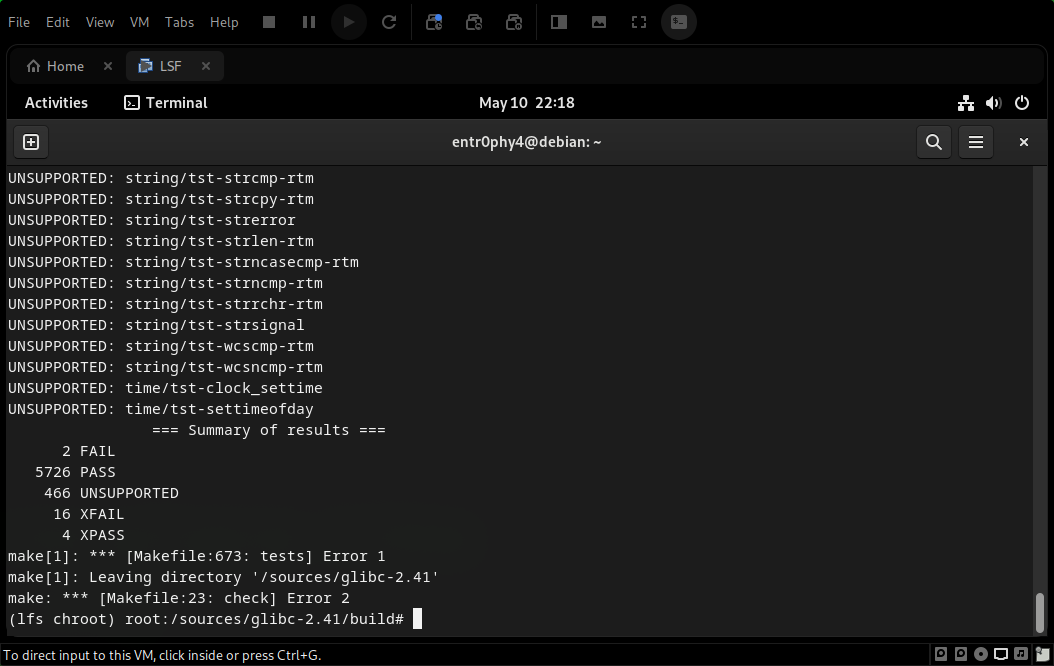
if you want check which test failed due to timeout run:
grep "Time out" $(find -name \*.out)Glibc will complain about the absence of /etc/ld.so.conf, so create that file.
touch /etc/ld.so.confFix teh makefile to skip an outdated sanity check that fails:
sed '/test-installation/s@$(PERL)@echo not running@' -i ../MakefileAnd install the package.
make installAnd fix a hardcoded path to the executable loader in the ldd script:
sed '/RTLDLIST=/s@/usr@@g' -i /usr/bin/lddInstall the locales that can make the system respond in a different language.
localedef -i C -f UTF-8 C.UTF-8
localedef -i cs_CZ -f UTF-8 cs_CZ.UTF-8
localedef -i de_DE -f ISO-8859-1 de_DE
localedef -i de_DE@euro -f ISO-8859-15 de_DE@euro
localedef -i de_DE -f UTF-8 de_DE.UTF-8
localedef -i el_GR -f ISO-8859-7 el_GR
localedef -i en_GB -f ISO-8859-1 en_GB
localedef -i en_GB -f UTF-8 en_GB.UTF-8
localedef -i en_HK -f ISO-8859-1 en_HK
localedef -i en_PH -f ISO-8859-1 en_PH
localedef -i en_US -f ISO-8859-1 en_US
localedef -i en_US -f UTF-8 en_US.UTF-8
localedef -i es_ES -f ISO-8859-15 es_ES@euro
localedef -i es_MX -f ISO-8859-1 es_MX
localedef -i fa_IR -f UTF-8 fa_IR
localedef -i fr_FR -f ISO-8859-1 fr_FR
localedef -i fr_FR@euro -f ISO-8859-15 fr_FR@euro
localedef -i fr_FR -f UTF-8 fr_FR.UTF-8
localedef -i is_IS -f ISO-8859-1 is_IS
localedef -i is_IS -f UTF-8 is_IS.UTF-8
localedef -i it_IT -f ISO-8859-1 it_IT
localedef -i it_IT -f ISO-8859-15 it_IT@euro
localedef -i it_IT -f UTF-8 it_IT.UTF-8
localedef -i ja_JP -f EUC-JP ja_JP
localedef -i ja_JP -f SHIFT_JIS ja_JP.SJIS 2> /dev/null || true
localedef -i ja_JP -f UTF-8 ja_JP.UTF-8
localedef -i nl_NL@euro -f ISO-8859-15 nl_NL@euro
localedef -i ru_RU -f KOI8-R ru_RU.KOI8-R
localedef -i ru_RU -f UTF-8 ru_RU.UTF-8
localedef -i se_NO -f UTF-8 se_NO.UTF-8
localedef -i ta_IN -f UTF-8 ta_IN.UTF-8
localedef -i tr_TR -f UTF-8 tr_TR.UTF-8
localedef -i zh_CN -f GB18030 zh_CN.GB18030
localedef -i zh_HK -f BIG5-HKSCS zh_HK.BIG5-HKSCS
localedef -i zh_TW -f UTF-8 zh_TW.UTF-8
and make the locales available for the system.
make localedata/install-localesNow, there are two locales that will be needed for testing in the near future.
localedef -i C -f UTF-8 C.UTF-8
localedef -i ja_JP -f SHIFT_JIS ja_JP.SJIS 2> /dev/null || true
Now, we going to configure glibc.
Let's create /etc/nsswitch.conf file.
cat > /etc/nsswitch.conf << "EOF"
# Begin /etc/nsswitch.conf

passwd: files
group: files
shadow: files

hosts: files dns
networks: files

protocols: files
services: files
ethers: files
rpc: files

# End /etc/nsswitch.conf
EOF
To add timezone data:
tar -xf ../../tzdata2025a.tar.gz

ZONEINFO=/usr/share/zoneinfo
mkdir -pv $ZONEINFO/{posix,right}

for tz in etcetera southamerica northamerica europe africa antarctica  \
          asia australasia backward; do
    zic -L /dev/null   -d $ZONEINFO       ${tz}
    zic -L /dev/null   -d $ZONEINFO/posix ${tz}
    zic -L leapseconds -d $ZONEINFO/right ${tz}
done

cp -v zone.tab zone1970.tab iso3166.tab $ZONEINFO
zic -d $ZONEINFO -p America/New_York
unset ZONEINFO tz
Now let's select local timezone.
tzselect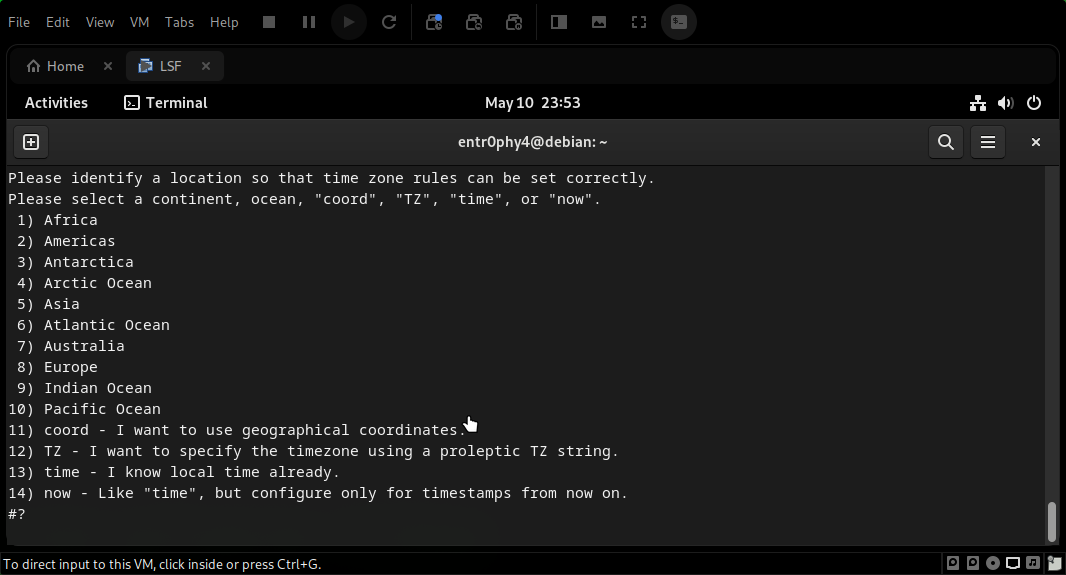
Select the option for your timezone.
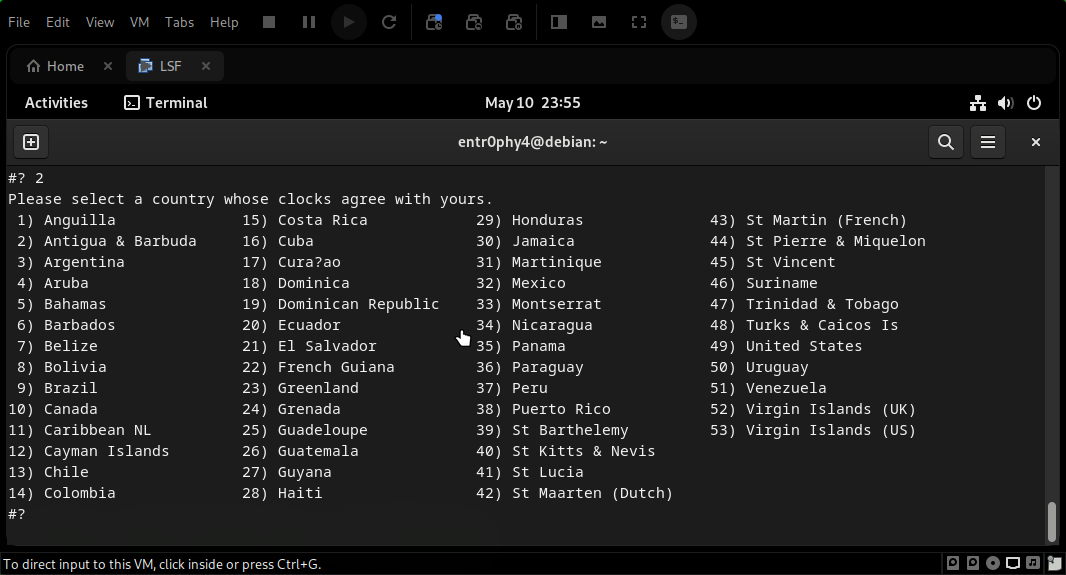
And your country, after confirm.
Once confirmed you will pay attention to the timezone you have selected in the output.
export TZ='America/Bogota'And create the /etc/localtime file as symlink.
ln -sfv /usr/share/zoneinfo/America/Bogota /etc/localtimeRight, now to finish we need configure the Dynamic Loader.
Create /etc/ld.so.conf file.
cat > /etc/ld.so.conf << "EOF"
# Begin /etc/ld.so.conf
/usr/local/lib
/opt/lib

EOF
And for dynamic loader also search a directory and include the contents of file found there.
cat >> /etc/ld.so.conf << "EOF"
# Add an include directory
include /etc/ld.so.conf.d/*.conf

EOF
mkdir -pv /etc/ld.so.conf.dTo extract, prepare compilation, make, check and install zlib.
tar -xvf zlib-1.3.1.tar.gz
cd zlib-1.3.1
./configure --prefix=/usr
make
make check
make install
After that, remove a useless static library.
rm -fv /usr/lib/libz.aUnzip the package.
tar -xvf bzip2-1.0.8.tar.gz
cd bzip2-1.0.8
For bzip2, we need apply a patch to the source code.
patch -Np1 -i ../bzip2-1.0.8-install_docs-1.patch
sed -i 's@\(ln -s -f \)$(PREFIX)/bin/@\1@' Makefile
sed -i "s@(PREFIX)/man@(PREFIX)/share/man@g" Makefile
Then prepare the compilation.
make -f Makefile-libbz2_so
make clean
make
make PREFIX=/usr install
And install shared library and bzip2 binary.
cp -av libbz2.so.* /usr/lib
ln -sv libbz2.so.1.0.8 /usr/lib/libbz2.so
cp -v bzip2-shared /usr/bin/bzip2
for i in /usr/bin/{bzcat,bunzip2}; do
  ln -sfv bzip2 $i
done
Finally, remove static libraries.
rm -fv /usr/lib/libbz2.aExtract the package, configure compilation, make, check and install.
tar -xvf xz-5.6.4.tar.xz
cd xz-5.6.4
./configure --prefix=/usr    \
            --disable-static \
            --docdir=/usr/share/doc/xz-5.6.4
make
make check
make install
Lz4 is a lossless compression algorithm, providing compression speed greater than 500 MB/s per core.
Extract, compile, check and install.
tar -xvf lz4-1.10.0.tar.gz
cd lz4-1.10.0
make BUILD_STATIC=no PREFIX=/usr
make -j1 check
make BUILD_STATIC=no PREFIX=/usr installZstandard is a real-time compression algorithm, providing high compression ratios.
To extract, compile, check and install.
tar -xvf zstd-1.5.7.tar.gz
cd zstd-1.5.7
make prefix=/usr
make check
make prefix=/usr install
Remove the static library.
rm -v /usr/lib/libzstd.aExtract, configure, compile, check and install.
tar -xvf file-5.46.tar.gz
cd file-5.46
./configure --prefix=/usr
make
make check
make installThe Readline package is a set of libraries that offer command-line editing and history capabilities.
Extract the package.
tar -xvf readline-8.2.13.tar.gz
cd readline-8.2.13
To prevent errors with the old libraries of readline, we type the following sed command.
sed -i '/MV.*old/d' Makefile.in
sed -i '/{OLDSUFF}/c:' support/shlib-install
sed -i 's/-Wl,-rpath,[^ ]*//' support/shobj-conf
Configure, compile, check and install.
./configure --prefix=/usr    \
            --disable-static \
            --with-curses    \
            --docdir=/usr/share/doc/readline-8.2.13
make SHLIB_LIBS="-lncursesw"
make install
If you want install the documentation:
install -v -m644 doc/*.{ps,pdf,html,dvi} /usr/share/doc/readline-8.2.13Extract, configure, compile, check and install.
tar -xvf m4-1.4.19.tar.xz
cd m4-1.4.19
./configure --prefix=/usr
make
make check
make installExtract, configure, compile, check and install.
tar -xvf bc-7.0.3.tar.xz
cd bc-7.0.3
CC=gcc ./configure --prefix=/usr -G -O3 -r
make
make test
make installThe Flex package contains a utility for generating programs that recognize patterns in text.
Extract, configure, compile, check and install.
tar -xvf flex-2.6.4.tar.gz
cd flex-2.6.4
./configure --prefix=/usr \
            --docdir=/usr/share/doc/flex-2.6.4 \
            --disable-static
make
make check
make install
Some programs try use lex instead of flex, so we need to create a symlink.
ln -sv flex   /usr/bin/lex
ln -sv flex.1 /usr/share/man/man1/lex.1The Tcl package contains the Tool Command Language, a robust general-purpose scripting language.
Extract, configure, compile, check and install.
tar -xvf tcl8.6.16-src.tar.gz
cd tcl8.6.16
SRCDIR=$(pwd)
cd unix
./configure --prefix=/usr           \
            --mandir=/usr/share/man \
            --disable-rpath
make
sed -e "s|$SRCDIR/unix|/usr/lib|" \
    -e "s|$SRCDIR|/usr/include|"  \
    -i tclConfig.sh
sed -e "s|$SRCDIR/unix/pkgs/tdbc1.1.10|/usr/lib/tdbc1.1.10|" \
    -e "s|$SRCDIR/pkgs/tdbc1.1.10/generic|/usr/include|"    \
    -e "s|$SRCDIR/pkgs/tdbc1.1.10/library|/usr/lib/tcl8.6|" \
    -e "s|$SRCDIR/pkgs/tdbc1.1.10|/usr/include|"            \
    -i pkgs/tdbc1.1.10/tdbcConfig.sh
sed -e "s|$SRCDIR/unix/pkgs/itcl4.3.2|/usr/lib/itcl4.3.2|" \
    -e "s|$SRCDIR/pkgs/itcl4.3.2/generic|/usr/include|"    \
    -e "s|$SRCDIR/pkgs/itcl4.3.2|/usr/include|"            \
    -i pkgs/itcl4.3.2/itclConfig.sh
unset SRCDIR
make test
make install
Make the installed library writable.
chmod -v u+w /usr/lib/libtcl8.6.soInstall the headers, make necessary symlink and rename man pages.
make install-private-headers
ln -sfv tclsh8.6 /usr/bin/tclsh
mv /usr/share/man/man3/{Thread,Tcl_Thread}.3
If you want install the documentation:
cd ..
tar -xf ../tcl8.6.16-html.tar.gz --strip-components=1
mkdir -v -p /usr/share/doc/tcl-8.6.16
cp -v -r ./html/* /usr/share/doc/tcl-8.6.16The expect package contains tools for automating, via scripted dialogues, interactive applications.
Extract and enter the directory.
tar -xvf expect5.45.4.tar.gz
cd expect5.45.4
Expect needs PTY to work, Verify that.
python3 -c 'from pty import spawn; spawn(["echo", "ok"])'So, let's apply a patch to the source code, prepare compilation, make, check and install.
patch -Np1 -i ../expect-5.45.4-gcc14-1.patch
./configure --prefix=/usr           \
            --with-tcl=/usr/lib     \
            --enable-shared         \
            --disable-rpath         \
            --mandir=/usr/share/man \
            --with-tclinclude=/usr/include
make
make test
make install
ln -svf expect5.45.4/libexpect5.45.4.so /usr/libThe DejaGNU package contains a framework for running test suites on GNU tools.
Extract, prepare compilation, make, check and install.
tar -xvf dejagnu-1.6.3.tar.gz
cd dejagnu-1.6.3
mkdir -v build
cd       build
../configure --prefix=/usr
makeinfo --html --no-split -o doc/dejagnu.html ../doc/dejagnu.texi
makeinfo --plaintext       -o doc/dejagnu.txt  ../doc/dejagnu.texi
make check
make install
install -v -dm755  /usr/share/doc/dejagnu-1.6.3
install -v -m644 doc/dejagnu.{html,txt} /usr/share/doc/dejagnu-1.6.3The pkgconf package is a successor to pkg-config and contains a tool for passing the include path and library path to applications.
Extract, configure, compile and install.
tar -xvf pkgconf-2.3.0.tar.xz
cd pkgconf-2.3.0
./configure --prefix=/usr              \
            --disable-static           \
            --docdir=/usr/share/doc/pkgconf-2.3.0
make
make install
For maintain compatibility with the original pkg-config, create two symlinks.
ln -sv pkgconf   /usr/bin/pkg-config
ln -sv pkgconf.1 /usr/share/man/man1/pkg-config.1Extract, configure, compile, check and install.
tar -xvf binutils-2.44.tar.xz
cd binutils-2.44
mkdir -v build
cd       build
../configure --prefix=/usr       \
             --sysconfdir=/etc   \
             --enable-ld=default \
             --enable-plugins    \
             --enable-shared     \
             --disable-werror    \
             --enable-64-bit-bfd \
             --enable-new-dtags  \
             --with-system-zlib  \
             --enable-default-hash-style=gnu
make tooldir=/usr
make -k check
make tooldir=/usr install
You can list failed tests with:
grep '^FAIL:' $(find -name '*.log')Finally, remove useless static libraries.
rm -rfv /usr/lib/lib{bfd,ctf,ctf-nobfd,gprofng,opcodes,sframe}.a \
/usr/share/doc/gprofng/The GMP package contains math libraries. These have usefull functions for arbitrary precision arithmetic.
tar -xvf gmp-6.3.0.tar.xz
cd gmp-6.3.0
Top tip
If you are building for 32-bit, but have a processor that supports 64-bit instructions, add the ABI=32 parameter to the ./configure command.
ABI=32 ./configure ...
./configure --prefix=/usr    \
            --enable-cxx     \
            --disable-static \
            --docdir=/usr/share/doc/gmp-6.3.0
Then, compile, generate html documentation and run tests.
make
make html
make check 2>&1 | tee gmp-check-log
You need ensure at least 199 test in the result test suite passed.
awk '/# PASS:/{total+=$3} ; END{print total}' gmp-check-logInstall the package.
make install
make install-htmlThe MPFR package contains functions for multiple precision math.
tar -xvf mpfr-4.2.1.tar.xz
cd mpfr-4.2.1
./configure --prefix=/usr        \
            --disable-static     \
            --enable-thread-safe \
            --docdir=/usr/share/doc/mpfr-4.2.1
make
make html
The tests suite are considered critical, so you need to ensure that all tests passed.
make check Install the package.
make install
make install-htmlThe MPC package contains a library for the arithmetic of complex numbers with arbitrary high precision and correct rounding of the result.
Extract, configure, compile, check and install.
tar -xvf mpc-1.3.1.tar.gz
cd mpc-1.3.1
./configure --prefix=/usr    \
            --disable-static \
            --docdir=/usr/share/doc/mpc-1.3.1
make
make html
make check
make install
make install-htmlThe Attr package contains utilities to administrer the extended attributes of filesystem objects.
Extract, configure, compile, check and install.
tar -xvf attr-2.5.2.tar.gz
cd attr-2.5.2
./configure --prefix=/usr     \
            --disable-static  \
            --sysconfdir=/etc \
            --docdir=/usr/share/doc/attr-2.5.2
make
make check
make installThe Acl package contains utilities to administer Access Control Lists, which are used to define fine-grained discretionary access rights for files and directories.
Extract, configure, compile, check and install.
tar -xvf acl-2.3.2.tar.xz
cd acl-2.3.2
./configure --prefix=/usr         \
            --disable-static      \
            --docdir=/usr/share/doc/acl-2.3.2
make
make check
make install
One test named test/cp.test is known to fail because Coreutils is not built with the Acl support yet.
The Libcap package implements the userspace interface to the POSIX 10003.1e capabilities available in the Linux kernels.
Extract, prevent the static libraries, compile, check and install.
tar -xvf libcap-2.73.tar.xz
cd libcap-2.73
sed -i '/install -m.*STA/d' libcap/Makefile
make prefix=/usr lib=lib
make test
make prefix=/usr lib=lib installThe libxcrypt package contains a modern library for one-way hashing of passwords.
Extract, configure, compile, check and install.
tar -xvf libxcrypt-4.4.38.tar.xz
cd libxcrypt-4.4.38
./configure --prefix=/usr                \
            --enable-hashes=strong,glibc \
            --enable-obsolete-api=no     \
            --disable-static             \
            --disable-failure-tokens
make
make check
make installThe Shadow package contains programs for handling passwords in a secure way.
tar -xvf shadow-4.17.3.tar.xz
cd shadow-4.17.3
Disable the installation of the groups program and its man pages.
sed -i 's/groups$(EXEEXT) //' src/Makefile.in
find man -name Makefile.in -exec sed -i 's/groups\.1 / /'   {} \;
find man -name Makefile.in -exec sed -i 's/getspnam\.3 / /' {} \;
find man -name Makefile.in -exec sed -i 's/passwd\.5 / /'   {} \;
sed -e 's:#ENCRYPT_METHOD DES:ENCRYPT_METHOD YESCRYPT:' \
    -e 's:/var/spool/mail:/var/mail:'                   \
    -e '/PATH=/{s@/sbin:@@;s@/bin:@@}'                  \
    -i etc/login.defs
Configure, compile and install.
touch /usr/bin/passwd
./configure --sysconfdir=/etc   \
            --disable-static    \
            --with-{b,yes}crypt \
            --without-libbsd    \
            --with-group-name-max-length=32
make
make exec_prefix=/usr install
make -C man install-man
Enable shadowed passwords.
pwconv
grpconv
Change the default parameters of useradd shadow's configuration file.
mkdir -p /etc/default
useradd -D --gid 999
And choose a password for user root.
passwd rootExtract the source code.
tar -xvf gcc-14.2.0.tar.xz
cd gcc-14.2.0
Change the default directory name for 64-bit libraries.
case $(uname -m) in
  x86_64)
    sed -e '/m64=/s/lib64/lib/' \
        -i.orig gcc/config/i386/t-linux64
  ;;
esac
Now, prepare the build and compile.
mkdir -v build
cd       build
../configure --prefix=/usr            \
             LD=ld                    \
             --enable-languages=c,c++ \
             --enable-default-pie     \
             --enable-default-ssp     \
             --enable-host-pie        \
             --disable-multilib       \
             --disable-bootstrap      \
             --disable-fixincludes    \
             --with-system-zlib
make
Set a stack size hard limit to infinite and remove several known test failures.
ulimit -s -H unlimited
sed -e '/cpython/d'               -i ../gcc/testsuite/gcc.dg/plugin/plugin.exp
sed -e 's/no-pic /&-no-pie /'     -i ../gcc/testsuite/gcc.target/i386/pr113689-1.c
sed -e 's/300000/(1|300000)/'     -i ../libgomp/testsuite/libgomp.c-c++-common/pr109062.c
sed -e 's/{ target nonpic } //' \
    -e '/GOTPCREL/d'              -i ../gcc/testsuite/gcc.target/i386/fentryname3.c
change the to testter user and run.
chown -R tester .
su tester -c "PATH=$PATH make -k check"
Test can take a while to complete, be patient.
Install the package.
make installChange the ownership to the root user and group.
chown -v -R root:root \
    /usr/lib/gcc/$(gcc -dumpmachine)/14.2.0/include{,-fixed}
Now, we need create this symlinks.
ln -svr /usr/bin/cpp /usr/lib
ln -sv gcc.1 /usr/share/man/man1/cc.1
ln -sfv ../../libexec/gcc/$(gcc -dumpmachine)/14.2.0/liblto_plugin.so \
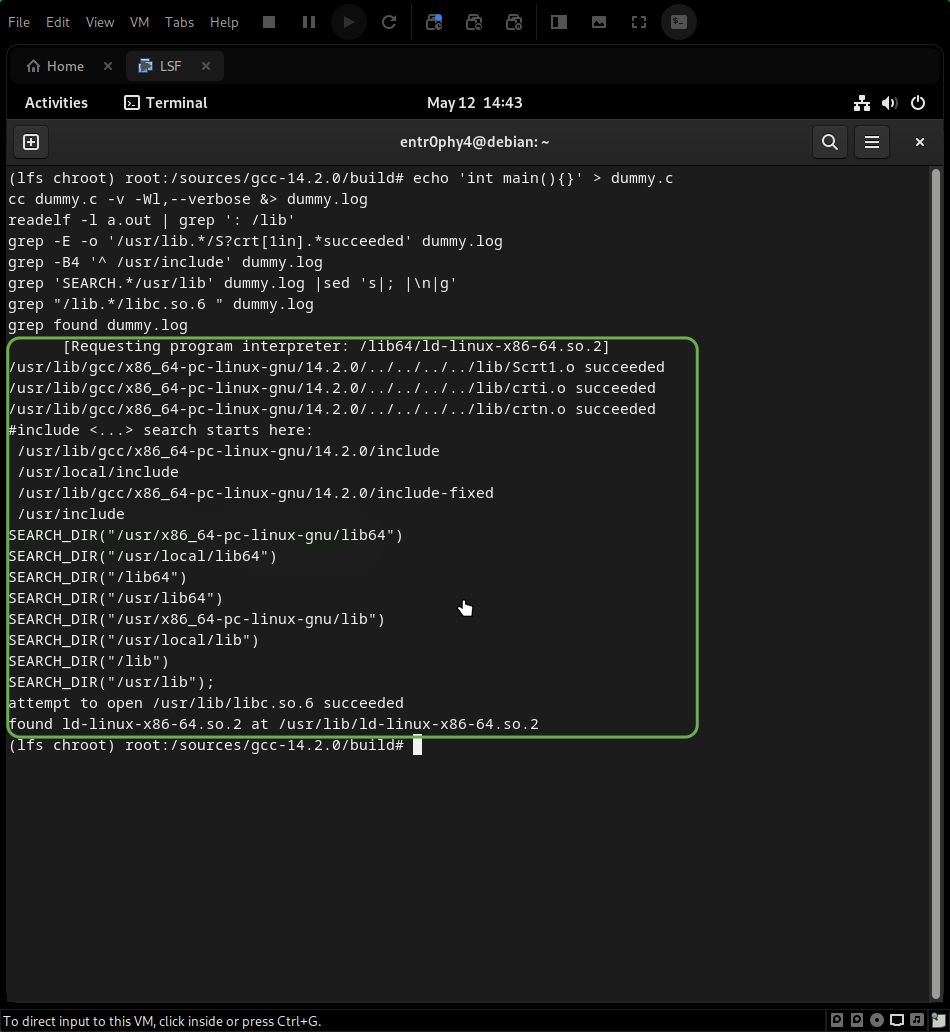
/usr/lib/bfd-plugins/And finally, to check if all is working, run:
echo 'int main(){}' > dummy.c
cc dummy.c -v -Wl,--verbose &> dummy.log
readelf -l a.out | grep ': /lib'
grep -E -o '/usr/lib.*/S?crt[1in].*succeeded' dummy.log
grep -B4 '^ /usr/include' dummy.log
grep 'SEARCH.*/usr/lib' dummy.log |sed 's|; |\n|g'
grep "/lib.*/libc.so.6 " dummy.log
grep found dummy.log
And the output should be something like this:
Once everything is working, we can remove the test files and move misplaced file.
rm -v dummy.c a.out dummy.log
mkdir -pv /usr/share/gdb/auto-load/usr/lib
mv -v /usr/lib/*gdb.py /usr/share/gdb/auto-load/usr/libExtract, configure and compile.
tar -xvf ncurses-6.5.tar.gz
cd ncurses-6.5
./configure --prefix=/usr           \
            --mandir=/usr/share/man \
            --with-shared           \
            --without-debug         \
            --without-normal        \
            --with-cxx-shared       \
            --enable-pc-files       \
            --with-pkg-config-libdir=/usr/lib/pkgconfig
make
Install the package.
make DESTDIR=$PWD/dest install
install -vm755 dest/usr/lib/libncursesw.so.6.5 /usr/lib
rm -v  dest/usr/lib/libncursesw.so.6.5
sed -e 's/^#if.*XOPEN.*$/#if 1/' \
    -i dest/usr/include/curses.h
cp -av dest/* /
for lib in ncurses form panel menu ; do
    ln -sfv lib${lib}w.so /usr/lib/lib${lib}.so
    ln -sfv ${lib}w.pc    /usr/lib/pkgconfig/${lib}.pc
done
ln -sfv libncursesw.so /usr/lib/libcurses.so
And install Ncurses documentation.
cp -v -R doc -T /usr/share/doc/ncurses-6.5The Sed package contains a stream editor.
Extract, configure, compile, check and install.
tar -xvf sed-4.9.tar.xz
cd sed-4.9
./configure --prefix=/usr
make
make html
chown -R tester .
su tester -c "PATH=$PATH make check"
make install
install -d -m755           /usr/share/doc/sed-4.9
install -m644 doc/sed.html /usr/share/doc/sed-4.9The Psmisc package contains programs for displaying information about running processes.
Extract, configure, compile, check and install.
tar -xvf psmisc-23.7.tar.xz
cd psmisc-23.7
./configure --prefix=/usr
make
make check
make installExtract, configure, compile, check and install.
tar -xvf gettext-0.24.tar.xz
cd gettext-0.24
./configure --prefix=/usr    \
            --disable-static \
            --docdir=/usr/share/doc/gettext-0.24
make
make check
make install
chmod -v 0755 /usr/lib/preloadable_libintl.so
Extract, configure, compile, check and install.
tar -xvf bison-3.8.2.tar.xz
cd bison-3.8.2
./configure --prefix=/usr --docdir=/usr/share/doc/bison-3.8.2
make
make check
make installExtract the package.
tar -xvf grep-3.11.tar.xz
cd grep-3.11
Some tests may fail if you not remove a warning about egrep and fgrep.
sed -i "s/echo/#echo/" src/egrep.shConfigure, compile, check and install.
./configure --prefix=/usr
make
make check
make installExtract, configure, compile, check and install.
tar -xvf bash-5.2.37.tar.gz
cd bash-5.2.37
./configure --prefix=/usr             \
            --without-bash-malloc     \
            --with-installed-readline \
            --docdir=/usr/share/doc/bash-5.2.37
make
The test suite we should run as a non-root user.
chown -R tester .
su -s /usr/bin/expect tester << "EOF"
set timeout -1
spawn make tests
expect eof
lassign [wait] _ _ _ value
exit $value
EOF
Install the package and run the newly compiled bash program.
make install
exec /usr/bin/bash --loginThe Libtool package contains the GNU generic library support script.
Extract, configure, compile, check, install and remove the static library.
tar -xvf libtool-2.5.4.tar.xz
cd libtool-2.5.4
./configure --prefix=/usr
make
make check
make install
rm -fv /usr/lib/libltdl.aThe GDBM package contains the GNU Database Manager.
Extract, configure, compile, check and install.
tar -xvf gdbm-1.24.tar.gz
cd gdbm-1.24
./configure --prefix=/usr    \
            --disable-static \
            --enable-libgdbm-compat
make
make check
make install
Gperf is a perfect hash function from a key set.
Extract, configure, compile, check and install.
tar -xvf gperf-3.1.tar.gz
cd gperf-3.1
./configure --prefix=/usr --docdir=/usr/share/doc/gperf-3.1
make
make -j1 check
make installThe Expat package contains a stream oriented XML parser in C.
Extract, configure, compile, check and install.
tar -xvf expat-2.6.4.tar.xz
cd expat-2.6.4
./configure --prefix=/usr    \
            --disable-static \
            --docdir=/usr/share/doc/expat-2.6.4
make
make check
make install
If you want install the documentation, run:
install -v -m644 doc/*.{html,css} /usr/share/doc/expat-2.6.4the Inetutils package contains programs for basic networking.
Extract the source code.
tar -xvf inetutils-2.6.tar.xz
cd inetutils-2.6
Ensure the package build with gcc-14.1 or later.
sed -i 's/def HAVE_TERMCAP_TGETENT/ 1/' telnet/telnet.cConfigure, compile, check, install and move to proper location.
./configure --prefix=/usr        \
            --bindir=/usr/bin    \
            --localstatedir=/var \
            --disable-logger     \
            --disable-whois      \
            --disable-rcp        \
            --disable-rexec      \
            --disable-rlogin     \
            --disable-rsh        \
            --disable-servers
make
make check
make install
mv -v /usr/{,s}bin/ifconfigThe Less package contains a text file viewer.
Extract, configure, compile, check and install.
tar -xvf less-668.tar.gz
cd less-668
./configure --prefix=/usr --sysconfdir=/etc
make
make check
make installExtract the source code.
tar -xvf perl-5.40.1.tar.xz
cd perl-5.40.1
First we need to say perl to use the compress libraries installed on the system.
export BUILD_ZLIB=False
export BUILD_BZIP2=0
Configure, compile, check and install.
sh Configure -des                                          \
             -D prefix=/usr                                \
             -D vendorprefix=/usr                          \
             -D privlib=/usr/lib/perl5/5.40/core_perl      \
             -D archlib=/usr/lib/perl5/5.40/core_perl      \
             -D sitelib=/usr/lib/perl5/5.40/site_perl      \
             -D sitearch=/usr/lib/perl5/5.40/site_perl     \
             -D vendorlib=/usr/lib/perl5/5.40/vendor_perl  \
             -D vendorarch=/usr/lib/perl5/5.40/vendor_perl \
             -D man1dir=/usr/share/man/man1                \
             -D man3dir=/usr/share/man/man3                \
             -D pager="/usr/bin/less -isR"                 \
             -D useshrplib                                 \
             -D usethreads
make
TEST_JOBS=$(nproc) make test_harness
make install
unset BUILD_ZLIB BUILD_BZIP2This module is a Perl interface to James Clark's XML parser, expat.
Extract, configure, compile, check and install.
tar -xvf XML-Parser-2.47.tar.gz
cd XML-Parser-2.47
perl Makefile.PL
make
make test
make installThe Intltool is an internalization tool used for extracting translatable strings from source files.
Extract the source code, fix the warnings caused by perl-5.22, configure, check and install
tar -xvf intltool-0.51.0.tar.gz
cd intltool-0.51.0
sed -i 's:\\\${:\\\$\\{:' intltool-update.in
./configure --prefix=/usr
make
make check
make installExtract, configure, compile, check and install.
tar -xvf autoconf-2.72.tar.xz
cd autoconf-2.72
./configure --prefix=/usr
make
make check
make installThe automake package contains programs for generating makefiles for use with Autoconf.
Extract, configure, compile, check and install.
tar -xvf automake-1.17.tar.xz
cd automake-1.17
./configure --prefix=/usr --docdir=/usr/share/doc/automake-1.17
make
make -j$(($(nproc)>4?$(nproc):4)) check
make installThe OpenSSL package contains management tools and libraries relating to cryptography.
Extract, configure, compile, check and install.
tar -xvf openssl-3.4.1.tar.gz
cd openssl-3.4.1
./config --prefix=/usr         \
         --openssldir=/etc/ssl \
         --libdir=lib          \
         shared                \
         zlib-dynamic
make
HARNESS_JOBS=$(nproc) make test
sed -i '/INSTALL_LIBS/s/libcrypto.a libssl.a//' Makefile
make MANSUFFIX=ssl install
mv -v /usr/share/doc/openssl /usr/share/doc/openssl-3.4.1
If you want install the documentation, run:
cp -vfr doc/* /usr/share/doc/openssl-3.4.1Libelf is a library for handling of handling ELF( Executable and Linkable Format) files.
Extract, configure, compile, check and install.
tar -xvf elfutils-0.192.tar.bz2
cd elfutils-0.192
./configure --prefix=/usr                \
            --disable-debuginfod         \
            --enable-libdebuginfod=dummy
make
make check
make -C libelf install
install -vm644 config/libelf.pc /usr/lib/pkgconfig
rm /usr/lib/libelf.aThe Libffi library provides a portable, high level programming interface to various calling conventions. This allows a programmer to call any function specified by a call interface description at run time.
Extract, configure, compile, check and install.
tar -xvf libffi-3.4.7.tar.gz
cd libffi-3.4.7
./configure --prefix=/usr          \
            --disable-static       \
            --with-gcc-arch=native.4.7
make
make check
make installExtract, configure, compile, check and install.
tar -xvf Python-3.13.2.tar.xz
cd Python-3.13.2
./configure --prefix=/usr       \
            --enable-shared     \
            --with-system-expat \
            --with-ensurepip=yes
make
make test TESTOPTS="--timeout 120"
make install
For supress warning related to the new version of pip3, run:
cat > /etc/pip.conf << EOF
[global]
root-user-action = ignore
disable-pip-version-check = true
EOF
And if you want install the documentation, run:
install -v -dm755 /usr/share/doc/python-3.13.2/html
tar --strip-components=1  \
    --no-same-owner       \
    --no-same-permissions \
    -C /usr/share/doc/python-3.13.2/html \
-xvf ../python-3.13.2-docs-html.tar.bz2Flit-core is the distribution-building parts of Flit( a packaging tool for simple Python modules).
Extract, build and install.
tar -xvf flit_core-3.11.0.tar.gz
cd flit_core-3.11.0
pip3 wheel -w dist --no-cache-dir --no-build-isolation --no-deps $PWD
pip3 install --no-index --find-links dist flit_core
Wheel is a Python library that is the reference implementation of the Python wheel packaging standard.
Extract, build and install.
tar -xvf wheel-0.45.1.tar.gz
cd wheel-0.45.1
pip3 wheel -w dist --no-cache-dir --no-build-isolation --no-deps $PWD
pip3 install --no-index --find-links dist wheel
Setuptools is a tool used to download build, install, upgrade and uninstall Python packages.
Extract, build and install.
tar -xvf setuptools-75.8.1.tar.gz
cd setuptools-75.8.1
pip3 wheel -w dist --no-cache-dir --no-build-isolation --no-deps $PWD
pip3 install --no-index --find-links dist setuptools
Ninja is a small build system with a focus on speed.
Extract, configure and install.
tar -xvf ninja-1.12.1.tar.gz
cd ninja-1.12.1
export NINJAJOBS=4
sed -i '/int Guess/a \
  int   j = 0;\
  char* jobs = getenv( "NINJAJOBS" );\
  if ( jobs != NULL ) j = atoi( jobs );\
  if ( j > 0 ) return j;\
' src/ninja.cc
python3 configure.py --bootstrap --verbose
install -vm755 ninja /usr/bin/
install -vDm644 misc/bash-completion /usr/share/bash-completion/completions/ninja
install -vDm644 misc/zsh-completion  /usr/share/zsh/site-functions/_ninja
Meson is an open source build system meant to be both extremely fast, and extremely user-friendly.
Extract, compile and install.
tar -xvf meson-1.7.0.tar.gz
cd meson-1.7.0
pip3 wheel -w dist --no-cache-dir --no-build-isolation --no-deps $PWD
pip3 install --no-index --find-links dist meson
install -vDm644 data/shell-completions/bash/meson /usr/share/bash-completion/completions/meson
install -vDm644 data/shell-completions/zsh/_meson /usr/share/zsh/site-functions/_mesonThe Kmod package contains libraries and utilities for loading kernel modules.
Extract, configure, compile and install.
tar -xvf kmod-34.tar.xz
cd kmod-34
mkdir -p build
cd       build
meson setup --prefix=/usr ..    \
            --sbindir=/usr/sbin \
            --buildtype=release \
            -D manpages=false
ninja
ninja installExtract, apply a patch, configure, compile, check and install.
tar -xvf coreutils-9.6.tar.xz
cd coreutils-9.6
patch -Np1 -i ../coreutils-9.6-i18n-1.patch
autoreconf -fv
automake -af
FORCE_UNSAFE_CONFIGURE=1 ./configure \
            --prefix=/usr            \
            --enable-no-install-program=kill,uptime
make
make NON_ROOT_USERNAME=tester check-root
groupadd -g 102 dummy -U tester
chown -R tester .
su tester -c "PATH=$PATH make -k RUN_EXPENSIVE_TESTS=yes check" \
   < /dev/null
groupdel dummy
make install
mv -v /usr/bin/chroot /usr/sbin
mv -v /usr/share/man/man1/chroot.1 /usr/share/man/man8/chroot.8
sed -i 's/"1"/"8"/' /usr/share/man/man8/chroot.8
Check is a unit testing framework for C.
Extract, configure, compile, check and install.
tar -xvf check-0.15.2.tar.gz
cd check-0.15.2
./configure --prefix=/usr --disable-static
make
make check
make docdir=/usr/share/doc/check-0.15.2 installExtract, configure, compile, check and install.
tar -xvf diffutils-3.11.tar.xz
cd diffutils-3.11
./configure --prefix=/usr
make
make check
make installThe Gawk package contains programs for manipulating text files.
Extract, configure, compile, check and install.
tar -xvf gawk-5.3.1.tar.xz
cd gawk-5.3.1
sed -i 's/extras//' Makefile.in
./configure --prefix=/usr
make
chown -R tester .
su tester -c "PATH=$PATH make check"
rm -f /usr/bin/gawk-5.3.1
make installExtract, configure, compile, check and install.
tar -xvf findutils-4.10.0.tar.xz
cd findutils-4.10.0
./configure --prefix=/usr --localstatedir=/var/lib/locate
make
chown -R tester .
su tester -c "PATH=$PATH make check"
make installThe Groff package contains programs for processing and formatting text and images.
Extract, configure, compile, check and install.
tar -xvf groff-1.23.0.tar.gz
cd groff-1.23.0
PAGE=A4 ./configure --prefix=/usr
make
make check
make installThe GRUB package provides Grand Unified Bootloader. In this page it will be built with UEFI suppert, which is not enabled for GRUP build in LFS.
Extract the package, configure, compile and install.
tar -xvf grub-2.12.tar.xz
cd grub-2.12
unset {C,CPP,CXX,LD}FLAGS
./configure --prefix=/usr        \
            --sysconfdir=/etc    \
            --disable-efiemu     \
            --with-platform=efi  \
            --target=x86_64      \
            --disable-werror     &&
make
make install &&
mv -v /etc/bash_completion.d/grub /usr/share/bash-completion/completionsExtract, configure, compile, check and install.
tar -xvf gzip-1.13.tar.xz
cd gzip-1.13
./configure --prefix=/usr
make
make check
make installThe IPRoute2 package conatins programs for basic and advanced IPV4-based networking.
Extract, configure, compile and install.
tar -xvf iproute2-6.13.0.tar.xz
cd iproute2-6.13.0
sed -i /ARPD/d Makefile
rm -fv man/man8/arpd.8
make NETNS_RUN_DIR=/run/netns
make SBINDIR=/usr/sbin install
Install the documentation.
install -vDm644 COPYING README* -t /usr/share/doc/iproute2-6.13.0The Kdb package contains key-table files, console fonts, and keyboard utilities.
Extract, apply a patch, configure, compile and install.
tar -xvf kbd-2.7.1.tar.xz
cd kbd-2.7.1
patch -Np1 -i ../kbd-2.7.1-backspace-1.patch
sed -i '/RESIZECONS_PROGS=/s/yes/no/' configure
sed -i 's/resizecons.8 //' docs/man/man8/Makefile.in
./configure --prefix=/usr --disable-vlock
make
make check
make installThe Libpipeline package contains a library for manipulating pipelines of subprocesses in a flexible and convenient way.
Extract, configure, compile and install.
tar -xvf libpipeline-1.5.8.tar.gz
cd libpipeline-1.5.8
./configure --prefix=/usr
make
make check
make installThe Make package contains a program for controlling the generation of executables and other non-source files of a package from source files.
Extract, configure, compile and install.
tar -xvf make-4.4.1.tar.gz
cd make-4.4.1
./configure --prefix=/usr
make
chown -R tester .
su tester -c "PATH=$PATH make check"
make installThe Patch package contains a program for modifying or creating files.
Extract, configure, compile and install.
tar -xvf patch-2.7.6.tar.xz
cd patch-2.7.6
./configure --prefix=/usr
make
make check
make installThe Tar package provides a program for manipulating tar archives.
Extract, configure, compile, check and install.
tar -xvf tar-1.35.tar.xz
cd tar-1.35
FORCE_UNSAFE_CONFIGURE=1  \
./configure --prefix=/usr
make
make check
make install
make -C doc install-html docdir=/usr/share/doc/tar-1.35Extract, configure, compile and install.
tar -xvf texinfo-7.2.tar.xz
cd texinfo-7.2
./configure --prefix=/usr
make
make install
make TEXMF=/usr/share/texmf install-texThe Vim package contains a powerful text editor.
Extract, configure, compile and install.
tar -xvf vim-9.1.1166.tar.gz
cd vim-9.1.1166
echo '#define SYS_VIMRC_FILE "/etc/vimrc"' >> src/feature.h
./configure --prefix=/usr
make
chown -R tester .
sed '/test_plugin_glvs/d' -i src/testdir/Make_all.mak
su tester -c "TERM=xterm-256color LANG=en_US.UTF-8 make -j1 test" \
   &> vim-test.log
make install
Create this symbolic links.
ln -sv vim /usr/bin/vi
for L in  /usr/share/man/{,*/}man1/vim.1; do
    ln -sv vim.1 $(dirname $L)/vi.1
done
ln -sv ../vim/vim91/doc /usr/share/doc/vim-9.1.1166
Markupsafe is a library for parsing and compiling XML, HTML and XHTML.
Extract, compile and install.
tar -xvf markupsafe-3.0.2.tar.gz
cd markupsafe-3.0.2
pip3 wheel -w dist --no-cache-dir --no-build-isolation --no-deps $PWD
pip3 install --no-index --find-links dist Markupsafe
Jinja2 is a Python module that implements a simple pythonic template lenguage.
Extract, compile and install.
tar -xvf jinja2-3.1.5.tar.gz
cd jinja2-3.1.5
pip3 wheel -w dist --no-cache-dir --no-build-isolation --no-deps $PWD
pip3 install --no-index --find-links dist Jinja2The Udev package contains programs for dynamic creation of device nodes.
tar -xvf systemd-257.3.tar.gz
cd systemd-257.3
Before building, remove some things.
sed -e 's/GROUP="render"/GROUP="video"/' \
    -e 's/GROUP="sgx", //'               \
    -i rules.d/50-udev-default.rules.in
sed -i '/systemd-sysctl/s/^/#/' rules.d/99-systemd.rules.in
sed -e '/NETWORK_DIRS/s/systemd/udev/' \
    -i src/libsystemd/sd-network/network-util.h
Configure, compile and install.
mkdir -p build
cd       build
meson setup ..                  \
      --prefix=/usr             \
      --buildtype=release       \
      -D mode=release           \
      -D dev-kvm-mode=0660      \
      -D link-udev-shared=false \
      -D logind=false           \
      -D vconsole=false
export udev_helpers=$(grep "'name' :" ../src/udev/meson.build | \
                      awk '{print $3}' | tr -d ",'" | grep -v 'udevadm')
ninja udevadm systemd-hwdb                                           \
      $(ninja -n | grep -Eo '(src/(lib)?udev|rules.d|hwdb.d)/[^ ]*') \
      $(realpath libudev.so --relative-to .)                         \
      $udev_helpers
And install the package.
install -vm755 -d {/usr/lib,/etc}/udev/{hwdb.d,rules.d,network}
install -vm755 -d /usr/{lib,share}/pkgconfig
install -vm755 udevadm                             /usr/bin/
install -vm755 systemd-hwdb                        /usr/bin/udev-hwdb
ln      -svfn  ../bin/udevadm                      /usr/sbin/udevd
cp      -av    libudev.so{,*[0-9]}                 /usr/lib/
install -vm644 ../src/libudev/libudev.h            /usr/include/
install -vm644 src/libudev/*.pc                    /usr/lib/pkgconfig/
install -vm644 src/udev/*.pc                       /usr/share/pkgconfig/
install -vm644 ../src/udev/udev.conf               /etc/udev/
install -vm644 rules.d/* ../rules.d/README         /usr/lib/udev/rules.d/
install -vm644 $(find ../rules.d/*.rules \
                      -not -name '*power-switch*') /usr/lib/udev/rules.d/
install -vm644 hwdb.d/*  ../hwdb.d/{*.hwdb,README} /usr/lib/udev/hwdb.d/
install -vm755 $udev_helpers                       /usr/lib/udev
install -vm644 ../network/99-default.link          /usr/lib/udev/network
tar -xvf ../../udev-lfs-20230818.tar.xz
make -f udev-lfs-20230818/Makefile.lfs install
tar -xf ../../systemd-man-pages-257.3.tar.xz                            \
    --no-same-owner --strip-components=1                              \
    -C /usr/share/man --wildcards '*/udev*' '*/libudev*'              \
                                  '*/systemd.link.5'                  \
                                  '*/systemd-'{hwdb,udevd.service}.8
sed 's|systemd/network|udev/network|'                                 \
    /usr/share/man/man5/systemd.link.5                                \
  > /usr/share/man/man5/udev.link.5
sed 's/systemd\(\\\?-\)/udev\1/' /usr/share/man/man8/systemd-hwdb.8   \
                               > /usr/share/man/man8/udev-hwdb.8
sed 's|lib.*udevd|sbin/udevd|'                                        \
    /usr/share/man/man8/systemd-udevd.service.8                       \
  > /usr/share/man/man8/udevd.8
rm /usr/share/man/man*/systemd*
unset udev_helpers
And configure.
udev-hwdb updateThe Man-DB package contains a collection of man pages.
Extract, configure, compile and install.
tar -xvf man-db-2.13.0.tar.xz
cd man-db-2.13.0
./configure --prefix=/usr                         \
            --docdir=/usr/share/doc/man-db-2.13.0 \
            --sysconfdir=/etc                     \
            --disable-setuid                      \
            --enable-cache-owner=bin              \
            --with-browser=/usr/bin/lynx          \
            --with-vgrind=/usr/bin/vgrind         \
            --with-grap=/usr/bin/grap             \
            --with-systemdtmpfilesdir=            \
            --with-systemdsystemunitdir=
make
make check
make installThe Procps-ng package contains programs for monitoring system processes.
Extract, configure, compile and install.
tar -xvf procps-ng-4.0.5.tar.xz
cd procps-ng-4.0.5
./configure --prefix=/usr                           \
            --docdir=/usr/share/doc/procps-ng-4.0.5 \
            --disable-static                        \
            --disable-kill                          \
            --enable-watch8bit
make
chown -R tester .
su tester -c "PATH=$PATH make check"
make installThe Util-linux package contains various programs for manipulating Linux filesystems.
Extract, configure, compile, check and install.
tar -xvf util-linux-2.40.4.tar.xz
cd util-linux-2.40.4
./configure --bindir=/usr/bin     \
            --libdir=/usr/lib     \
            --runstatedir=/run    \
            --sbindir=/usr/sbin   \
            --disable-chfn-chsh   \
            --disable-login       \
            --disable-nologin     \
            --disable-su          \
            --disable-setpriv     \
            --disable-runuser     \
            --disable-pylibmount  \
            --disable-liblastlog2 \
            --disable-static      \
            --without-python      \
            --without-systemd     \
            --without-systemdsystemunitdir        \
            ADJTIME_PATH=/var/lib/hwclock/adjtime \
            --docdir=/usr/share/doc/util-linux-2.40.4
make
bash tests/run.sh --srcdir=$PWD --builddir=$PWD
touch /etc/fstab
chown -R tester .
su tester -c "make -k check"
make installThe E2fsprogs package contains programs for creating and managing ext2/ext3/ext4 filesystems.
Extract, configure, compile and install.
tar -xvf e2fsprogs-1.47.2.tar.gz
cd e2fsprogs-1.47.2
mkdir -v build
cd       build
../configure --prefix=/usr           \
             --sysconfdir=/etc       \
             --enable-elf-shlibs     \
             --disable-libblkid      \
             --disable-libuuid       \
             --disable-uuidd         \
             --disable-fsck
make
make check
make install
Remove the static libraries and install additional documentation.
rm -fv /usr/lib/{libcom_err,libe2p,libext2fs,libss}.a
gunzip -v /usr/share/info/libext2fs.info.gz
install-info --dir-file=/usr/share/info/dir /usr/share/info/libext2fs.infoAnd configure the program.
sed 's/metadata_csum_seed,//' -i /etc/mke2fs.confThe Sysklogd package contains programs for loggin system messages, such as those emitted by the kernel when unusual things happen.
Extract, configure, compile and install.
tar -xvf sysklogd-2.7.0.tar.gz
cd sysklogd-2.7.0
./configure --prefix=/usr \
--sysconfdir=/etc \
--runstatedir=/run \
--without-logger \
--disable-static \
--docdir=/usr/share/doc/sysklogd-2.7.0
make
make installAnd configure the program.
cat > /etc/syslog.conf << "EOF"
# Begin /etc/syslog.conf
auth,authpriv.* -/var/log/auth.log
*.*;auth,authpriv.none -/var/log/sys.log
daemon.* -/var/log/daemon.log
kern.* -/var/log/kern.log
mail.* -/var/log/mail.log
user.* -/var/log/user.log
*.emerg *
# Do not open any internet ports.
secure_mode 2
# End /etc/syslog.conf
EOFThe SysVinit package conatins a program fro controlling the startup, running, and shutdown of the system.
Extract, apply the patch and compile.
tar -xvf sysvinit-3.14.tar.xz
cd sysvinit-3.14
patch -Np1 -i ../sysvinit-3.14-consolidated-1.patch
make
make installThis is a one of the final phases in the build of a LFS system, from now we will start mostly with the configuration, but first, we'll reduce the size of everything we carry a little bit.
With this proccess, we will remove the debugging symbols from the libraries and binaries and some unnecessary symbol table entries.
Before execute the following commands, make sure that you have a backup of the files.
save_usrlib="$(cd /usr/lib; ls ld-linux*[^g])
libc.so.6
libthread_db.so.1
libquadmath.so.0.0.0
libstdc++.so.6.0.33
libitm.so.1.0.0
libatomic.so.1.2.0"
cd /usr/lib
for LIB in $save_usrlib; do
objcopy --only-keep-debug --compress-debug-sections=zlib $LIB $LIB.dbg
cp $LIB /tmp/$LIB
strip --strip-unneeded /tmp/$LIB
objcopy --add-gnu-debuglink=$LIB.dbg /tmp/$LIB
install -vm755 /tmp/$LIB /usr/lib
rm /tmp/$LIB
done
online_usrbin="bash find strip"
online_usrlib="libbfd-2.44.so
libsframe.so.1.0.0
libhistory.so.8.2
libncursesw.so.6.5
libm.so.6
libreadline.so.8.2
libz.so.1.3.1
libzstd.so.1.5.7
$(cd /usr/lib; find libnss*.so* -type f)"
for BIN in $online_usrbin; do
cp /usr/bin/$BIN /tmp/$BIN
strip --strip-unneeded /tmp/$BIN
install -vm755 /tmp/$BIN /usr/bin
rm /tmp/$BIN
done
for LIB in $online_usrlib; do
cp /usr/lib/$LIB /tmp/$LIB
strip --strip-unneeded /tmp/$LIB
install -vm755 /tmp/$LIB /usr/lib
rm /tmp/$LIB
done
for i in $(find /usr/lib -type f -name \*.so* ! -name \*dbg) \
$(find /usr/lib -type f -name \*.a) \
$(find /usr/{bin,sbin,libexec} -type f); do
case "$online_usrbin $online_usrlib $save_usrlib" in
*$(basename $i)* )
;;
* ) strip --strip-unneeded $i
;;
esac
done
unset BIN LIB save_usrlib online_usrbin online_usrlibA large number of files will be flagged as errors because their file format is not recognized. These warnings can be safely ignored. They indicate that those files are scripts, not binaries.
And finally, clean up some extra files.
rm -rf /tmp/{*,.*}
find /usr/lib /usr/libexec -name \*.la -delete
find /usr -depth -name $(uname -m)-lfs-linux-gnu\* | xargs rm -rf
userdel -r testerThe LFS-Bootscripts package contains a set of script to start/stop the LFS system at bootup/shutdown.
Extract and install.
tar -xvf lfs-bootscripts-20240825.tar.xz
cd lfs-bootscripts-20240825
make installFirst you should check what's your network interface name.
ip link show
In my case, is ens33.
So let's create a simple configuration with a static IP address.
cd /etc/sysconfig/
cat > ifconfig.ens33 << "EOF"
ONBOOT=yes
IFACE=ens33
SERVICE=ipv4-static
IP=192.168.1.2
GATEWAY=192.168.1.1
PREFIX=24
BROADCAST=192.168.1.255
EOFNow, let's create the /etc/resolv.conf file.
cat > /etc/resolv.conf << "EOF"
# Begin /etc/resolv.conf
nameserver 8.8.8.8
nameserver 8.8.4.4
# End /etc/resolv.conf
EOFConfigure the hostname.
echo "entr0phy4" > /etc/hostnameAnd /etc/hosts file.
cat > /etc/hosts << "EOF"
# Begin /etc/hosts
127.0.0.1 localhost
127.0.1.1 entr0phy4 entr0phy4
192.168.1.2 entr0phy4 entr0phy4
::1 localhost ip6-localhost ip6-loopback
ff02::1 ip6-allnodes
ff02::2 ip6-allrouters
# End /etc/hosts
EOFThe first program should run at kernel initialization is init. This reads the /etc/inittab, let's create it.
cat > /etc/inittab << "EOF"
# Begin /etc/inittab
id:3:initdefault:
si::sysinit:/etc/rc.d/init.d/rc S
l0:0:wait:/etc/rc.d/init.d/rc 0
l1:S1:wait:/etc/rc.d/init.d/rc 1
l2:2:wait:/etc/rc.d/init.d/rc 2
l3:3:wait:/etc/rc.d/init.d/rc 3
l4:4:wait:/etc/rc.d/init.d/rc 4
l5:5:wait:/etc/rc.d/init.d/rc 5
l6:6:wait:/etc/rc.d/init.d/rc 6
ca:12345:ctrlaltdel:/sbin/shutdown -t1 -a -r now
su:S06:once:/sbin/sulogin
s1:1:respawn:/sbin/sulogin
1:2345:respawn:/sbin/agetty --noclear tty1 9600
2:2345:respawn:/sbin/agetty tty2 9600
3:2345:respawn:/sbin/agetty tty3 9600
4:2345:respawn:/sbin/agetty tty4 9600
5:2345:respawn:/sbin/agetty tty5 9600
6:2345:respawn:/sbin/agetty tty6 9600
# End /etc/inittab
EOFWe need create a new file /etc/sysconfig/clock.
cat > /etc/sysconfig/clock << "EOF"
# Begin /etc/sysconfig/clock
UTC=1
# Set this to any options you might need to give to hwclock,
# such as machine hardware clock type for Alphas.
CLOCKPARAMS=
# End /etc/sysconfig/clock
EOFWe going to set a variable SYSKLOGD_PARMS in file /etc/sysconfig/rc.site to a null value.
SYSKLOGD_PARMS=and change the hostname.
HOSTNAME=entr0phy4If you need list all the locales can use:
locale -aAfter find the locale you want, type:
LC_ALL=en_US.utf8 locale charmap
LC_ALL=en_US.utf8 locale language
LC_ALL=en_US.utf8 locale charmap
LC_ALL=en_US.utf8 locale int_curr_symbol
LC_ALL=en_US.utf8 locale int_prefixAnd check not found errors.
cat > /etc/locale.conf << "EOF"
LANG=en_US.utf8
EOFthe file /etc/inputrc provides editing capabilities while the user is entering a line from the terminal.
It works by translating keyboard inputs into specific actions.
Readline is used by bash and most other shells as well as many other applications.
cat > /etc/inputrc << "EOF"
# Begin /etc/inputrc
# Modified by Chris Lynn <roryo@roryo.dynup.net>
# Allow the command prompt to wrap to the next line
set horizontal-scroll-mode Off
# Enable 8-bit input
set meta-flag On
set input-meta On
# Turns off 8th bit stripping
set convert-meta Off
# Keep the 8th bit for display
set output-meta On
# none, visible or audible
set bell-style none
# All of the following map the escape sequence of the value
# contained in the 1st argument to the readline specific functions
"\eOd": backward-word
"\eOc": forward-word
# for linux console
"\e[1~": beginning-of-line
"\e[4~": end-of-line
"\e[5~": beginning-of-history
"\e[6~": end-of-history
"\e[3~": delete-char
"\e[2~": quoted-insert
# for xterm
"\eOH": beginning-of-line
"\eOF": end-of-line
# for Konsole
"\e[H": beginning-of-line
"\e[F": end-of-line
# End /etc/inputrc
EOFThe shells file contains a list of login shells on the system.
cat > /etc/shells << "EOF"
# Begin /etc/shells
/bin/sh
/bin/bash
# End /etc/shells
EOFIn progress...